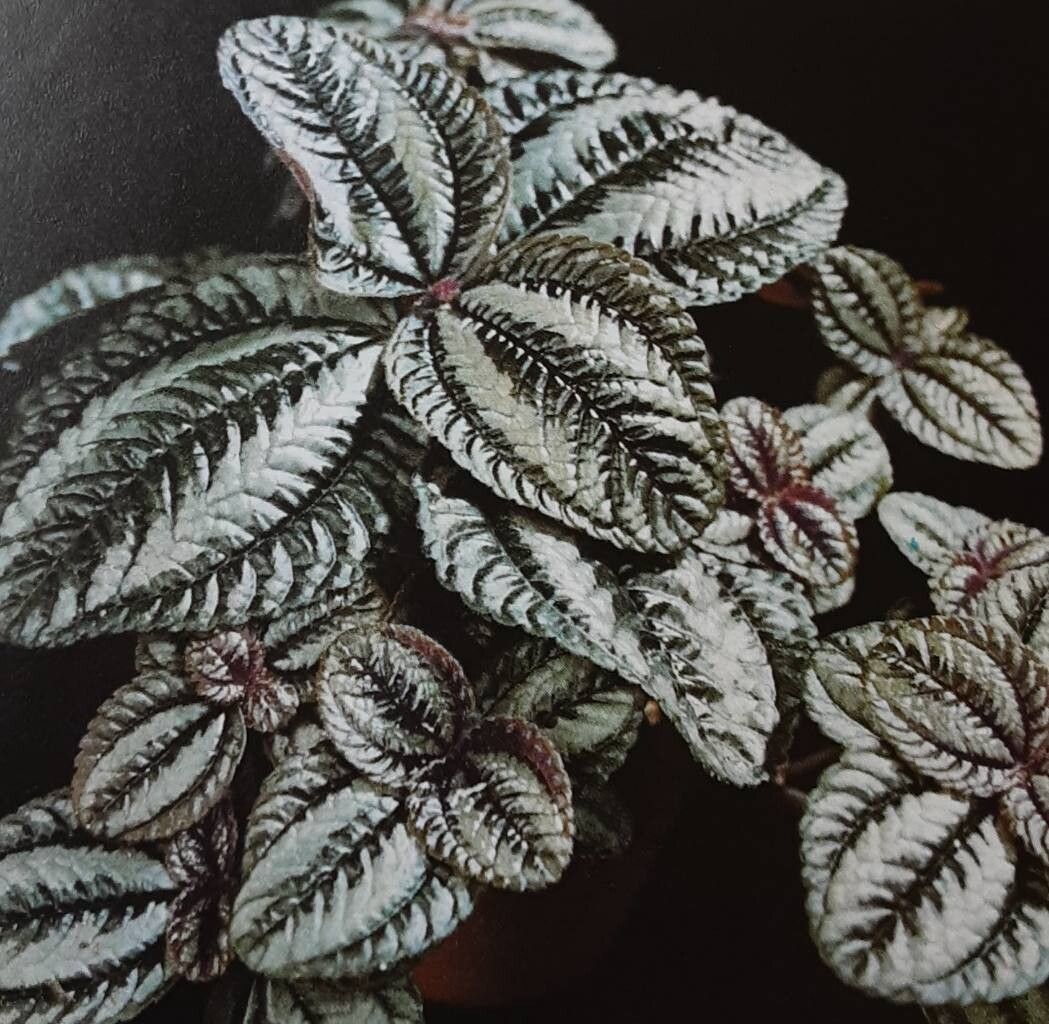
Hello, fellow plant lovers! If you’ve ever admired the striking, metallic-silver markings on a Pilea spruceana – often called the Aluminum Plant – you’re not alone. It’s a wonderfully unique houseplant, adding a touch of modern artistry to any indoor jungle. And the best part? It’s surprisingly easy to share its beauty. Propagating Pilea spruceana is a wonderfully rewarding experience, even for those just dipping their toes into the world of plant multiplication. You’ll feel that special joy when you see those tiny roots emerge and a new life begins!
The Best Time to Start
My experience tells me that the absolute best time to propagate Pilea spruceana is during its active growing season. Think late spring through summer. The plant is full of energy then, making it eager to sprout those new roots. You can certainly try in the fall or winter, but you’ll likely see much slower progress, if any. Patience is key with any propagation, but giving your cuttings a head start in the warmer months really speeds things up.
Supplies You’ll Need
To get your Pilea spruceana propagation party started, gather these simple items:
- Sharp pruning shears or a clean knife: For making clean cuts.
- Well-draining potting mix: A standard houseplant mix with added perlite or perlite is perfect. You want it to dry out between waterings.
- A small pot or container: Anything from a tiny nursery pot to a yogurt cup with drainage holes will do.
- Rooting hormone (optional but helpful): A powder or gel can give your cuttings a little boost.
- A clear plastic bag or a small propagation dome: To create a humid environment.
- A watering can with a fine rose or a mister: For gentle watering.
Propagation Methods: Taking Stem Cuttings
This is my go-to method for Pilea spruceana, and it’s incredibly successful.
- Identify a healthy stem: Look for a healthy, mature stem on your Pilea spruceana that has at least two sets of leaves. Avoid any that look leggy or stressed.
- Make the cut: Using your clean shears or knife, make a clean cut just below a leaf node. This is the little bump on the stem where leaves (or roots!) emerge. This ensures you’re cutting in the best spot for root development.
- Prepare the cutting: Gently remove any leaves from the bottom half of the cutting. You want to expose the nodes where roots will form. If your cutting is very long, you can trim it down to a few inches, ensuring it has at least two leaf nodes.
- Apply rooting hormone (optional): If you’re using rooting hormone, dip the cut end into the powder or gel. Tap off any excess.
- Plant your cutting: Fill your small pot with your well-draining potting mix. Make a small hole in the center with your finger or a pencil. Insert the cut end of your Pilea cutting, making sure at least one or two leaf nodes are buried in the soil. Gently firm the soil around the stem.
- Water gently: Water your cutting thoroughly until you see water drain from the bottom of the pot.
Water Propagation (An Alternative)
You can also start Pilea spruceana cuttings directly in water!
- Prepare the cutting: Follow steps 1-3 from the stem cutting method.
- Place in water: Fill a small jar or glass with clean water. Place your cutting in the water, ensuring the leaf nodes are submerged. Crucially, make sure no leaves are touching the water. This will cause them to rot.
- Change water regularly: Change the water every few days to keep it fresh and prevent bacterial growth. You’ll soon see tiny white roots emerging from the nodes.
- Pot up once rooted: Once the roots are about an inch long, your cutting is ready to be planted in soil, following step 5 from the stem cutting method.
The “Secret Sauce” (Pro Tips)
Here are a couple of my little tricks that often make a difference:
- Don’t be afraid of humidity: Pilea spruceana loves a good humid environment when propagating. Once you’ve planted your cutting, pop the pot into a clear plastic bag, closing it loosely, or cover it with a propagation dome. This creates a mini-greenhouse effect, which is fantastic for root development. Just open it up for a few minutes each day to let in fresh air and prevent mold.
- Consider bottom heat: If you have a seedling heat mat, placing your potted cuttings on it can dramatically speed up rooting. It mimics the warmth of spring and encourages those roots to get going even faster. Just make sure the mat isn’t too hot – a gentle warmth is what you’re after.
Aftercare & Troubleshooting
Once you’ve got your cutting planted, keep the soil consistently moist but not soggy. Think of it like a wrung-out sponge. If you’re using the plastic bag method, you’ll need to water less often than if your cutting is exposed.
You’ll know your Pilea spruceana has rooted when you see new leaf growth. This can take anywhere from a few weeks to a couple of months, so be patient! Gently tugging on the cutting is another sign – if there’s resistance, roots are forming.
The most common problem you might encounter is rot. This usually happens if the soil stays too wet, or if leaves are rotting in the water. If you see a stem turning mushy or developing black spots, it’s often the beginning of rot. Remove the affected part immediately. If the whole cutting goes south, don’t be discouraged! Just grab another healthy stem and try again.
A Warm Closing
Propagating Pilea spruceana is such a wonderful way to expand your plant collection or to share a bit of green joy with friends. It’s a process that connects you to the life cycle of plants in a truly intimate way. Embrace the journey, be patient, and don’t be afraid to experiment. Happy propagating!
Resource:
https://identify.plantnet.org/k-world-flora/species/Pilea%20spruceana%20Wedd./data