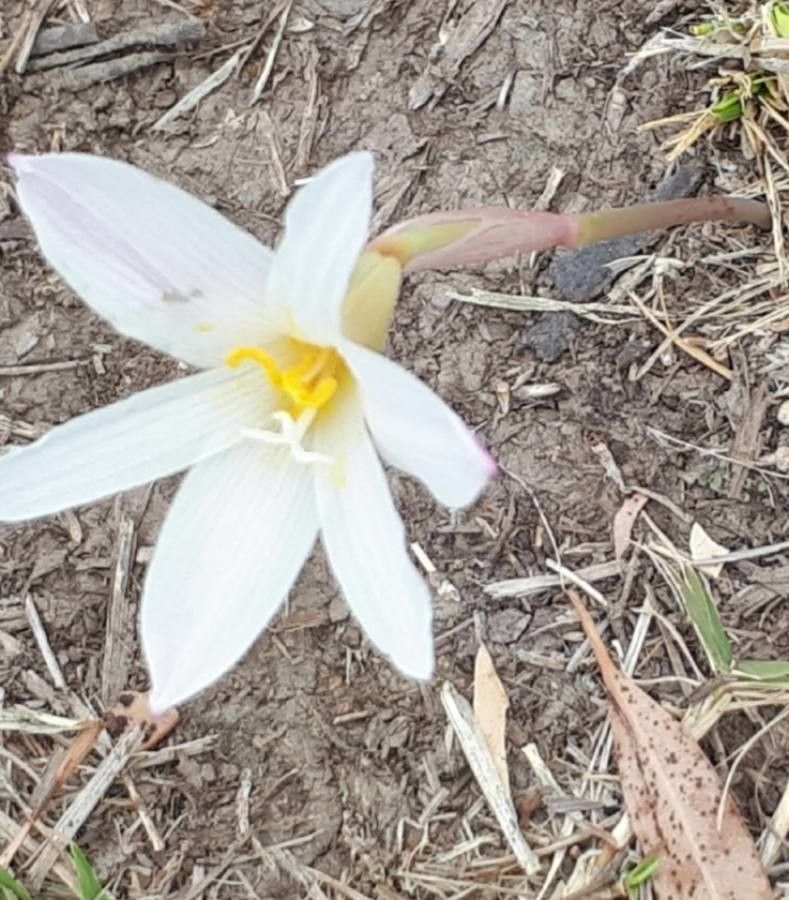
Hey there, fellow garden enthusiasts! I’m so excited to chat with you today about a real gem in the plant world: Zephyranthes cubensis, or commonly known as the Cuban Zephyr Lily or Fairy Lily. These beauties are just magical with their delicate, trumpet-shaped blooms that often appear seemingly out of nowhere after a good rain. They bring such a splash of joy to any garden, and honestly, propagating them is a wonderfully rewarding experience. Good news for you beginners out there – this plant is remarkably easy to propagate, making it a perfect project to build your confidence!
When the Magic Happens: The Best Time to Start
The absolute best time to get your hands dirty with propagating Zephyranthes cubensis is during their active growing season. Think late spring through summer. This is when the bulbs are putting on their energy, creating new offsets, and generally feeling robust and ready to grow. You’ll often find new little bulbs nestled right alongside the parent bulb. Timing it with when you see these little ones forming will give you the highest success rate.
Your Propagation Toolkit: Supplies You’ll Need
Don’t worry, you don’t need a whole fancy setup for this. Most of these items you probably already have lurking in your gardening shed!
- Sharp Pruning Shears or a Clean Knife: For making clean cuts.
- Well-Draining Potting Mix: A good blend of potting soil, perlite, and compost works wonders. You want it to dry out a bit between waterings, but not turn into a brick.
- Small Pots or Seed Starting Trays: Whatever you have that can hold your new little treasures. Make sure they have drainage holes!
- Gloves (Optional): If you prefer to keep your hands clean.
- Watering Can with a Fine Rose: For gentle watering.
- Rooting Hormone (Optional, but helpful): This can give your cuttings a little boost.
Bringing New Life: Propagation Methods
Zephyranthes cubensis is wonderfully forgiving, and the easiest and most common way to propagate it is through division of bulbs. This is where the magic really happens with this particular plant.
Method: Division of Bulbs
- Excavate with Care: When you’ve identified the best time (remember, active growing season!), gently dig up the entire clump of bulbs. I like to use a trowel or a small hand fork, working around the edges to loosen the soil. You want to avoid damaging those precious bulbs.
- Gently Separate: Once the clump is out of the ground, gently brush off excess soil. You’ll see that the main bulb has produced smaller offsets, which are essentially baby bulbs attached by a thin piece of root or stem. With your fingers, or very carefully with your clean knife, separate these offsets from the parent bulb. Be sure each offset has at least one small bulb and a bit of root attached. If an offset is completely detached with no roots, don’t fret! It can often still grow, but it might take a little longer.
- Plant Your Babies: Now, it’s time to give these new little bulbs a home. Fill your small pots with that lovely well-draining potting mix. Make a little hole in the center and place your offset in, planting it at the same depth it was growing before, or just slightly deeper. The pointed end should be facing up.
- Water Wisely: Give them a gentle watering right after planting. You want the soil to be moist, but not soggy.
The “Secret Sauce”: Inside Gardener Tips
Here are a few little tricks I’ve picked up over the years that can really make a difference:
- Don’t Overcrowd: While Zephyranthes naturally form clumps, give your new divisions a little elbow room when you plant them. Overcrowding can lead to competition for resources and potentially more rot issues if the soil stays damp too long.
- The “Dry Rest” Strategy (Sometimes): After separating the bulbs, sometimes I’ll let them air dry for a day or two in a shady, well-ventilated spot. This can help any cuts to callus over and reduces the risk of rot, especially if you’ve had a very wet period. It’s not strictly necessary, but I find it gives them a stronger start.
- Think Bottom Up: If you’re struggling with root development, especially for those offsets that might have lost most of their roots, consider using a heat mat. Just a gentle warmth from below can really encourage root formation. It’s like giving them a warm hug to get them going!
Nurturing the New Sprouts: Aftercare & Troubleshooting
Once your new Zephyranthes are potted up, treat them much like you would a mature plant. Keep the soil consistently moist but not waterlogged. Place them in a spot with bright, indirect light. Direct, scorching sun can be too much for tender new growth.
The most common issue you might encounter is rot. This usually happens when the soil stays too wet, especially in cooler conditions. You’ll notice the bulb or new growth turning mushy and brown. If you see this, remove the affected plant immediately to prevent it from spreading. Adjust your watering – is the pot draining well? Is it in a spot with good air circulation?
If you don’t see any leaves emerge after a few weeks, don’t despair too much! Some bulbs, especially if they lost a lot of roots, can take their time. Just keep the soil lightly moist and provide good light. Patience is truly a gardener’s best friend!
Keep Growing!
See? Propagating Zephyranthes cubensis is such a joyful way to expand your collection or share these little beauties with friends. It’s a simple process that offers big rewards. Be patient, trust your instincts, and enjoy the unfolding magic as your new Fairy Lilies grow and eventually grace you with their enchanting blooms. Happy gardening!
Resource:
https://identify.plantnet.org/k-world-flora/species/Zephyranthes%20cubensis%20Urb./data