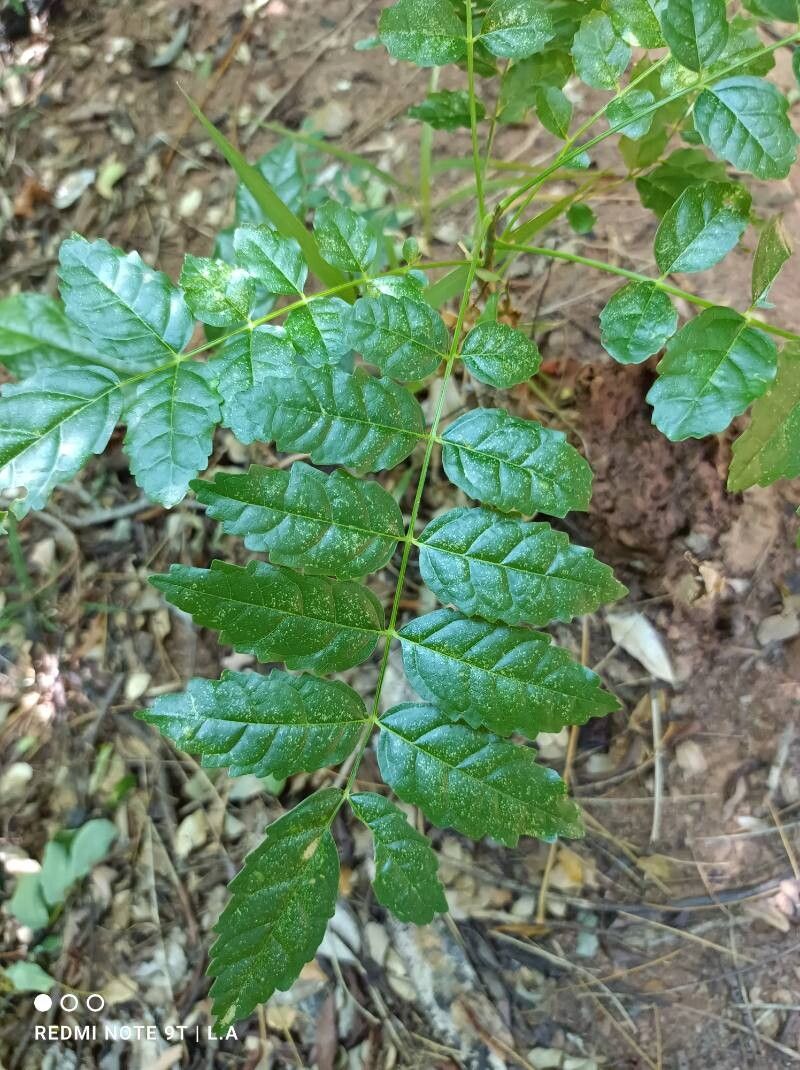
Hello there, fellow garden enthusiasts! I’m so excited to chat with you today about a plant that holds a special place in my heart – the wonderfully fragrant and strikingly architectural Zanthoxylum caribaeum. You might know it by its common names, like West Indian Prickly Ash or Yellow Prickle-tongue. I’ve been growing and fussing over these beauties for two decades, and let me tell you, seeing a tiny cutting transform into a thriving new plant is one of gardening’s greatest joys. If you’re looking for a rewarding project that’s not overly complicated, this is a fantastic choice. While it has a few quirks, I wouldn’t call it a beginner-only kind of plant, but with a little guidance, you’ll be well on your way.
The Best Time to Start
For Zanthoxylum caribaeum, spring is your prime time. Think late spring, just as the plant is really hitting its stride after the cooler months. You’re looking for new growth that’s starting to mature – not the super soft, floppy new shoots, but wood that’s beginning to firm up a bit. This is when the plant has the most energy to push out roots.
Supplies You’ll Need
Gathering your tools beforehand makes the whole process so much smoother, just like having all your ingredients prepped before you start cooking. Here’s what I always have on hand:
- Sharp Pruning Shears or a Craft Knife: Clean cuts are crucial for success.
- A Good Potting Mix: I like a well-draining mix, usually a blend of perlite, peat moss, and a bit of compost.
- Small Pots or Seedling Trays: About 4-inch pots are usually perfect to start.
- Rooting Hormone: A powder or gel can give your cuttings a good boost.
- Watering Can with a Fine Rose: Gentle watering is key.
- Clear Plastic Bag or Humidity Dome: To create that moist environment your cuttings crave.
- Optional but Helpful: Heat Mat: This can really speed things up!
Propagation Methods
I’ve found the most reliable way to propagate Zanthoxylum caribaeum is through stem cuttings. It’s pretty straightforward, so let’s dive in.
- Take Your Cuttings: On a bright, mild morning, select a healthy stem from your mature plant. Aim for a section that is about 4-6 inches long and has at least a few sets of leaves. Using your incredibly sharp pruning shears or knife, make a clean cut just below a leaf node (where a leaf attaches to the stem).
- Prepare the Cuttings: Gently remove the leaves from the bottom half of the cutting. You can leave the top few leaves on, but I often prune them in half to reduce water loss. This sounds a bit counterintuitive, but it really helps!
- Apply Rooting Hormone: Dip the cut end of the stem into your rooting hormone, making sure it’s coated all around. Tap off any excess.
- Plant Your Cuttings: Fill your small pots with your well-draining potting mix. Make a small hole in the center of the soil with your finger or a pencil. Carefully insert the cut end of the stem into the hole, ensuring the nodes where you removed leaves are below the soil surface. Gently firm the soil around the cutting.
- Water Gently: Water the potting mix thoroughly but gently, so you don’t dislodge your cuttings.
The “Secret Sauce” (Pro Tips)
Now for those little tricks that make a big difference. I’ve learned these through trial and error over the years!
- Don’t Crowd Them: Give each cutting its own space. Overcrowding leads to poor air circulation and can encourage rot, which is the bane of propagation.
- Bottom Heat is Your Friend: This is a game-changer! Placing your pots on a heated seed mat provides consistent warmth to the roots, which encourages them to get going much faster. It mimics what happens underground when the soil warms up in spring.
- Freshly Dug Soil: While a good potting mix is important, I sometimes find using a mix that’s freshly dug and allowed to “air out” slightly before planting can reduce the risk of fungal issues. It’s a subtle difference, but I’ve noticed it.
Aftercare & Troubleshooting
Once your cuttings are planted, it’s time for a little TLC.
Create a Humid Environment: Cover the pots with a clear plastic bag or a humidity dome. This creates a mini greenhouse effect that keeps the cuttings from drying out while they’re trying to form roots. Make sure the leaves don’t touch the plastic, as this can also lead to rot. Open the bag or dome for a few minutes each day to allow for fresh air exchange – this really helps prevent mold and mildew. Keep them in a bright spot but out of direct, harsh sunlight, which can overheat the leaves and the plastic.
Be patient! It can take several weeks, sometimes even a couple of months, for Zanthoxylum caribaeum cuttings to show signs of rooting. You’ll know they’re doing well when you see new leaf growth appearing at the top of the cutting.
If you notice your cuttings wilting severely and not perking up, or if you see blackening at the base, this is often a sign of rot. Unfortunately, this means the cutting hasn’t taken, and it’s best to discard it to prevent any potential spread to others. Sometimes overwatering is the culprit, or a lack of air circulation.
A Encouraging Closing
Propagating Zanthoxylum caribaeum is such a rewarding journey. It’s about working with nature, observing closely, and learning from each step. Don’t get discouraged if every single cutting doesn’t make it – that’s all part of gardening! Just keep trying, enjoy the process, and celebrate those tiny new plants as they emerge. Happy propagating!
Resource:
https://identify.plantnet.org/k-world-flora/species/Zanthoxylum%20caribaeum%20Lam./data