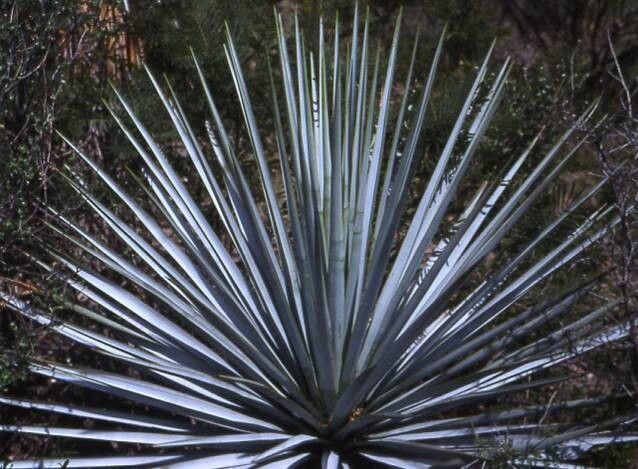
Oh, hello there, fellow garden enthusiast! I’m so glad you’ve stopped by. Today, we’re diving into the wonderful world of Yucca luminosa. You know, those elegant plants with their striking, sword-like leaves? They add such a dramatic flair to any space, whether it’s a sun-drenched patio or a bright corner indoors. And the best part? You can easily create more of them yourself! Propagating Yuccas is incredibly rewarding. You get to watch new life emerge from a piece of the parent plant. For beginners, I’d say Yucca propagation is moderately easy. A little patience goes a long way!
The Best Time to Start
My favorite time to propagate Yucca luminosa is during its active growing season. That usually means late spring through summer. The plant is full of energy then, ready to bounce back and put forth new roots with gusto. You can also do it in early fall, but I’ve found the success rate is generally higher when the weather is warmer.
Supplies You’ll Need
Before we get our hands dirty, let’s gather our essentials:
- Sharp Pruning Shears or a Clean Knife: For making clean cuts.
- Potting Soil: A well-draining mix is crucial. I often use a blend of cactus/succulent mix with a bit of perlite added in for extra drainage.
- Small Pots or Containers: With drainage holes, of course!
- Rooting Hormone (Optional but Recommended): This really gives your cuttings a head start.
- Watering Can or Spray Bottle: For gentle watering.
- Gloves (Optional): Yucca sap can be a bit sticky.
Propagation Methods
There are a few ways to go about this, but I find stem cuttings and division to be the most reliable for Yucca luminosa.
Stem Cuttings
This is probably my go-to method. It’s straightforward and effective.
- Take a Cutting: With your sharp tool, select a healthy stem from your mature Yucca. You’re looking for a section that’s at least 6-8 inches long. Make a clean cut just below a leaf node. You can also take offsets, which are smaller plants that grow at the base of the mother plant.
- Prepare the Cutting: Gently remove any lower leaves from the stem, leaving a few at the top. This just helps with airflow and prevents rot below the soil surface.
- Let it Callus: This is a super important step! Allow the cut end of the stem to air dry and form a callus for a few days to a week. Place it in a dry, well-ventilated spot out of direct sun. This prevents rot when you plant it.
- Apply Rooting Hormone (Optional): Dip the callused end into your rooting hormone. Tap off any excess.
- Plant Your Cutting: Fill a small pot with your well-draining soil mix. Make a hole in the center and insert the callused end of your cutting about 1-2 inches deep. Gently firm the soil around it.
- Water Gently: Water the soil lightly. You want it moist but not waterlogged.
Division
If your Yucca has grown a bit bushy with multiple shoots at the base, division is a fantastic option.
- Remove from Pot (or Carefully Dig): Gently unpot your Yucca. If it’s in the ground, carefully dig around the root ball to expose the base.
- Identify Offsets: Look for smaller plantlets growing off the main stem or near the roots.
- Separate the Pups: Using a clean, sharp knife or trowel, carefully separate an offset from the parent plant. Try to get some of its own roots attached if possible.
- Prepare for Planting: If the offset has a significant cut, you might want to let it callus over for a day or two, just like with a stem cutting.
- Plant: Pot each separated offset in its own container with well-draining soil.
The “Secret Sauce” (Pro Tips)
Here are a couple of things I’ve learned over the years that really make a difference:
- Don’t Drown Your Cuttings: This is probably the most common mistake. Yuccas are succulents, and they hate wet feet. Only water when the top inch or so of soil feels dry. Overwatering is the quickest way to invite rot.
- Bottom Heat is Your Friend: If you’re propagating in a cooler environment, a heat mat placed under your pots can significantly speed up root development. It mimics the warmth of spring and gives those roots a gentle nudge.
- Patience is Key with Callusing: I know it’s tempting to plant your cutting right away, but letting that cut end fully callus truly builds resilience and drastically reduces the risk of rot. Trust the process!
Aftercare & Troubleshooting
Once your new Yucca starts to show signs of life – usually new leaf growth or resistance when you gently tug on it – roots have formed! For cuttings, you can gently try to pull on a leaf. If there’s resistance, you’ve got roots.
Continue to water sparingly, allowing the soil to dry out between waterings. Gradually introduce your new plant to brighter light, but avoid direct, intense sun for the first few weeks.
Signs of trouble usually involve soft, mushy stems or leaves, or a foul smell. This is almost always a sign of rot due to overwatering. If you see this, act quickly. You might be able to salvage a healthier section of the stem if you catch it early. Cut away the rotted parts, let the healthy section callus, and try again in fresh, dry soil.
A Encouraging Closing
See? It’s not so daunting, is it? Propagating your Yucca luminosa is a rewarding journey that connects you even more deeply with your plants. Be patient, trust your instincts, and enjoy the magical process of watching something new grow. Happy propagating!
Resource:
https://identify.plantnet.org/k-world-flora/species/Yucca%20luminosa%20ined./data