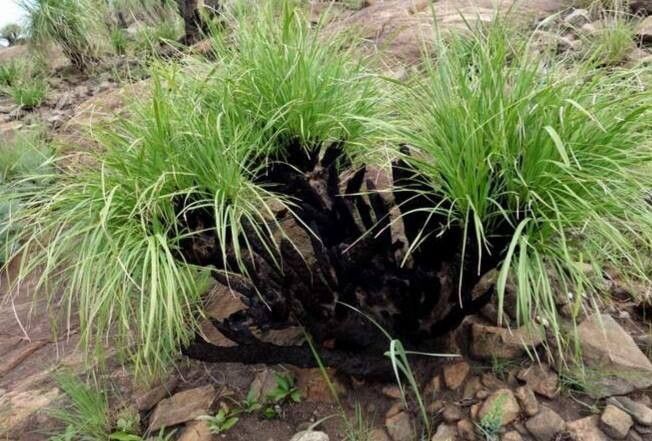
Oh, Xerophyta retinervis! What a star. I’ve been captivated by these beauties for years. Their architectural form and delicate, wind-blown flowers are just stunning, aren’t they? Propagating them is such a wonderful way to share that magic. Now, for beginners, I’d say Xerophyta retinervis is a moderately easy plant to propagate. It requires a little attention to detail, but the rewards are absolutely worth it. You’ll soon have a whole clan of these beauties to dot around your garden or give as heartfelt gifts.
The Best Time to Start
For the highest success rate, I always recommend starting your Xerophyta retinervis propagation in late spring or early summer. This is when the plant is actively growing and has the most energy to put into developing new roots. You’re looking for healthy, semi-hardwood stems – not brand new, flimsy growth, but also not old, woody material. Think of a stem that feels sturdy but still has a bit of flexibility.
Supplies You’ll Need
Getting your supplies ready is half the battle, right? Here’s what I always have on hand:
- Sharp Pruning Shears or a Knife: Make sure they’re clean and sterilized.
- Rooting Hormone (Powder or Gel): This really gives your cuttings a boost.
- A Well-Draining Potting Mix: I like a 50/50 blend of perlite and peat moss, or a good quality cactus/succulent mix.
- Small Pots or Seed Trays: About 4-inch pots are usually a good size.
- Plastic Bags or a Propagation Dome: To create a humid environment.
- Rubbing Alcohol: For sterilizing your tools.
- Watering Can with a Fine Rose: Gentle watering is key.
Propagation Methods
Let’s get our hands dirty! The most reliable method for Xerophyta retinervis is stem cuttings.
- Take Your Cuttings: Early in the morning is best, when the plant is fully hydrated. Using your sterilized pruning shears, make a clean cut just below a leaf node. Aim for cuttings that are about 4-6 inches long. Remove any leaves from the bottom half of the cutting, as these will just rot in the soil.
- Prepare the Cuttings: Dip the cut end into your rooting hormone. Make sure the hormone coats the entire wounded area. Gently tap off any excess.
- Potting Up: Fill your pots with your well-draining potting mix. Moisten the soil slightly – it should be damp, not waterlogged. Make a small hole in the center of the soil with your finger or a pencil.
- Planting: Insert the prepared cutting into the hole, ensuring the hormone-coated end is well within the soil. Firm the soil gently around the stem.
- Create Humidity: Water the soil gently again. Now, cover the pot with a plastic bag or a propagation dome. This creates that essential humid environment. If you’re using a plastic bag, you can support it with stakes so it doesn’t touch the leaves.
The “Secret Sauce” (Pro Tips)
Here are a few tricks I’ve learned over the years that make a big difference:
- Bottom Heat is Your Friend: If you have a heat mat, place your pots on it. This gentle warmth from below encourages root development much faster than room temperature alone. It’s like a little spa for your cuttings!
- Don’t Overwater, Even with Humidity: While humidity is crucial, soggy soil will lead to rot. Check the soil moisture regularly. If it feels dry to the touch about an inch down, give it a gentle watering. The plastic bag will help retain moisture, so you won’t need to water too often.
- Patience is a Virtue (and a Necessity!): Xerophyta retinervis can be a bit slow to root. I usually expect to see signs of new growth or feel a gentle tug when I lightly pull on the cutting within 4-8 weeks. Don’t get discouraged if it takes a little longer!
Aftercare & Troubleshooting
Once you see signs of new growth, like tiny leaves emerging or the cutting resisting a gentle tug, it’s time for a bit of change. Gradually remove the plastic bag or dome over a few days to let the new plant acclimate to normal humidity. Continue watering sparingly when the soil dries out.
The most common problem you’ll encounter is rot. If your cutting turns black and mushy, it’s usually a sign of too much moisture or not enough air circulation. If you spot this, sadly, it’s best to discard the cutting and start again, paying closer attention to your watering and air flow. Sometimes, a cutting might just not take – that’s part of the process!
A Encouraging Closing
So there you have it! Propagating Xerophyta retinervis is a journey, and like all good gardening adventures, it’s filled with learning and moments of quiet anticipation. Trust your instincts, be patient, and enjoy the process of watching new life emerge from your efforts. Happy propagating!
Resource:
https://identify.plantnet.org/k-world-flora/species/Xerophyta%20retinervis%20Baker/data