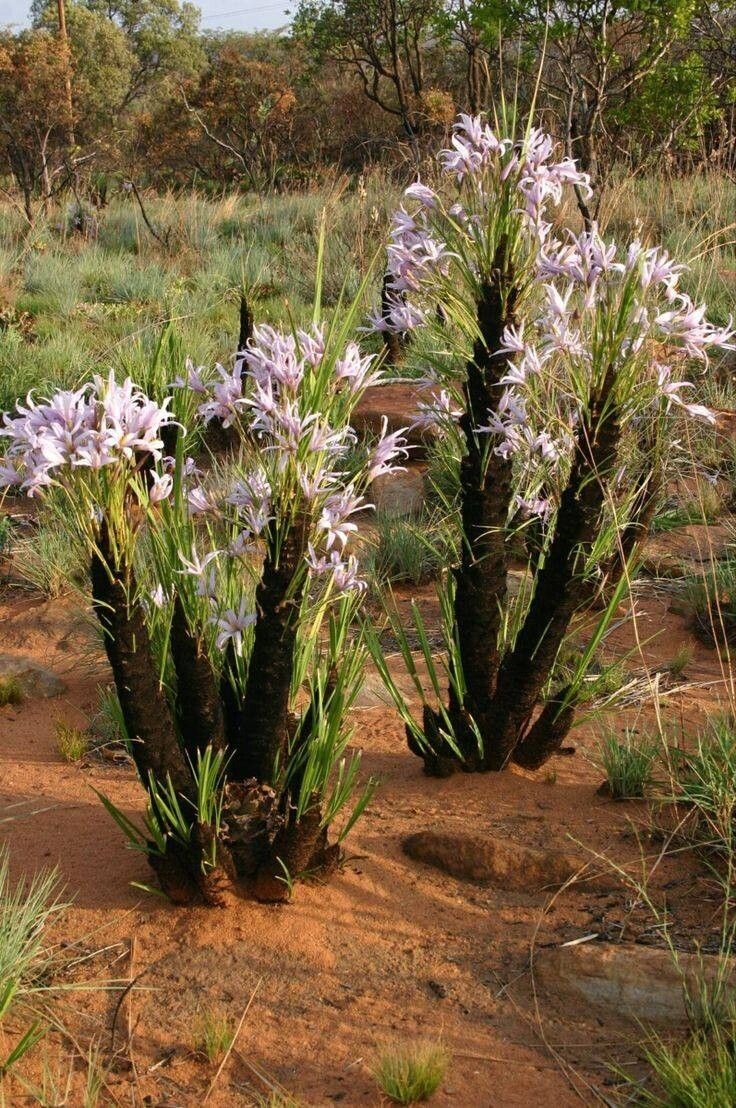
Oh, hello there! Come on in, grab a cup of tea. Let’s talk about one of my very favorite plants: Xerophyta dasyrioides. You know, those striking, almost architectural beauties with their rosette of stiff, leathery leaves. They bring such a unique, sculptural element to any garden or even a sunny windowsill, don’t they? And the best part? You can absolutely grow your own! Propagating them is a truly rewarding experience, and while they aren’t as hands-off as some succulents, with a little know-how, you’ll be well on your way to success.
The Best Time to Start
For Xerophyta dasyrioides, the sweet spot for propagation is definitely active growing season. Think late spring through summer. This is when the plant has the most energy to put into developing new roots. You’ll want to take cuttings or divide offsets when the plant is looking strong and healthy, not stressed or just coming out of dormancy.
Supplies You’ll Need
Before we dive in, let’s make sure you have everything at the ready. It’ll make the whole process so much smoother!
- Sharp, clean pruning shears or a sharp knife: Essential for making clean cuts. Make sure they’re disinfected with rubbing alcohol.
- Well-draining potting mix: A cactus/succulent mix is a good base. You can also mix in perlite or pumice for extra aeration.
- Rooting hormone (optional but recommended): A powder or gel can really give your cuttings a helping hand.
- Small pots or containers: With drainage holes, of course!
- Grit or small pebbles: For top dressing and to help keep the base of the plant dry.
- Spray bottle: For gentle misting.
- A warm, bright location: But out of direct, harsh sunlight initially.
Propagation Methods
Xerophyta dasyrioides is most commonly propagated through offsets (also called pups or suckers) and sometimes through stem cuttings, though offsets are generally easier and more reliable.
Method 1: Dividing Offsets
This is my go-to method for Xerophyta. You’ll often see these lovely plants sending up baby rosettes from the base.
- Gently remove the plant from its pot. This gives you a clear view of what’s happening beneath the soil.
- Identify a healthy offset that has a few leaves and looks like it might have its own root system starting.
- Carefully separate the offset from the mother plant. You can often gently pull them apart with your hands. If it’s really tough to separate, use your clean knife or pruning shears to make a clean cut, ensuring you get some roots with the offset if possible.
- Allow the cut end to callus over. This is crucial! Place the offset in a dry, bright spot for a day or two. You want the cut surface to dry and form a tough skin. This prevents rot.
- Pot it up! Fill a small pot with your well-draining mix. Make a small hole in the center and position the offset so the base is just at soil level.
- Gently firm the soil around the base. Don’t pack it down too hard.
- Water very sparingly after a few days. Just a light drink to settle the soil. You want the soil to dry out considerably between waterings.
Method 2: Stem Cuttings (Less Common for Beginners)
While not as common as offsets, you can propagate from stem cuttings if you have a larger plant.
- Take a cutting: Select a healthy stem with a few leaves. Using your clean shears, cut a piece about 4-6 inches long.
- Remove lower leaves: Strip off the bottom leaves, leaving a few at the top for energy.
- Allow it to callus: Just like with offsets, let the cut end dry and form a callus for a day or two.
- Apply rooting hormone (optional): Dip the callused end into rooting hormone powder or gel.
- Plant the cutting: Stick the callused end into your well-draining potting mix. Make sure it’s stable.
- Water sparingly: Again, err on the side of caution with watering.
The “Secret Sauce” (Pro Tips)
Here are a few things I’ve learned over the years that make a big difference:
- Don’t overwater, ever! This is the number one killer of Xerophyta cuttings. They are desert plants and hate wet feet. I always wait at least a week after potting an offset before the first proper watering, and even then, it’s a light drink.
- Bottom heat is your friend. If you’re doing stem cuttings, or even if you want to give offsets an extra boost, placing the pots on a gentle seedling heat mat can significantly speed up root development. Just make sure the soil isn’t constantly soggy.
- Patience is a virtue. These plants are slow growers. Don’t expect roots to appear overnight. I often judge success by whether the leaves are still firm and green, and then by the first signs of new growth, which can take weeks or even months.
Aftercare & Troubleshooting
Once your offset or cutting has established roots (you’ll know because it will feel secure in the soil and new growth will eventually appear), it’s time for normal care. Keep it in bright, indirect light and water only when the soil is completely dry.
The main thing to watch out for is rot. If you see the leaves turning mushy, yellowing excessively, or if the base of the plant starts to look dark and soft, it’s likely due to overwatering. Sadly, if rot sets in deeply, it’s very difficult to save. Prevention is key! Remove any dead or dying leaves promptly, as they can harbor pests or diseases.
A Encouraging Closing
So there you have it! Propagating Xerophyta dasyrioides is such a wonderfully satisfying way to expand your collection or share these beauties with friends. Remember to be patient, trust your instincts, and most importantly, enjoy the process of nurturing new life. Happy gardening!
Resource:
https://identify.plantnet.org/k-world-flora/species/Xerophyta%20dasylirioides%20Baker/data