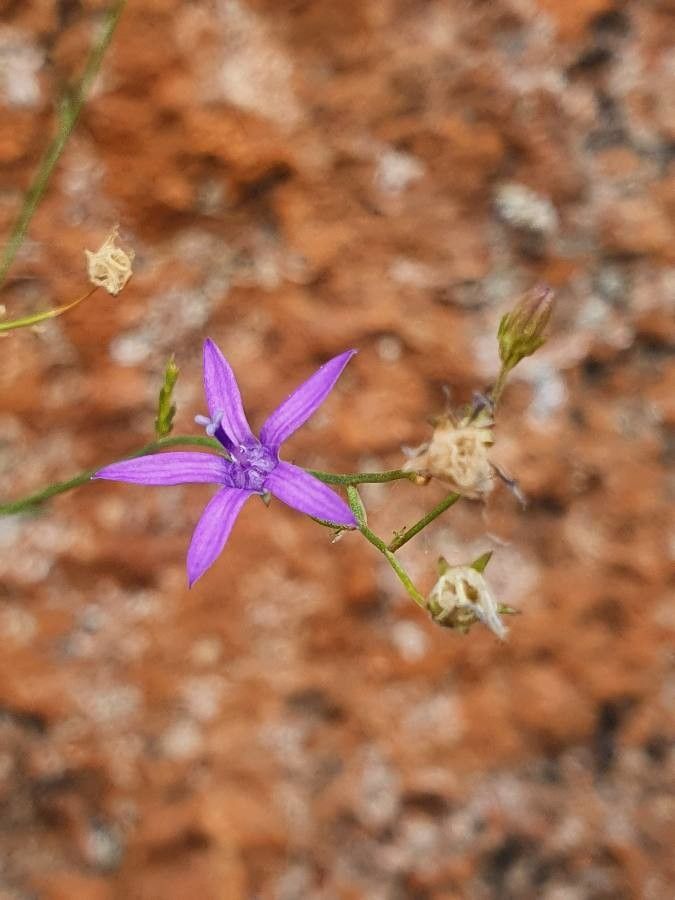
Oh, Wahlenbergia abyssinica! If you haven’t met this darling little plant yet, prepare to be charmed. Often called African Bellflower, its delicate, bell-shaped blooms in shades of soft blue and purple are just breathtaking, especially when they cascade over the edge of a pot or spill out from a rock crevice. My own garden has never felt complete without them.
The real beauty of propagating Wahlenbergia abyssinica? It’s incredibly rewarding to watch those tiny new plants take hold, knowing you’ve helped bring more of this loveliness into existence. And the good news for you? For the most part, this plant is quite happy to be multiplied, making it a delightful project for both seasoned gardeners and those just dipping their toes into the world of propagation.
The Best Time to Start
When it comes to getting the best results with Wahlenbergia abyssinica, I’ve found spring is your absolute best friend. As the days start to lengthen and the plant itself is stirring from its winter rest, its energy is ripe for new growth. You’re looking for that period when the plant is actively growing, but before the intense heat of summer sets in. Think of it as capturing that youthful vigor.
Supplies You’ll Need
Gathering your tools beforehand makes the whole process so much smoother. Here’s what I usually have on hand:
- Sharp, clean pruning shears or a sharp knife: For making those crucial, clean cuts on your cuttings.
- A light, well-draining potting mix: I often blend my own using equal parts peat moss, perlite, and a bit of coarse sand. You can also find good quality seed starting mixes.
- Small pots or seed trays: Clean ones are essential to avoid disease.
- A spray bottle: For gentle misting of your cuttings.
- Rooting hormone (optional but recommended): Especially for stem cuttings, this can significantly boost your success rate. Look for one that contains IBA.
- Plastic bags or a propagator: To create a humid environment for your cuttings.
- A small trowel or dibber: For making holes to insert cuttings.
Propagation Methods
Wahlenbergia abyssinica is quite adaptable, and I’ve had good luck with a couple of methods.
1. Stem Cuttings: My Go-To Approach
This is usually my preferred method for Wahlenbergia abyssinica.
- Take your cuttings: In spring, look for healthy, non-flowering stems. Using your sharp shears, take cuttings that are about 3-4 inches long. Make sure to take them from healthy, vigorous growth.
- Prepare the cuttings: Gently remove the lower leaves from the cutting, leaving just a few at the top. If you’re using rooting hormone, slightly dampen the cut end and dip it into the powder, tapping off any excess.
- Plant your cuttings: Fill your small pots with your prepared potting mix. Make a small hole with a dibber or your finger, and gently insert the cut end of the stem. Firm the soil gently around it.
- Create humidity: Water the soil lightly. Then, cover the pot with a plastic bag (supported by skewers so it doesn’t touch the leaves) or place it in a propagator. This is crucial for keeping the cuttings from drying out.
- Provide ideal conditions: Place the pots in a bright spot that receives indirect sunlight. Avoid direct sun, which can scorch those delicate new cuttings.
2. Division: For Mature Plants
If you have a well-established Wahlenbergia abyssinica that’s looking a bit crowded, you can also propagate it by division.
- Gently unpot the plant: Carefully lift the entire plant from its pot or from the ground.
- Loosen the root ball: Gently tease apart the soil to expose the roots. You’ll often see distinct clumps or crowns.
- Divide the plant: Using your hands, or a clean knife if the root ball is dense, carefully separate the plant into smaller sections. Each section should have a good amount of roots and at least one healthy shoot.
- Replant: Pot up each division into its own container with fresh potting mix, or replant them directly into the garden. Water them in well.
The “Secret Sauce” (Pro Tips)
Over the years, I’ve picked up a few tricks that really make a difference.
Firstly, don’t let the leaves of your cuttings touch the water (if you were to try water propagation, which I find trickier for this particular plant). This can lead to rot surprisingly quickly. Keeping them slightly elevated in the humid environment is key.
Secondly, for stem cuttings, a little bit of bottom heat can work wonders. If you have a heat mat designed for seedlings, placing your pots on it can encourage root development much faster. It mimics the warmth of spring soil and encourages those roots to get going.
Thirdly, and this is a big one: be patient with your cuttings. Sometimes it feels like they’re not doing anything, but below the surface, those roots are quietly forming. Don’t be tempted to pull them out too early to check!
Aftercare & Troubleshooting
Once you start seeing signs of new growth – tiny leaves unfurling or a gentle tug on the cutting revealing resistance – you know roots are forming!
- Gradually acclimate: Once roots are established, you can start to gradually remove the plastic bag or open the propagator for increasing periods each day. This helps the new plant adjust to normal humidity levels.
- Watering: Keep the soil consistently moist but not waterlogged. Overwatering is the quickest way to invite trouble.
- Transplant: When the seedling or cutting is large enough to handle and has a good root system, you can transplant it into its own pot or its permanent garden spot.
Now, what if things go wrong? The most common issue I see is rot. If your cutting looks mushy, dark, or just unhealthy, it’s likely too much moisture and not enough air circulation. Usually, if rot sets in, that particular cutting is a goner. It’s why using clean tools and a well-draining mix is so incredibly important. Another sign of failure can be wilting or yellowing leaves, which might point to insufficient humidity or a lack of roots. Don’t be discouraged if a few don’t make it – it’s all part of the learning curve!
So there you have it! Growing Wahlenbergia abyssinica from cuttings or divisions is a truly satisfying endeavor. Remember to be kind to yourself, celebrate every little success, and enjoy the process of nurturing these beautiful blooms. Happy gardening!
Resource: