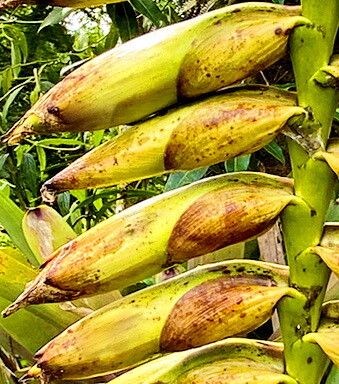
Hello, fellow plant lovers! Today, we’re diving into the wonderful world of bromeliads, specifically the stunning Vriesea sazimae. If you’re mesmerized by its dramatic, striking inflorescence and the way it brings a touch of the tropics right into your home, then you’re in for a treat. Propagating this beauty isn’t just about getting more plants; it’s about sharing that joy and watching new life unfurl. For those new to plant propagation, don’t worry, Vriesea sazimae is a good teacher. You’ll learn a lot with this one.
The Best Time to Start
The absolute best time to propagate your Vriesea sazimae is when it has finished flowering and you start seeing pups forming at the base of the mother plant. This usually happens in the late spring or early summer, when the plant is in an active growth phase and has plenty of energy to spare. Trying to propagate before this or when the plant is stressed won’t yield the best results.
Supplies You’ll Need
Gathering your tools beforehand makes the whole process much smoother. I always have these on hand:
- Sharp, sterile pruning shears or a clean knife: For making clean cuts. Sterilizing is key to prevent disease.
- A well-draining potting mix: I like a blend of orchid bark, perlite, and a bit of sphagnum moss. Bromeliads hate soggy feet!
- Small pots or containers: Whatever fits the size of your pup.
- Rooting hormone (optional but recommended): A powder or gel can give your pups a helpful boost.
- Spray bottle: For misting.
- Clear plastic bag or a small greenhouse/terrarium: To create a humid environment.
Propagation Methods
For Vriesea sazimae, the most effective and straightforward method is division of pups. These are essentially baby plants that grow from the base of the mature Vriesea.
- Identify the Pups: Look for small plantlets emerging from the soil around the base of your mature bromeliad. They should have at least two or three leaves.
- Gently Excavate: Carefully remove the mother plant from its pot. You might need to gently tease away some of the soil to get a good look at how the pups are attached.
- Separate the Pup: Using your sterile shears or knife, carefully cut the pup away from the mother plant. Try to keep as much of its natural root system intact as possible. If a pup doesn’t have visible roots yet, don’t fret; it will develop them.
- Potting Up: Fill your small pots with your well-draining mix.
- Plant the Pup: Make a small indentation in the soil and place the pup inside, firming the soil gently around its base.
- Rooting Hormone (if using): If you’re using rooting hormone, lightly dip the cut end of the pup into it before placing it in the soil. Tap off any excess.
- Water Lightly: Give the newly potted pup a light watering.
The “Secret Sauce” (Pro Tips)
Here are a few tricks I’ve picked up over the years that really make a difference:
- Don’t Overwater! This is the number one killer of new bromeliad pups. The soil should be consistently moist, not soggy. Think of it like a wrung-out sponge.
- Embrace the Humidity: Bromeliads love humidity. Once your pup is potted, place it in a clear plastic bag (loosely tied, so air can circulate) or in a propagator. This mini-greenhouse will keep moisture levels high, encouraging root development.
- Patience and Warmth: While not strictly “bottom heat” like for some tropicals, keeping your new pups in a warm spot (around 70-75°F or 21-24°C) will significantly speed up root formation. Avoid direct, harsh sunlight at this stage.
Aftercare & Troubleshooting
Once you see new leaf growth on your pup, it’s a very good sign that roots are developing nicely! Continue to keep the soil consistently moist but not waterlogged, and maintain that humid environment for a few more weeks. Gradually introduce it to brighter, indirect light.
The most common issue you’ll encounter is rot. If you notice the base of your pup turning mushy or black, it’s usually a sign of too much moisture. In this case, you might need to remove it from the soil, let it air dry for a day or two, and then repot in fresh, drier mix. If it’s too far gone, unfortunately, it might be time to start over.
A Encouraging Closing
Propagating bromeliads like Vriesea sazimae is part of the gardener’s journey. It’s a process that teaches you about patience and the resilience of nature. Don’t be discouraged if your first attempt isn’t perfect. Each plant you choose to propagate is an opportunity to connect deeper with your green companions. So, get your hands dirty, enjoy the process, and soon you’ll have a whole new generation of these magnificent plants to admire! Happy propagating!
Resource:
https://identify.plantnet.org/k-world-flora/species/Vriesea%20sazimae%20Leme/data