Oh, hello there! Come on in, pull up a chair. I’ve got my mug of chamomile ready, and I’m so excited to chat with you today about one of my favorite bromeliads: the Vriesea pleiosticha.
A Dazzling Delight: Why Propagate Vriesea pleiosticha?
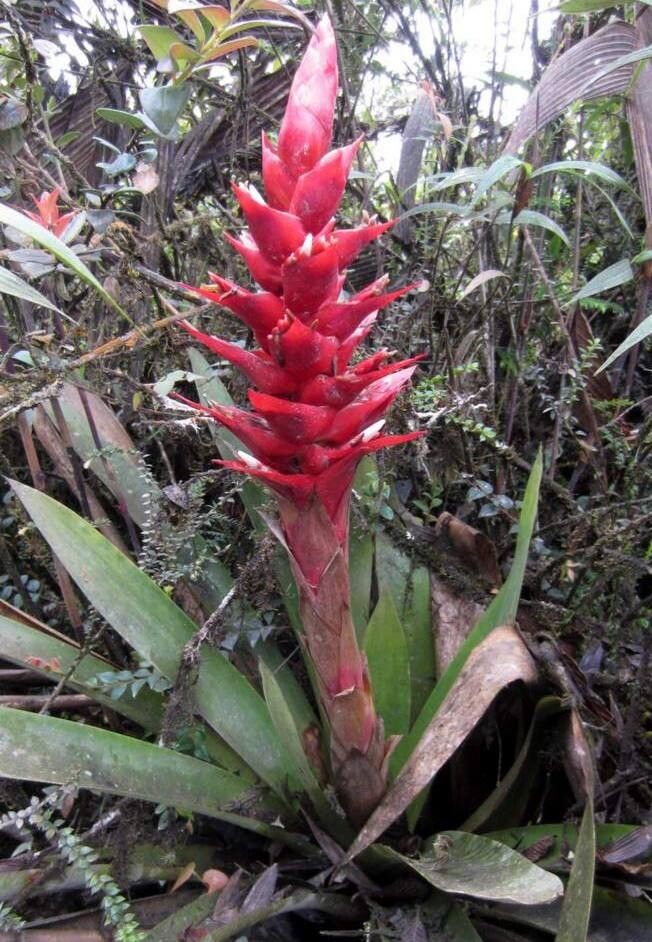
If you’ve ever seen a Vriesea pleiosticha in full glory, you know what I mean. Those vibrant, often red or orange, flower spikes that emerge from their neat rosettes are simply breathtaking. They bring such a tropical flair to any space! Now, I know some might say bromeliads can be a bit fussier, but honestly, I find propagating these beauties to be incredibly rewarding, and not nearly as daunting as you might think. It’s a fantastic way to multiply that stunning color without breaking the bank.
The Sweet Spot for Starting
The absolute best time to get your propagation party started is spring or early summer. This is when the plant is actively growing and has plenty of energy to dedicate to producing new babies. You’ll usually see these new growths, often called “pups,” emerging at the base of the mother plant. That’s your cue!
Your Propagation Toolkit
Before we dive in, let’s make sure you’ve got everything you need. It’s always good to be prepared!
- Sharp Pruning Shears or a Clean Knife: For making clean cuts.
- Well-Draining Potting Mix: I like a mix of equal parts orchid bark, perlite, and quality potting soil.
- Small Pots or Containers: Just big enough for your pups.
- Rooting Hormone (Optional but Recommended): A little boost can speed things up.
- Spray Bottle: For light misting.
- Patience: The most important tool of all!
Bringing New Life: Propagation Methods
For Vriesea pleiosticha, the division of pups is your go-to method. It’s straightforward and really mimics how they grow naturally.
- Identify the Pups: Look for those little plantlets that have started to form at the base of your mature Vriesea. They should have their own small leaves.
- Gently Ease Them Out: If the pup is large enough and has started to develop its own roots, you can carefully try to wiggle it free from the mother plant. Sometimes, you might need to gently tease away some of the soil around the base to see what you’re working with.
- Make the Cut (If Necessary): If the pup is still quite attached, or if you want to encourage quicker root development, use your sharp pruning shears or knife to make a clean cut, separating the pup from the mother plant. Try to leave a little bit of the mother plant’s base attached to the pup if possible.
- Let it Callous: This is a crucial step! Place the pup in a dry, shaded spot for 24-48 hours. This allows the cut surface to dry and form a protective scab, which significantly reduces the risk of rot when you pot it.
- Potting Up: Fill your small pot with your well-draining mix. Make a small well in the center and dip the base of the pup in rooting hormone (if you’re using it). Then, carefully place the pup in the soil and firm the mix around it gently. The base of the pup should be snug in the soil.
The “Secret Sauce”: Insider Tips from My Garden
Here are a few things I’ve picked up over the years that really make a difference with Vriesea pups:
- Don’t Drown Them! When you first pot your pup, water it lightly. After that, resist the urge to waterlog it. These guys prefer to dry out slightly between waterings. A light misting with your spray bottle a couple of times a week is usually enough in the early stages. Too much water is the quickest way to invite rot.
- Warmth is Key: Bromeliads love a bit of gentle warmth. If your home tends to be on the cooler side, consider placing your potted pups on a heating mat set to a low temperature. This can really give their root development a kickstart.
- Indirect Light is Best: Direct sunlight will scorch those tender new leaves. Place your newly potted pups in a bright spot, but out of direct sun. A north-facing window is often perfect.
Keeping Them Happy: Aftercare and What to Watch For
Once your pup is potted, give it a gentle watering. Continue with that light misting every few days. Keep it in bright, indirect light and that gentle warmth.
Now, what if things aren’t going as planned? The most common issue you’ll face is rot. If you notice the base of the pup turning mushy, brown, or looking slimy, it’s likely too much moisture. If you catch it early, you can try gently removing the rotted part, letting the rest callous again, and repotting in fresh, dry soil. Sometimes, unfortunately, a rotted pup is a goner, and that’s just part of gardening. Don’t be discouraged!
You’ll know your pup is happy and rooting when you see new leaf growth emerging from the center. It might take a few weeks, or even a couple of months, so remember that patience we talked about!
Happy Growing!
So there you have it! Propagating Vriesea pleiosticha is a wonderful journey, and seeing those little pups thrive and grow into their own stunning plants is such a rewarding experience. Be patient with yourself and them, and enjoy the process. Happy gardening!
Resource:
https://identify.plantnet.org/k-world-flora/species/Vriesea%20pleiosticha%20(Griseb.)%20Gouda/data