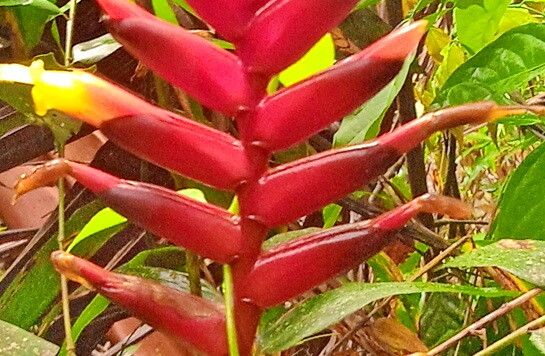
Oh, hello there! I’m so glad you’re thinking about propagating Vriesea gradata. It’s a truly stunning bromeliad, isn’t it? Those elegant, strap-like leaves, often with a beautiful red base, and that dramatic flower spike – it’s a real showstopper. And the joy of creating more of these beauties from your existing plants? Pure gardening magic! For beginners, I’d say Vriesea gradata is moderately easy. It’s not quite as foolproof as, say, a spider plant, but with a little attention, you’ll do wonderfully.
When Nature Says “Go!” – The Best Time to Start
The absolute best time to propagate your Vriesea gradata is during its active growth phase. Think of it as spring and early summer. This is when the plant has the most energy to dedicate to sending out new shoots, called pups or offsets. You’ll usually see these little guys start to form around the base of the mother plant. Trying to propagate when the plant is dormant, usually in the cooler, darker months, is a recipe for disappointment.
Your Propagation Toolkit – What You’ll Need
Gathering your supplies beforehand makes the whole process so much smoother. Here’s what you’ll want to have on hand:
- Sharp, sterile pruning shears or a clean knife: For making precise cuts. A little rubbing alcohol or bleach solution can sterilize them quickly.
- Fine-mesh potting mix: Something that drains exceptionally well. A good orchid or bromeliad mix is perfect. You can also make your own by combining equal parts perlite, coco coir, and a bit of charcoal.
- Small pots or trays: Clean containers with drainage holes are essential.
- Cinnamon powder or a rooting hormone (optional but helpful): Cinnamon acts as a natural antifungal, while rooting hormone can give your pups a little kickstart.
- Watering can with a fine rose nozzle: For gentle watering.
- A spray bottle: For misting.
- Clear plastic bags or a propagation dome: To create a humid environment.
Making More Vriesea Magic – Propagation Methods
For Vriesea gradata, the most successful and straightforward method is pup separation. These plants are clump-formers, and the pups are essentially baby plants that grow from the base of the mature plant.
- Wait for the pups to grow: You want the pups to be at least one-third the size of the mother plant, and ideally, have a few of their own leaves showing. This indicates they have their own energy reserves.
- Gently excavate: Loosen the soil around the base of the mother plant. You might need to carefully pull back some of the older leaves to get a clear view of where the pups are attached.
- The crucial cut: Using your sharp, sterilized shears or knife, carefully cut the pup away from the mother plant. Try to get as much of the pup’s base, including any tiny roots, as possible. If you can’t get roots, don’t despair, but it does give them a head start.
- Dry and dust (optional but recommended): Let the cut surface of both the pup and the mother plant air dry for a day or two in a well-ventilated spot. This helps calluses over the wound, preventing rot. You can then lightly dust the cut surface of the pup with cinnamon powder or dip it in rooting hormone.
- Potting up: Fill your small pots with your well-draining potting mix. Plant the pup upright, pressing the soil gently around its base. Don’t plant it too deep; you want the base just nestled in the soil.
- Initial watering and humidity: Water the pot lightly. Then, cover the pot with a clear plastic bag (propped up so it doesn’t touch the leaves) or place it in a propagation dome. This creates a humid environment that helps the pup conserve moisture while it establishes roots.
The “Secret Sauce” – My Insider Tips
Here are a few little things I’ve learned over the years that can really make a difference:
- Don’t rush the pup separation. Patience is key! Waiting until the pup is a decent size makes it much more likely to survive and thrive. If you try to take too-small pups, they often just wither away.
- Think about bottom heat. If you have a heat mat that gardeners use for starting seeds, this is the perfect place for your potted pups. A gentle, consistent warmth from below – around 70-75°F (21-24°C) – will truly encourage root development. It mimics the natural warmth of a tropical environment.
Keeping Them Happy and Healthy – Aftercare & Troubleshooting
Once your pup is potted, keep it in a bright spot but out of direct, hot sunlight. The humidity is your friend right now, so keep that plastic bag or dome on. Check the soil moisture every few days; it should always be slightly moist, never waterlogged. Mist the leaves occasionally, but try to avoid water sitting in the crown of the new pup.
You’ll know your pup is happy when you see new leaf growth! This can take anywhere from a few weeks to a couple of months.
The most common issue you might encounter is rot. This usually happens if the pup is kept too wet or doesn’t have good air circulation. If you notice the leaves turning mushy or brown at the base, it’s a sign of rot. Unfortunately, if rot sets in, it’s often difficult to save the pup. The best prevention is good drainage and not overwatering. If you catch it early, you might be able to cut away the rotted parts and let it callus again, but it’s a gamble.
Go Forth and Propagate!
So there you have it – a little guide to doubling your Vriesea gradata joy. Don’t be afraid to give it a go. Remember, gardening is all about learning and experimenting. Be patient with your new pups, enjoy the process of watching them grow, and soon you’ll have a whole collection of these beautiful plants to admire! Happy gardening!
Resource:
https://identify.plantnet.org/k-world-flora/species/Vriesea%20gradata%20(Baker)%20Mez/data