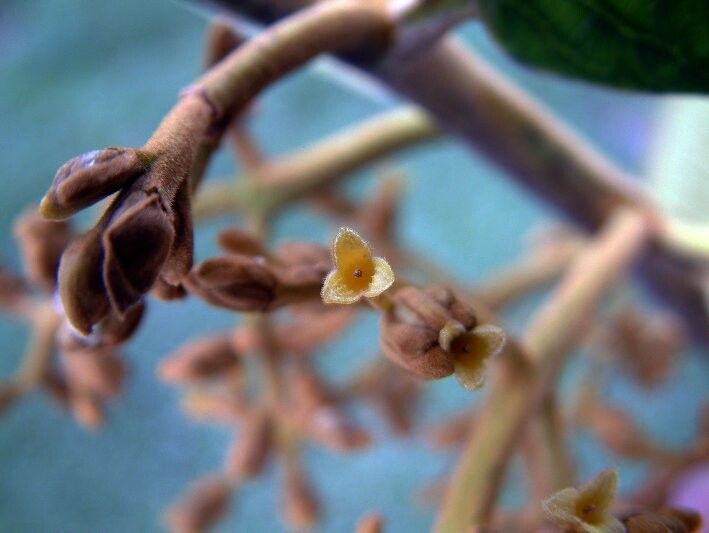
Oh, hello there! So, you’ve spotted a gorgeous Virola duckei and are thinking about bringing more of that beauty into your life? That’s wonderful. There’s something truly special about watching a new plant sprout from a tiny cutting, isn’t there? Virola duckei, with its elegant foliage and potential for a lovely tree form, is a plant that’s definitely worth getting to know.
While Virola duckei might feel a little more special than your average houseplant, propagating it is absolutely achievable. It’s not one of those “stick a twig in the ground and it’ll grow” plants, but with a bit of care and attention, you’ll be rewarded with your own little Virola babies. I’d say it’s a moderately challenging plant for beginners, but definitely within reach if you follow these steps.
The Best Time to Start
For the highest chance of success with Virola duckei, you’ll want to focus your efforts during its active growing season. This typically means late spring and through the summer months. During this time, the plant has plenty of energy to put into root development. I find that taking cuttings when the plant is flush with new growth, but before it becomes overly woody, works best.
Supplies You’ll Need
Gathering your tools beforehand makes the whole process much smoother. Here’s what I usually have on hand:
- Sharp, clean pruning shears or a knife: Essential for making clean cuts to prevent disease.
- Rooting hormone: A little helps a lot! I prefer a powdered form for stem cuttings.
- Well-draining potting mix: A good blend of peat moss, perlite, and a bit of compost works wonders. You want it to hold some moisture but not get waterlogged.
- Small pots or propagation trays: For your new cuttings. Make sure they have drainage holes.
- Plastic bags or a propagation dome: To keep humidity high around the cuttings.
- Hand sanitizer or rubbing alcohol: To sterilize your tools.
- Watering can with a fine rose: For gentle watering.
Propagation Methods
Let’s dive into how we can get those new Virola duckei plants started.
Stem Cuttings
This is my go-to method for Virola duckei. It’s reliable and gives you a good chance of success.
- Select your parent plant: Find a healthy, vigorous stem on your Virola duckei. Look for a stem that has new growth but is starting to firm up – not the very tip, which is too soft, and not the old, woody part.
- Make the cut: Using your sterilized pruners or knife, make a clean cut just below a leaf node (the point where a leaf attaches to the stem). This is where the magic happens for rooting. Aim for cuttings that are about 4-6 inches long.
- Prepare the cutting: Gently remove any lower leaves, leaving just a couple of leaves at the very top. If the top leaves are very large, you can even cut them in half to reduce water loss from transpiration.
- Apply rooting hormone: Dip the cut end of the stem into your rooting hormone, tapping off any excess.
- Plant the cutting: Fill your small pots with your prepared potting mix. Make a hole in the center with your finger or a pencil, and insert the cutting so that the leaf nodes are buried. Gently firm the soil around the stem.
- Water and cover: Water gently to settle the soil. Then, cover the pot with a plastic bag or place it under a propagation dome. This creates a mini-greenhouse effect, keeping the humidity high.
Water Propagation (Less Common, but Possible)
While I find stem cuttings in soil more reliable for Virola duckei, you can try water propagation if you want to watch the roots develop.
- Take a cutting: Follow steps 1-3 above for selecting and preparing your cutting.
- Place in water: Find a clean jar or glass and fill it with clean water. Place the cutting in the water, ensuring that the leaf nodes are submerged but that the leaves themselves are not touching the water.
- Change water regularly: Change the water every 2-3 days to keep it fresh and prevent bacterial growth.
- Wait for roots: Once you see small white roots developing, usually after a few weeks, you’ll need to transplant it into soil. Be very careful, as water roots are quite fragile.
The “Secret Sauce” (Pro Tips)
After years of trying different things, I’ve picked up a few tricks that can really boost your success rate.
- Bottom Heat is Your Friend: If you have access to a heat mat specifically designed for seedlings and cuttings, use it! Virola duckei loves a bit of warmth from below. It encourages root development much faster than relying solely on ambient room temperature. Place your pots on the mat, and you’ll likely see results sooner.
- Humidity is Key, But Not Drowning: While that plastic bag or dome is crucial for humidity, I’ve learned to watch for condensation. If the inside of the bag is constantly dripping, it means it might be too moist and could lead to rot. Open the bag for a few hours each day to allow for some air circulation. This is especially important for water propagation – always make sure leaves are above the water.
- Patience, Young Grasshopper: I know it’s tempting to constantly check for roots, but try to resist! Resist the urge to tug on your cuttings. You might think you’re checking for roots, but you could actually be dislodging the new, delicate root hairs that are just starting to form. Give them at least 4-6 weeks before giving them a gentle tug.
Aftercare & Troubleshooting
Once you see those lovely roots emerging – hooray! This is where the real nurturing begins.
- Transplanting: When your cuttings have developed a good root system (usually about an inch or two long), it’s time to transplant them into slightly larger pots. Continue to use your well-draining potting mix. Water them thoroughly after transplanting.
- Gradual Acclimation: If you used a propagation dome or plastic bag, start by gradually removing the cover over a week or two. This helps the new plant adjust to normal humidity levels.
- Light and Water: Provide your new Virola duckei with bright, indirect light. Water when the top inch of soil feels dry. Avoid overwatering, as this is the quickest way to invite problems.
- Signs of Trouble: The most common issue is rot, which often appears as a black, mushy stem, especially at the soil line. This is usually a sign of the cutting being too wet and not having enough air circulation. You might also see yellowing leaves which can indicate overwatering or insufficient light.
A Word of Encouragement
So there you have it! Propagating Virola duckei is a journey, and each step brings its own little rewards. Don’t be discouraged if your first attempt isn’t perfect. Gardening is all about learning and adapting. Keep trying, enjoy the process of nurturing these new beginnings, and soon you’ll have a small jungle of your own Virola duckei to admire! Happy growing!
Resource:
https://identify.plantnet.org/k-world-flora/species/Virola%20duckei%20A.C.Sm./data