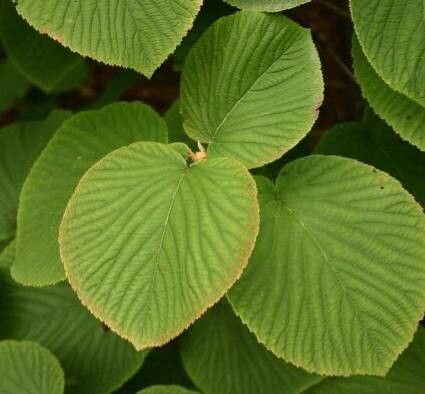
Hello fellow plant lovers! I’m so excited to chat with you today about one of my favorite shrubs: Viburnum furcatum. If you haven’t encountered it before, imagine a woodland beauty with delicate, lacy white flowers that give way to lovely red berries. It’s truly a gem for naturalistic gardens, attracting all sorts of pollinators and birds. And the best part? Growing your own from cuttings or divisions is incredibly rewarding, and while it might take a little patience, it’s absolutely achievable for most gardeners.
The Best Time to Start
When it comes to Viburnum furcatum, softwood cuttings are usually my go-to. The sweet spot for taking these is in late spring to early summer, right after the plant has finished its main flush of spring growth but before the stems start to harden off. You want stems that are flexible and bend easily, rather than snap. If you miss that window, you can also try semi-hardwood cuttings in late summer, but success rates might be a tad lower.
Supplies You’ll Need
Gathering your supplies beforehand makes the whole process smoother. Here’s what I usually have on hand:
- Sharp Pruning Shears or a Craft Knife: Clean cuts are crucial for healthy rooting.
- Rooting Hormone: A good quality hormone, especially one with IBA (indole-3-butyric acid), can significantly boost your success.
- Well-Draining Potting Mix: I like a blend of peat moss, perlite, and a little bit of compost. A standard softwood cutting mix works wonderfully.
- Small Pots or Seed Trays: Clean ones are a must to prevent disease.
- Plastic Bags or a Propagation Dome: To create a humid environment for your cuttings.
- Water: For misting and for water propagation if you choose that route.
- Labels and a Marker: You’ll want to know what you planted and when!
Propagation Methods
Let’s get our hands dirty! Here are my favorite ways to multiply Viburnum furcatum.
1. Softwood Cuttings (My Favorite!)
This is usually the most successful method for Viburnum furcatum.
- Take Your Cuttings: In late spring or early summer, look for healthy, non-flowering shoots on your established plant. Select stems that are about 4-6 inches long and have at least two sets of leaves.
- Prepare the Cuttings: Using your sharp shears or knife, make a clean cut just below a leaf node (where a leaf meets the stem). Remove the lower leaves, leaving just a couple at the top. If any flower buds or clusters are present, pinch them off.
- Apply Rooting Hormone: Dip the cut end of each cutting into your rooting hormone powder, tap off any excess.
- Plant the Cuttings: Insert the treated end of each cutting into your prepared potting mix, about an inch deep. Gently firm the soil around them.
- Create Humidity: Water the soil lightly and then cover the pots with a plastic bag or a propagation dome. Make sure the leaves aren’t touching the plastic if possible.
- Provide Light and Heat: Place the pots in a bright location out of direct sunlight. If you have a heat mat, placing the pots on it can really speed up root development.
- Wait for Roots: Check periodically. You should see new leaf growth as a sign of successful rooting, which can take anywhere from 4 to 8 weeks. You can also gently tug a cutting – if it resists, roots have formed!
2. Water Propagation (Simple and Visual)
This is a fun method because you can see the roots as they grow!
- Take Cuttings: Follow the same steps as above for taking softwood cuttings, but you don’t need to apply rooting hormone for this method.
- Place in Water: Place the cuttings in a glass or jar filled with clean water. Make sure the leaf nodes are submerged, but do not let the leaves themselves touch the water.
- Change Water: Change the water every few days to keep it fresh and prevent bacterial growth.
- Watch for Roots: Place the container in a bright spot, out of direct sun. Within a few weeks, you should start to see tiny white roots emerging from the nodes.
- Plant When Ready: Once the roots are about an inch long, you can carefully transplant them into your well-draining potting mix. Treat them like softwood cuttings at this stage.
3. Division (For Established Plants)
If you have a mature Viburnum furcatum that’s become quite large, dividing it in early spring or fall is a great option.
- Dig Up the Plant: Carefully dig around the base of the shrub, aiming to lift the entire root ball.
- Separate the Sections: Use a clean spade or even your hands to gently pull apart sections of the root ball. Aim for pieces that have both roots and some healthy stems.
- Replant Immediately: Replant the divided sections into their new locations or into pots with fresh soil, watering them thoroughly.
The “Secret Sauce” (Pro Tips)
After years of getting my hands dirty, I’ve learned a few tricks that seem to make all the difference.
- Don’t Drown Your Cuttings: When you’re water propagating, it’s crucial that the leaves don’t sit in the water. They’ll just rot and can take the whole cutting down with them. Keep them dry.
- Bottom Heat is Your Friend: Seriously, a propagation heat mat makes a world of difference, especially if your house tends to be on the cooler side. It encourages root formation from the bottom up, giving your cuttings a much better start.
- Sterilize, Sterilize, Sterilize: I can’t stress this enough! Always use clean tools, clean pots, and clean soil. Fungus and bacteria can be the silent killers of your propagation efforts, and a little bit of bleach or rubbing alcohol on your tools and pots goes a long way.
Aftercare & Troubleshooting
Once you see those lovely roots, it’s time to shift gears to nurturing your new little Viburnum furcatum.
- Gradual Acclimation: If your cuttings were in a humid environment (under plastic or a dome), gradually introduce them to drier air by opening the cover a little more each day before removing it entirely.
- Watering: Keep the soil consistently moist but not soggy. Overwatering is a common mistake and can lead to root rot.
- Light: Continue to provide bright, indirect light. As the plant grows stronger, you can slowly introduce it to more direct sunlight, but always observe its reaction.
- First Potting: Once your propagated plants have established a good root system and are showing new growth, you can pot them into slightly larger containers with your regular potting mix.
Now, what if things go wrong? The most common sign of trouble is wilting that doesn’t improve with watering, or a blackening and mushy stem at the soil line – that’s rot, usually from too much moisture and poor air circulation. If you see this, sadly, that cutting is likely lost. Don’t get discouraged! Just learn from it and try again. Sometimes a cutting just doesn’t take, and that’s part of the gardening process.
A Gently Encouraging Closing
Growing new plants from cuttings or divisions is such a fulfilling part of gardening. It connects you more deeply to your plants and allows you to share their beauty with friends and family. Be patient with your Viburnum furcatum – some plants are quicker to root than others. Keep experimenting, observe your plants closely, and most importantly, enjoy the journey. Happy propagating!
Resource:
https://identify.plantnet.org/k-world-flora/species/Viburnum%20furcatum%20Blume%20ex%20Maxim./data