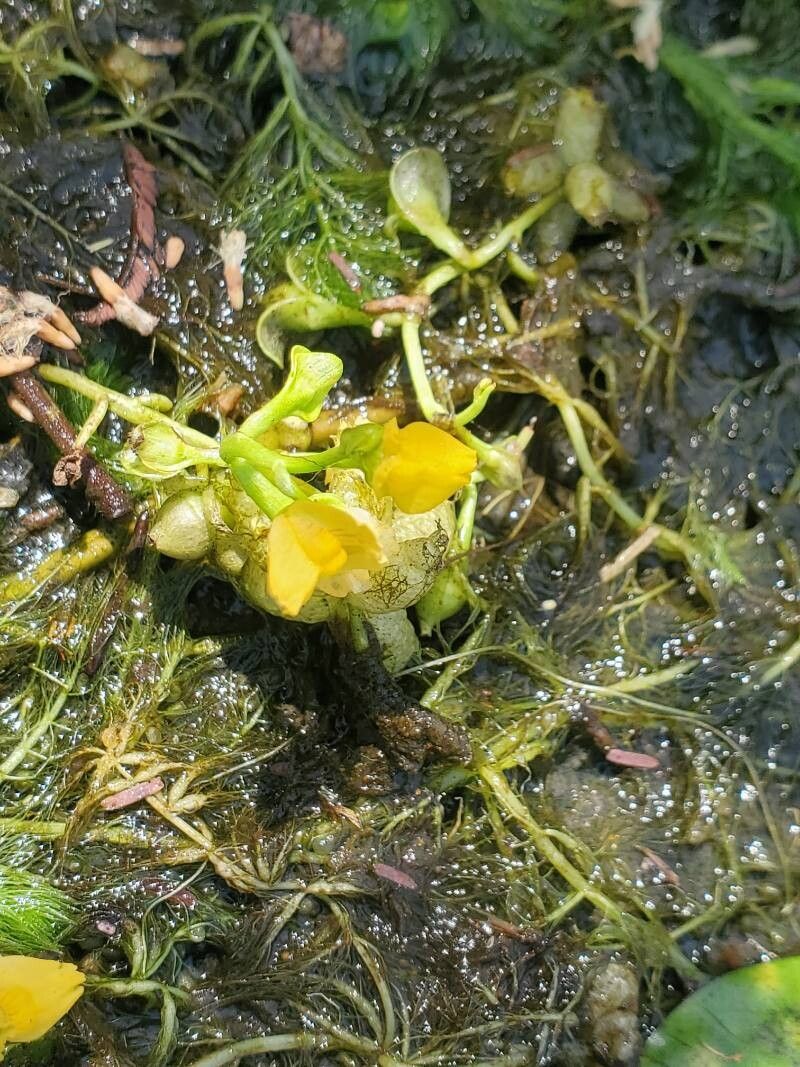
Hey there, fellow plant lovers! I’m so excited to chat with you today about a truly fascinating plant: Utricularia stellaris. If you’re not familiar, this aquatic marvel, also known as the Star Bladderwort, is a carnivorous wonder that catches tiny prey with its ingenious bladder-like traps. Watching them grow and thrive, and then successfully creating new plants from them, is one of the most rewarding experiences a gardener can have. Now, is Utricularia stellaris a good choice for beginners? I’d say it’s more of an intermediate challenge, but with a little guidance, absolutely anyone can master it! The joy of multiplying these unique plants is well worth the effort.
The Best Time to Start
For the most enthusiastic growth and the highest chance of success, spring or early summer is your golden ticket. This is when Utricularia stellaris is typically in its most vigorous growth phase. You’ll see lots of new shoots and healthy foliage, which means plenty of material to work with. Avoid propagating when the plant seems dormant or stressed.
Supplies You’ll Need
Here’s what you’ll want to have on hand:
- Sharp, clean pruning shears or scissors: For making clean cuts.
- Clean containers or jars: For water propagation.
- Nutrient-poor substrate: For divisions, think sphagnum moss, peat moss, or a mix specifically for carnivorous plants.
- Distilled or rainwater: Essential for Utricularia, as they are sensitive to minerals.
- Small, shallow trays or pots: If you’re going the substrate route.
- (Optional) Rooting hormone: For an extra boost, though often not strictly necessary for Utricularia.
Propagation Methods
Let’s get down to the nitty-gritty on how to create more of these beauties!
Stem Cuttings
This is my go-to method, and it’s incredibly effective.
- Select healthy shoots: Look for pieces of the plant that are at least 2-4 inches long and have several sets of leaves (or tiny leaf-like structures). They should be vibrant green and look robust.
- Make a clean cut: Using your sharp shears, cut the stem just below a node (where the leaves emerge).
- Prepare the cutting: Gently remove any leaves or traps from the bottom inch of the cutting. This prevents them from rotting in the water.
- Place in fresh water: Put the prepared cutting into a clean jar or container filled with distilled or rainwater. Make sure the water level is high enough to cover the node you just cleared.
Water Propagation
This is practically synonymous with stem cuttings for Utricularia, as they thrive in water.
- Follow the steps for stem cuttings above.
- Keep the water clean: Change the water every few days, or whenever it starts to look cloudy. This is crucial for preventing bacterial growth.
- Provide ample light: Place the container in a bright spot, but avoid direct, scorching sunlight. Bright, indirect light is perfect.
Division
If your Utricularia stellaris has grown into a dense clump, division is a fantastic way to get new plants.
- Gently remove from water: Carefully take the entire plant out of its aquatic environment.
- Separate the clumps: You’ll often see natural divisions within the plant. Gently tease apart the larger clumps into smaller sections. Try to ensure each section has some healthy-looking growth.
- Plant in substrate: Pot each division into a small container filled with a nutrient-poor, moist substrate like long-fibered sphagnum moss or a carnivorous plant mix. Don’t pack it too tightly.
- Keep moist: Place the potted divisions in a shallow tray filled with about an inch of distilled or rainwater.
The “Secret Sauce” (Pro Tips)
Here are a few things I’ve learned that can really make a difference:
- Don’t let the leaves touch the water. Especially for stem cuttings, any submerged foliage is a prime spot for rot. Ensure your cuttings are trimmed so only the stem is in the water.
- Think “warmth and light, but not heat.” While these plants love bright conditions, direct sun can cook them. However, a little consistent bottom heat from a heat mat (especially if your room is on the cooler side) can significantly speed up root development. Just don’t overdo it!
- Patience is your best friend. Utricularia can be surprisingly slow to show visible signs of rooting, especially from cuttings. Don’t be tempted to keep digging them up to check. Trust the process!
Aftercare & Troubleshooting
Once you see little white nubs or new, tiny leaves emerging from your cuttings or divisions, you’re on the right track!
- Continue with distilled/rainwater: Keep misting or maintaining the water level with your preferred pure water.
- Bright, indirect light: Maintain those optimal lighting conditions.
- Gradual acclimation: If you planted divisions in substrate, you can slowly begin to introduce them to more traditional aquatic setups once they look well-established.
The most common issue you’ll encounter is rot, often caused by stagnant water, too much decaying organic matter (submerged leaves), or insufficient light. If a cutting or division starts to turn brown and mushy, it’s often a sign of rot. Sometimes, a clean cut and fresh water can save it, but other times, it’s best to discard the affected part to prevent it from spreading.
A Little Encouragement
Growing plants is a journey, and propagating your Utricularia stellaris is a wonderful way to deepen your connection with these intricate plants. Be patient, observe closely, and don’t be discouraged if your first few attempts aren’t perfect. The satisfaction of seeing a tiny cutting flourish into a new plant is truly special. Happy propagating!
Resource:
https://identify.plantnet.org/k-world-flora/species/Utricularia%20stellaris%20L.f./data