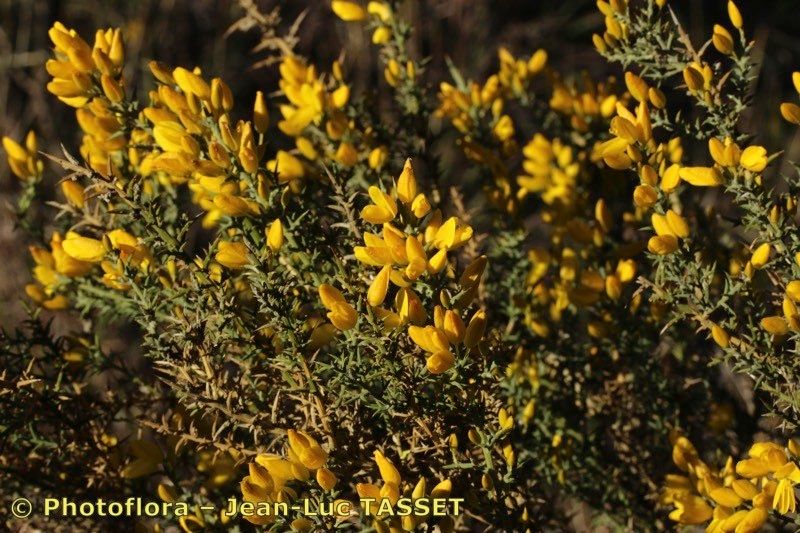
Oh, hello there! Come on in and pull up a chair. I’m so glad you’re curious about propagating Ulex australis, also known as the Australian Coastal Gorse. It’s a truly magnificent plant, isn’t it? Those vibrant yellow blooms can really brighten up a corner of the garden, and the way it thrives in coastal conditions is just inspiring. Plus, there’s a special kind of joy in taking a piece of your beloved plant and nurturing it into something new. It feels like magic, really. Now, for beginners, I’d say Ulex australis is moderately challenging. It’s not a “stick it in the ground and forget it” kind of propagation, but with a little care and attention, you absolutely can be successful.
The Best Time to Start
Timing is everything in gardening, and that’s especially true with propagation. For Ulex australis, I find the late spring to early summer is your best bet. You want to be working with semi-hardwood cuttings. These are stems that have started to mature after the initial flush of spring growth but haven’t become completely woody yet. They have that perfect balance of flexibility and structure, which is ideal for rooting. Trying to take cuttings too early in the spring, when they’re still soft and sappy, often leads to disappointment.
Supplies You’ll Need
Before we get our hands dirty, let’s gather our tools. Having everything ready makes the whole process smoother.
- Sharp Pruning Shears or a Clean Knife: You need a clean cut for the best chance of rooting.
- Rooting Hormone Powder or Gel: This isn’t strictly mandatory for some plants, but it really gives Ulex australis a helping hand.
- Small Pots or Seedling Trays: Make sure they have drainage holes!
- Well-Draining Potting Mix: I like to use a mix of equal parts peat moss, perlite, and coarse sand. You can also buy a good quality seedling mix and amend it with extra perlite.
- A Plastic Bag or Clear Propagator Lid: This will create a humid microclimate.
- Watering Can with a Fine Rose: Gentle watering is key.
- Labels and a Pen: Don’t forget to label your cuttings! You’ll thank me later.
Propagation Methods
There are a couple of ways to go about this, but for Ulex australis, stem cuttings are generally the most reliable.
Stem Cuttings
- Select Your Cuttings: Head out to your mature Ulex australis plants in late spring or early summer. Look for healthy, non-flowering shoots that are about the thickness of a pencil. You want to take cuttings that are roughly 4-6 inches long.
- Make the Cut: Using your sterilized pruning shears or knife, make a clean cut just below a leaf node (the point where a leaf joins the stem). This is a particularly active area for root formation.
- Prepare the Cuttings: Gently remove the leaves from the bottom half of each cutting. You want to expose those stem nodes so they can initiate rooting. If any of the remaining leaves are very large, you can cut them in half horizontally to reduce water loss. This is important because the cutting doesn’t have roots to supply moisture yet.
- Dip in Rooting Hormone: Now, this is where that rooting hormone comes in handy. Dip the bottom inch of each prepared cutting into the rooting hormone powder or gel. Tap off any excess.
- Pot Them Up: Fill your small pots or seedling trays with your well-draining potting mix. Make a hole in the center of the soil with a pencil or your finger.
- Insert the Cuttings: Gently place the bottom of each cutting into the hole, making sure the nodes are covered by the soil. Firm the soil gently around the stem to ensure good contact.
- Water Gently: Water the pots thoroughly until you see water draining from the bottom. This helps settle the soil.
- Create Humidity: The key to success here is humidity. You can place the pots inside a clear plastic propagator or cover them loosely with a clear plastic bag, making sure the plastic doesn’t touch the leaves. This traps moisture.
- Find a Bright Spot: Place your pots in a location that receives bright, indirect light. Avoid direct sun, as this can scorch the delicate cuttings. A greenhouse or a bright windowsill is perfect.
The “Secret Sauce” (Pro Tips)
After years of coaxing plants, you pick up a few tricks. Here are a couple that really work wonders for Ulex australis cuttings:
- Bottom Heat is Your Friend: While not absolutely essential, applying gentle bottom heat from a propagator mat can significantly speed up the rooting process. It mimics the warmth you’d find in soil during the growing season and encourages root development. Aim for a consistent temperature of around 70-75°F (21-24°C).
- Don’t Disturb Too Soon: Resist the urge to tug on your cuttings to see if they have roots! This can break delicate new growths. Wait at least 6-8 weeks. You’ll usually see new leaf growth as a sign of successful rooting. If you’re really antsy, you can carefully lift one cutting to check, but do so very gently.
Aftercare & Troubleshooting
Once you start seeing little roots forming (or new growth appearing), it’s time to transition them.
- Acclimatize: Gradually begin to remove the plastic cover over a week or two. You want the new plants to get used to the normal humidity of your home or greenhouse.
- Watering: Keep the soil consistently moist but not waterlogged. Overwatering is one of the most common culprits for failure. Let the top inch of soil dry out slightly between waterings.
- Potting Up: Once the roots have filled the pot and you see good, healthy top growth, you can carefully transplant them into larger pots. Use a compost that’s not too rich, similar to your rooting mix.
- Common Signs of Failure: The most common issue is rot. If your cuttings turn black and mushy, or develop a fuzzy mold, it’s usually a sign of too much moisture and not enough air circulation. Damping-off is another problem, where the base of the stem collapses. Ensuring good drainage and not overcrowding your cuttings can help prevent this. If they just seem to be wilting and not rooting after a long time, they may have simply failed to establish. Don’t take it personally!
A Bit of Encouragement
Propagating plants is a journey, and it’s one filled with learning and discovery. Not every cutting will make it, and that’s perfectly okay. Each attempt is a lesson learned for the next. Be patient with your little Ulex australis starts. Give them time, a bit of warmth and light, and the right amount of moisture, and you’ll soon be rewarded with beautiful new plants to share. Enjoy the process, and happy growing!
Resource:
https://identify.plantnet.org/k-world-flora/species/Ulex%20australis%20Clemente/data