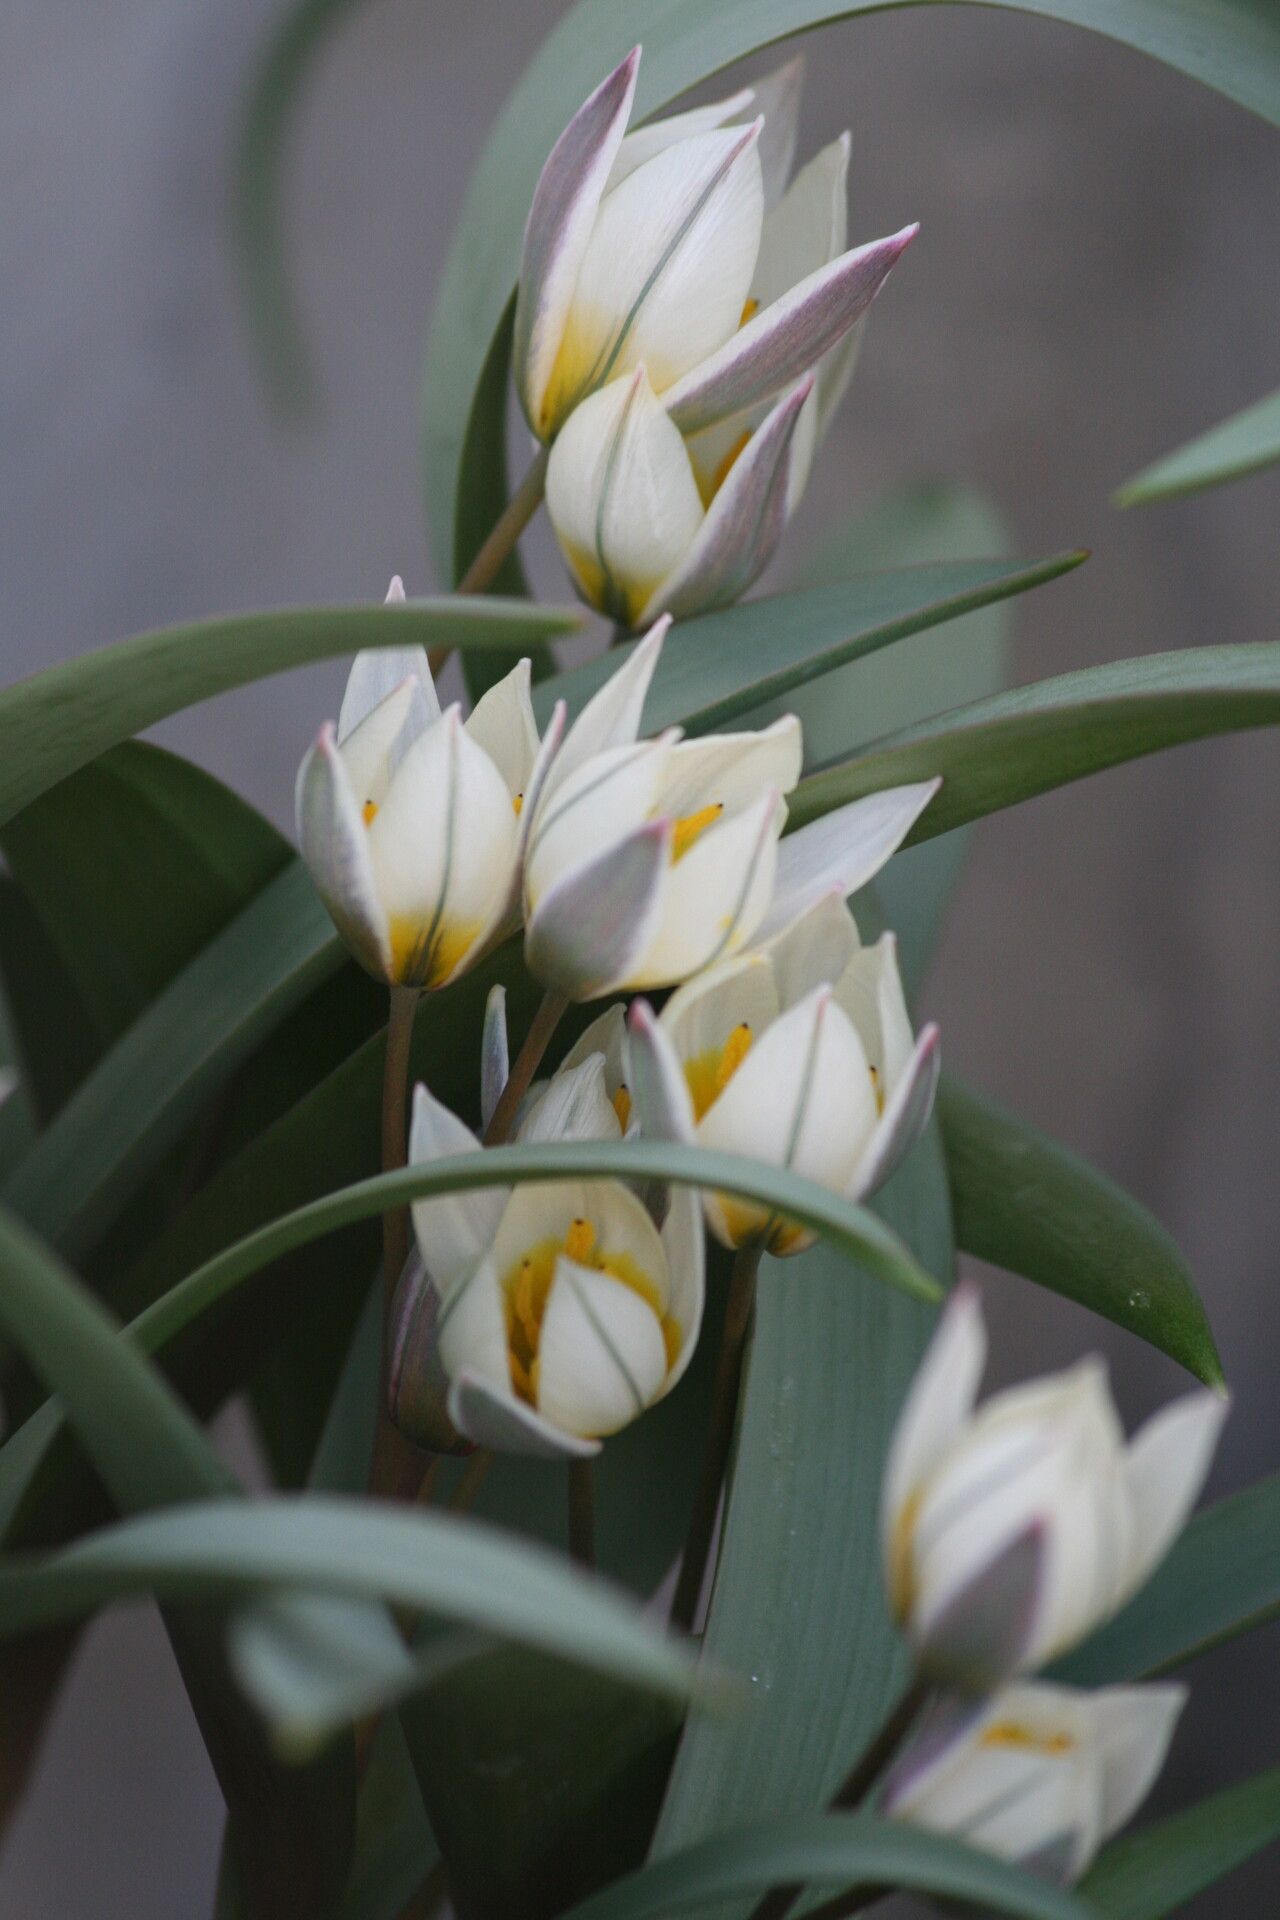
Hello, fellow plant lovers! Today, I want to chat about one of my absolute favorites: Tulipa orithyioides. This charming little tulip, with its delicate blooms and often a wonderfully unique color palette, is a real treasure in the garden. Growing more of them feels like sharing a bit of joy with yourself, wouldn’t you agree? Propagation can seem a bit daunting at first, but with Tulipa orithyioides, I find it to be a wonderfully rewarding adventure, and quite accessible even for those just starting their gardening journey.
The Best Time to Start
For our precious Tulipa orithyioides, the absolute sweet spot for propagation is after the plant has finished flowering and the foliage begins to yellow and die back. This typically happens in late spring or early summer. This is when the plant is storing energy in its bulbs and any daughter bulbs are already well-formed and strong enough to be separated. Trying to propagate too early, while the leaves are still green and actively photosynthesizing, can stress the parent plant and reduce its future blooming power.
Supplies You’ll Need
Gathering your supplies upfront makes the whole process so much smoother. Here’s what I always have on hand:
- A sharp, clean knife or small trowel: For carefully separating bulbs.
- Diluted fungicide (optional but recommended): To help prevent rot.
- A well-draining potting mix: Avoid anything too heavy. A good blend for bulbs or a mix of peat, perlite, and sand works beautifully.
- Small pots or trays: Clean and with drainage holes, of course!
- A gentle watering can or spray bottle: For delicate new roots.
- Labels and a marker: To keep track of your treasures.
- A shady, protected spot: For newly potted bulbs to establish.
Propagation Methods: Division is Key!
Tulipa orithyioides, like many tulips, is best propagated through division of its bulbs. This is the most straightforward and successful method for this particular plant.
- Wait for the Right Stage: As I mentioned, the key is to wait until the foliage of the parent plant has naturally died back. Gently tug on the leaves; if they come away easily, the bulb is ready to be unearthed.
- Carefully Excavate: Using your trowel or knife, carefully dig around the base of the plant. You want to unearth the main bulb and any smaller bulbs, often called “offsets” or “daughter bulbs,” that have formed alongside it. Be gentle! These can be delicate.
- Separate Gently: Once the clump of bulbs is out, you’ll see the main bulb and the smaller ones attached. Gently tease them apart with your fingers or use your clean knife to separate them. If you find a very tiny offset, you can plant it, but it may take a few seasons to reach flowering size.
- Inspect and Treat (Optional): Take a moment to look at the bulbs. If you see any soft spots or signs of disease, you can dip them in a diluted fungicide solution for a few minutes to help prevent issues later on. Allow them to air dry for a few hours before planting.
- Planting Time: Fill your clean pots with your well-draining potting mix. Plant each separated bulb at a depth of about 2-3 times its height, with the pointed end facing upwards. Space them adequately so they have room to grow.
- Water and Shade: Water them in gently. Then, place the pots in a cool, shady location with good air circulation. Avoid direct sunlight, which can overheat the bulbs.
The “Secret Sauce” (Pro Tips)
Here are a few little tricks I’ve learned over the years that can really give you an edge:
- The “Rest” Period is Crucial: Don’t be tempted to plant them immediately after separating. Allowing the newly separated bulbs to **dry and rest for a few days to a week** can actually help prevent rot. It allows any minor nicks or cuts to heal over.
- Think About Airflow: When planting your bulbs in pots, ensure there’s good air circulation around them. Overcrowding can lead to fungal issues. If you’re planting many in a tray, give them a little breathing room.
- Avoid Overwatering Early On: Newly planted bulbs don’t need to be waterlogged. Keep the soil consistently moist but not soggy. It’s better to err on the side of slightly drier than too wet, especially in the initial rooting phase.
Aftercare & Troubleshooting
Once your new bulbs are planted, be patient! They’re busy establishing roots. Keep the soil lightly moist. You’ll know they’re happy when you start to see new green shoots emerging from the soil, usually in the fall or early spring depending on your climate.
The most common issue you might encounter is rot. This is usually due to excessive moisture and poor drainage. If you notice a bulb turning mushy and black, it’s best to discard it to prevent it from affecting other bulbs. Ensure your potting mix is free-draining and you’re not overwatering. Another sign of trouble can be a lack of growth after a significant period, which might indicate the bulb wasn’t viable or didn’t have enough stored energy.
Happy Growing!
Propagating Tulipa orithyioides is such a joy. It’s a wonderful way to expand your collection and share their beauty. Remember to be patient, enjoy the process, and celebrate each tiny green shoot that emerges. Happy gardening!
Resource:
https://identify.plantnet.org/k-world-flora/species/Tulipa%20orithyioides%20Vved./data