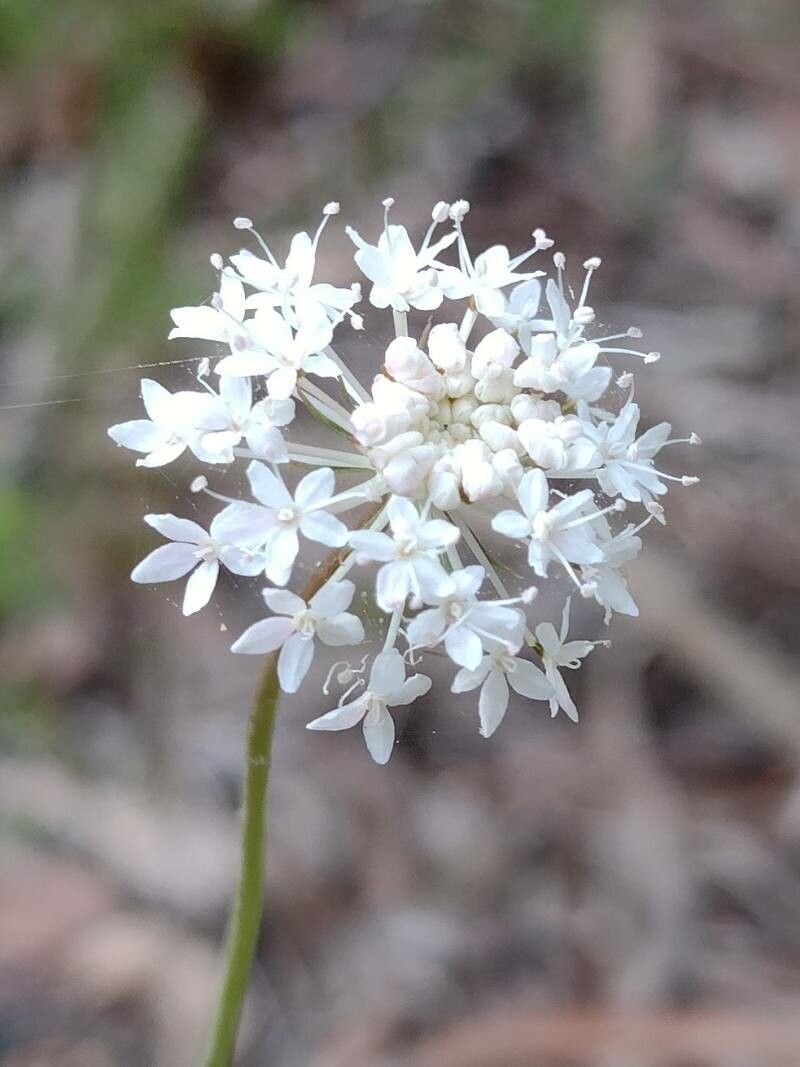
Hello there, fellow garden enthusiasts! Today, I want to share a little something special with you – how to bring more of that cheerful Trachymene incisa into your life. You know, those lovely plants with their delicate, star-shaped blooms? They just have a way of brightening up any corner, whether they’re tucked into a border or gracing a pot on your patio.
For me, propagating them is a pure joy. It’s like unlocking a secret to having an endless supply of these beauties. And the best part? I find Trachymene incisa to be quite forgiving, making it a wonderful plant for beginners to try their hand at propagation. Don’t be intimidated; we’ll go through it together!
The Best Time to Start
Hands down, the most successful time to propagate Trachymene incisa is during its active growing season. Think late spring to mid-summer. This is when the plant has the most energy to put into developing new roots. You’ll want to take cuttings from healthy, non-flowering stems if possible. If you’re looking at dividing plants, doing it in early spring, just as new growth is emerging, is ideal.
Supplies You’ll Need
Gathering your tools beforehand makes the whole process smoother. Here’s what I usually have on hand:
- Sharp Pruning Shears or a Craft Knife: Clean cuts are crucial for preventing disease.
- Potting Mix: A well-draining mix is key. I like to use a blend of peat moss, perlite, and a little bit of compost, or a good quality seed-starting mix.
- Small Pots or Seed Trays: Clean ones, of course!
- Rooting Hormone (Optional but Recommended): This helps give your cuttings a little boost. Gel formulas are usually easy to work with.
- Plastic Bags or a Propagation Dome: To keep humidity high.
- Watering Can with a Fine Rose: For gentle watering.
- Labels: To remember what you’ve propagated and when!
Propagation Methods
Now, let’s get our hands dirty! Trachymene incisa is quite responsive to a couple of methods.
Stem Cuttings
This is my go-to for increasing my Trachymene numbers.
- Select Your Cutting: Look for healthy, firm stems on your parent plant. You want to take a section that’s about 4-6 inches long. Make your cut just below a leaf node (where a leaf attaches to the stem). This is where the magic of rooting often happens!
- Prepare the Cutting: Gently remove the lower leaves from your cutting, leaving just the top couple of leaves. If the leaves are quite large, you can even cut them in half to reduce water loss through transpiration.
- Apply Rooting Hormone (if using): Dip the cut end of the stem into your rooting hormone powder or gel, tapping off any excess.
- Plant Your Cuttings: Fill your small pots with your prepared potting mix. Make a small hole with your finger or a pencil. Insert the cut end of the stem into the hole, ensuring the nodes where you removed the leaves are buried underground. Gently firm the soil around the stem.
- Water Gently: Give them a good, gentle watering. You want the soil to be moist but not waterlogged.
- Create a Humid Environment: Place a clear plastic bag over the pot, or cover your seed tray with a propagation dome. This will trap moisture and create a mini-greenhouse effect. You can also prop up the bag with sticks to keep it from touching the leaves.
Water Propagation
This method is visually satisfying and can be a fun way to see the roots develop.
- Take Your Cutting: Just as you would for stem cuttings, take a 4-6 inch cutting from a healthy stem, making your cut below a leaf node. Remove the lower leaves.
- Place in Water: Fill a clean jar or vase with fresh water. Place your cutting in the water, making sure no leaves are submerged. Leaves in the water will rot and can quickly kill your cutting.
- Find a Suitable Spot: Place the jar in a bright location, but out of direct, scorching sunlight.
- Change the Water Regularly: Change the water every few days to keep it fresh and prevent stagnation.
The “Secret Sauce”
Here are a few tricks I’ve learned over the years that can really boost your success:
- Bottom Heat is Your Friend: If you’re struggling with stem cuttings, consider placing your pots on a heated propagation mat. This gentle warmth encourages root formation from below, especially if your ambient room temperature is a bit cooler.
- Don’t Be Afraid to Prune: Sometimes, I’ll take cuttings from stems that are already starting to look a bit leggy. The act of taking the cutting can actually encourage the parent plant to become bushier!
- Patience with Water Cuttings: With water propagation, you often see roots appear quite quickly. But don’t rush to pot them up. Wait until those roots are at least an inch long and have started to branch out a bit. This gives them a stronger start in soil.
Aftercare & Troubleshooting
Once your cuttings have a good set of roots (this can take anywhere from a few weeks to a couple of months), it’s time for them to move into their own pots, or for the divisions to settle.
- Potting Up: For stem cuttings that have rooted, carefully transplant them into pots filled with your well-draining potting mix. Water them in gently. For water-propagated plants, treat them much like you would a small seedling.
- Gradual Acclimation: If your cuttings were under a dome or bag, gradually increase the ventilation over a few days before removing it completely. This helps them adjust to drier air.
- Watering: Water when the top inch of soil feels dry. Avoid overwatering, as this is the quickest way to invite root rot, which is often signaled by wilting leaves, yellowing foliage, and a mushy stem base.
- Signs of Success: Look for new leaf growth. This is the surest sign that your cutting has successfully rooted. You might also notice the cutting looking perkier and more robust.
A Little Bit of Patience Goes a Long Way
Remember, gardening is a journey, and propagation is a rewarding part of it. Not every cutting will take, and that’s perfectly okay. Learn from each attempt, enjoy the process of nurturing these new little plants, and soon you’ll have a delightful abundance of Trachymene incisa to share and enjoy. Happy propagating!
Resource:
https://identify.plantnet.org/k-world-flora/species/Trachymene%20incisa%20Rudge/data