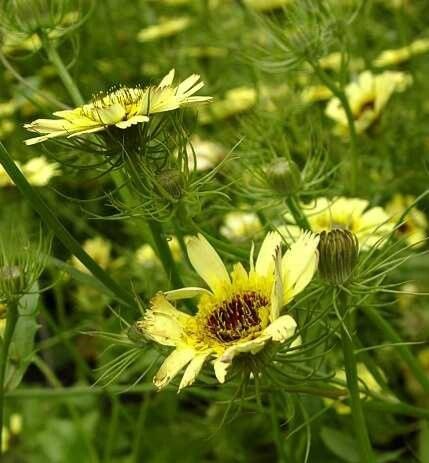
Hello there, fellow plant enthusiasts! If you’ve ever admired the cheerful, daisy-like blooms of Tolpis barbata – often called “Yellow” or “Sweet Candytuft” – and thought, “I wish I had more of those!” then you’re in the right place. This delightful Mediterranean native brings such a sunny disposition to any garden with its bright yellow flowers, and multiplying it yourself is wonderfully rewarding. The good news? Propagating Tolpis barbata isn’t overly complicated, making it a lovely project for beginners and seasoned gardeners alike.
The Best Time to Start
For the highest success rate, late spring to early summer is generally your golden window. This is when the plant is actively growing, full of life, and has plenty of healthy stems to work with. You’re looking for new, non-woody growth – think of it as the plant’s energetic teenager phase.
Supplies You’ll Need
To get your propagation station ready, gather these essentials:
- Sharp pruning shears or a clean craft knife: For taking clean cuts.
- Rooting hormone (optional but helpful): A powder or gel to encourage root development.
- Potting mix: A light, well-draining mix is crucial. I like a blend of peat moss or coco coir with perlite or coarse sand. About a 50/50 ratio works wonders.
- Small pots or seed trays: Clean and with drainage holes.
- Plastic bags or a propagator lid: To create a humid environment.
- Watering can or spray bottle: For gentle watering.
Propagation Methods
Let’s get our hands dirty! The most straightforward way to multiply Tolpis barbata is through stem cuttings.
- Take Your Cuttings: Head out to your Tolpis barbata plant on a mild morning. Look for healthy, non-flowering stems. Using your clean shears or knife, make a cut just below a leaf node (where a leaf joins the stem). You want cuttings that are about 4-6 inches long. Remove the lower leaves, leaving just a few at the top.
- Prepare for Rooting: If you’re using rooting hormone, dip the cut end of the stem into the powder or gel. Gently tap off any excess.
- Pot Them Up: Fill your small pots with your chosen well-draining potting mix. Make a small hole in the center of the soil with your finger or a pencil.
- Plant Your Cuttings: Insert the cut end of each stem cutting into the pre-made hole, ensuring the soil makes good contact. Gently firm the soil around the base.
- Create a Humid Environment: Water the soil gently. Then, cover the pot with a clear plastic bag (use stakes to keep the bag from touching the leaves) or place it inside a propagator. This humidity is key to preventing the cuttings from drying out before they can root.
- Find a Good Spot: Place your pots in a bright location with indirect sunlight. Avoid harsh, direct sun, as this can scorch the delicate cuttings.
The “Secret Sauce”
Now, for a few little nuggets of wisdom that truly make a difference:
- Don’t let the leaves touch the water: If you opt for water propagation (which can work for Tolpis barbata but is a bit trickier for success), make sure only the cut stem is submerged. Any leaves in the water will quickly rot, taking your cutting down with them.
- Bottom heat is your friend: If you have a heated propagator or can place your pots on a gentle heat mat, this can significantly speed up root formation. It mimics the warmth of spring soil and gives your cuttings a real boost.
- Patience with the ‘mother’ plant: After you’ve taken cuttings, you might be tempted to deadhead or prune aggressively. Resist the urge! Let the parent plant recover and conserve its energy.
Aftercare & Troubleshooting
Once your cuttings have been in their humid haven for a few weeks, gently tug on a leaf. If there’s resistance, it means roots have formed! You can also look for new leaf growth at the top of the stem.
Once you see good root development, it’s time to gradually introduce them to less humid air. You can do this by slowly opening the plastic bag a little each day. Once they are fully acclimatized, you can transplant them into slightly larger pots.
The most common issue you might encounter is rot. This usually happens if the soil is too wet or the humidity is too high for too long without any air circulation. If you see stems browning or turning mushy, sadly, that cutting is likely lost. Prevention is key: ensure excellent drainage and provide ventilation if using a propagator.
A Warm Garden Welcome
Propagating Tolpis barbata is such a wonderful way to fill your garden with these sunny delights. Don’t get discouraged if your first few attempts don’t yield perfect results. Gardening is a journey of learning, and each cutting teaches you something new. Be patient, enjoy the process, and soon you’ll be sharing these cheerful blooms with friends! Happy gardening!
Resource:
https://identify.plantnet.org/k-world-flora/species/Tolpis%20barbata%20(L.)%20Gaertn./data