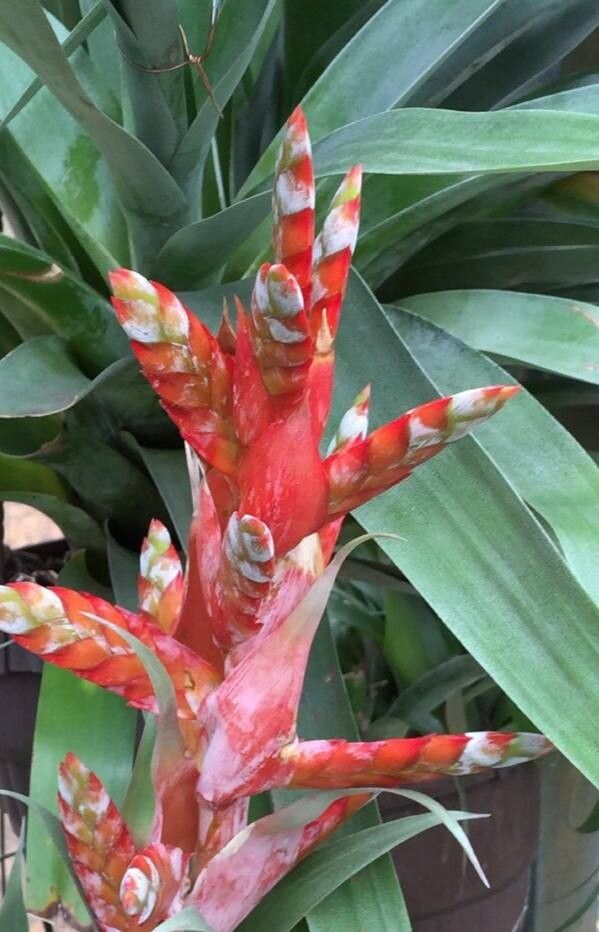
Hello, fellow plant lovers! It’s so wonderful to have you join me today. We’re going to talk about a plant that truly captures the imagination – Tillandsia confinis. If you haven’t had the pleasure yet, imagine a plant that seems to defy gravity, its silvery leaves reaching out as if to embrace the air itself. They’re just magnificent, aren’t they? Propagating them is such a rewarding journey. You get to witness new life emerge from an existing beauty, and trust me, it’s a feeling that never gets old. Now, for beginners, Tillandsia confinis can be a little bit of a learning curve, but don’t let that deter you! With a little patience and the right guidance, you’ll be amazed at what you can achieve.
The Best Time to Start
When it comes to coaxing new life from our air plants, spring and early summer are your golden windows of opportunity. This is when the plant is naturally geared up for growth after a winter’s rest. You’ll see new pups or offsets emerging, and that’s your cue. Essentially, you’re looking for signs of active growth. If your plant is looking plump, healthy, and has a little baby sprout at its base, you’re in prime propagation territory!
Supplies You’ll Need
Don’t worry, you won’t need a whole workshop for this! Here’s what I’ve found to be most helpful:
- A clean, sharp knife or sterile pruning shears: Precision is key, so make sure your tool is sharp and won’t crush delicate tissues.
- Small pots or trays: For housing your new propagations if you’re using media.
- A well-draining potting mix: I lean towards a mix of coir, perlite, and a bit of orchid bark. The goal is excellent aeration!
- Watering can or mister: For gentle hydration.
- Optional: Rooting hormone: While not strictly necessary for Tillandsia, some people find it gives an extra boost.
Propagation Methods
For Tillandsia confinis, the most common and successful method is division of offsets (pups). These charming little babies grow from the base of the mother plant.
- Assess your plant: Gently examine your Tillandsia confinis. Look for pups that have started to form their own tiny leaves and are at least a third of the size of the mother plant. They should also have developed their own root structure, even if it’s just small nubs.
- Carefully separate: This is the crucial step. Using your clean, sharp knife or pruning shears, gently cut or pry the pup away from the mother plant. Try to make a clean cut as close to the base of the pup as possible, ensuring it has some of its own root system attached. Patience here is your best friend. Don’t yank!
- Allow to callous (optional but recommended): After separation, I like to let the cut end of the pup dry and callous over for a day or two in a bright, airy spot. This helps prevent rot when it’s introduced to its new environment.
- Potting up: You can either repot your pup into a small container filled with your well-draining mix, burying the base slightly, or you can mount it onto a piece of bark or driftwood, much like you would an adult air plant. For beginners, potting is often a bit more forgiving.
- Watering: Water sparingly at first. Mist the pup lightly every few days, ensuring the potting medium dries out between waterings. If you’ve mounted it, a gentle soak once a week is usually sufficient.
The “Secret Sauce” (Pro Tips)
Now for a couple of little insights from my years of green-thumb adventures:
- Think humidity, not drowning: While Tillandsias are epiphytes, meaning they grow in air, when you’re propagating, they need a little something to encourage root formation. However, this doesn’t mean soaking them constantly. Overwatering is the fastest way to a soggy, sad end for any new propagation. Aim for good ambient humidity and light misting.
- Give them a gentle warm hug: Many tropical plants, including our Tillandsias, thrive with a bit of bottom heat during propagation. A seedling heat mat placed underneath your pots or propagation trays can significantly speed up root development. It mimics the conditions they’d find on a warm forest floor.
Aftercare & Troubleshooting
Once you see signs of new root growth – you might see it peeking out of the potting mix or anchoring itself to your mounting material – you’re on the right track! Continue with your gentle watering routine. Gradually increase humidity and watering frequency as the plant grows larger and more established.
The most common pitfall is rot. Yellowing, mushy leaves, especially at the base of the plant, are a clear sign of too much moisture and poor air circulation. If you spot this, immediately remove the affected parts with your sterile knife and allow the plant to dry out completely in a well-ventilated area. If rot is extensive, sadly, the propagation might not recover. Another sign of distress is wilting or browning leaf tips, which can indicate dryness or insufficient light.
A Encouraging Closing
Propagating Tillandsia confinis is a journey of patience and observation. Don’t get discouraged if your first attempt isn’t a roaring success. Every gardener has learned through trial and error! Celebrate the small victories – the tiny roots, the emergence of a new leaf. Enjoy the process, and soon you’ll be sharing these beautiful air plants with friends and family. Happy growing!
Resource:
https://identify.plantnet.org/k-world-flora/species/Tillandsia%20confinis%20L.B.Sm./data