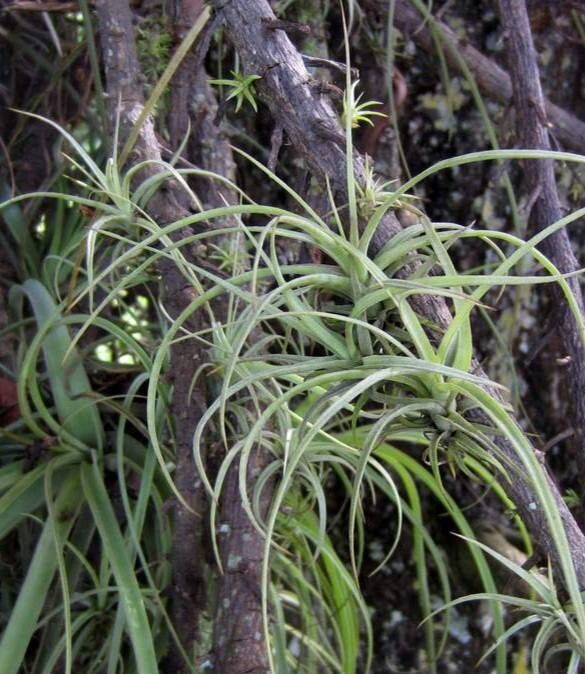
Hey there, fellow plant lover! Let’s chat about a wonderfully elegant air plant: Tillandsia balbisiana. If you’ve ever admired its long, thin, tentacle-like leaves that seem to dance in the breeze, you’re not alone. These beauties bring a touch of jungle sophistication to any space.
Propagating Tillandsia balbisiana is such a rewarding endeavor. It’s like being able to multiply that charm and share it with friends, or simply fill your own home with more of these fascinating specimens. For beginners, I’d say Tillandsia balbisiana is moderately easy to propagate once you get the hang of it. It doesn’t require a super-green thumb, just a little bit of patience and understanding of its needs.
The Best Time to Start
The prime time to think about propagating Tillandsia balbisiana is when the plant is actively growing. For most air plants, this means during the spring and summer months. You’ll know it’s a good time if your plant is looking robust, healthy, and perhaps even showing signs of producing offsets (those little baby plants that sprout from the base). Trying to propagate during its dormant period in cooler months just won’t yield the same enthusiastic results.
Supplies You’ll Need
Here’s what you’ll want to have on hand before you get started:
- Sharp, clean pruning shears or a sterile knife: We need precise cuts.
- A healthy, mature Tillandsia balbisiana plant: This is your mama!
- A small spray bottle: For misting.
- A shallow dish or tray: To sit your propagations in.
- Optional: A rooting hormone powder (for stem cuttings): This can give a little boost, though not always strictly necessary for air plants.
- No soil needed! Remember, these are air plants.
Propagation Methods
While Tillandsia balbisiana can sometimes produce pups, the most reliable way to get more plants from a mature specimen is by taking offsets. These are the baby plants that emerge from the base of the mother plant.
Propagating Offsets (Pups):
- Inspect your mother plant: Look for new growths emerging from the base. These are your “pups.” They should be at least one-third to half the size of the mother plant before you consider separating them. This ensures they have enough energy reserves to thrive on their own.
- Gently pull apart: Sometimes, pups will naturally separate from the mother plant with a gentle tug. If it feels like it’s still quite attached, don’t force it.
- Make a clean cut: If they don’t pull apart easily, use your sharp, clean pruning shears or sterile knife to carefully cut the pup away from the mother plant, trying to get as much of its base as possible, including any tiny roots it might have. Make the cut as close to the mother plant’s base as you can without damaging it.
- Let them callous: This is a crucial step! Place the separated pup in a dry, well-ventilated spot for 24-48 hours. This allows the cut end to dry out and form a protective callus, which helps prevent rot.
- Rooting: Once calloused, you can place the offset on a shallow dish or tray, or mount it. They don’t need to be buried in anything. They will start to root from the base.
The “Secret Sauce” (Pro Tips)
Here are a few things I’ve learned over the years that really make a difference:
- Don’t rush the separation: Seriously, let those pups grow a good size. A bigger pup has more stored energy, making it far more likely to establish successfully. Patience is truly a virtue here.
- Humidity, not submersion: While you might think water propagation is a good idea, for Tillandsia balbisiana, it’s usually best to avoid direct, prolonged water contact on the cut end once it’s calloused. Instead, focus on high humidity. Mist the new plant lightly, and place it in a tray with pebbles and water (making sure the plant itself isn’t sitting in the water). This encourages rooting without the risk of rot.
- A little bit of air circulation is key: Think of how these plants grow in nature – they’re usually in breezy environments. So, when you’re letting your pups callous or setting them up to root, ensure there’s good airflow around them. This helps prevent fungal issues.
Aftercare & Troubleshooting
Once your offset has developed roots (you’ll see them emerging from the base!), you can start treating it like a miniature version of the mother plant.
- Watering: Continue to mist regularly, perhaps every other day, and soak it about once a week for 20-30 minutes. Always shake out excess water thoroughly afterwards.
- Light: Place it in bright, indirect light. Avoid direct sun, which can scorch its delicate leaves.
- Fertilizing: You can start feeding it with a bromeliad or air plant fertilizer diluted to quarter strength every 2-3 waterings, once it looks established.
The most common issue you might encounter is rot. If you see the base of your new plant turning mushy or black, it’s likely rot. This usually happens from too much moisture and not enough air circulation. If you catch it early, you might be able to cut away the rotten parts and let it callous again, but sometimes it’s too far gone. Proper callousing and excellent air circulation are your best defenses against this.
So, there you have it! It’s a journey, really, watching these little lives emerge. Don’t be discouraged if your first attempt isn’t a spectacular success. Each plant is an individual, and sometimes they just need a little extra time. Embrace the process, enjoy the learning curve, and soon you’ll have a whole family of elegant Tillandsia balbisiana gracing your home. Happy propagating!
Resource: