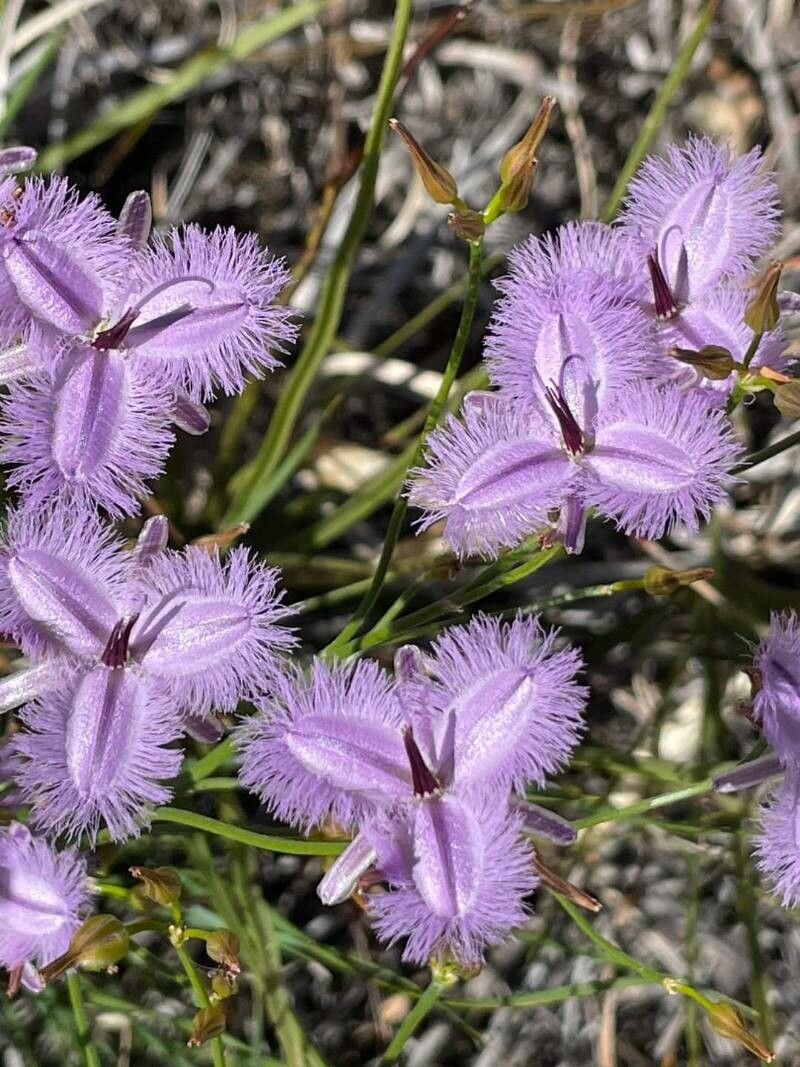
Well hello there, fellow plant enthusiasts! I’m so excited to chat with you today about a truly enchanting plant: Thysanotus dichotomus, sometimes called Fringed Lily. If you’ve ever seen these delicate, almost ethereal flowers with their beautifully fringed petals, I’m sure you’ve fallen head over heels, just like I did all those years ago. Propagating them is such a joy, a way to multiply that magic and share it with others, or simply to fill your own garden with more of their charm. Now, if you’re wondering if this is a beginner-friendly plant to propagate, I’d say it’s a tad more rewarding for those with a little experience under their belt. But don’t let that deter you! With a bit of patience and my tried-and-true methods, you’ll be well on your way.
The Best Time to Start
For Thysanotus dichotomus, the absolute sweet spot for propagation is during its active growing season. This usually means late spring through summer. You’re looking for healthy, vigorous growth. Avoid trying to propagate from plants that are stressed, flowering heavily, or looking a bit tired. A plant that’s got loads of energy is much more likely to put that energy into making roots!
Supplies You’ll Need
To get started on your Thysanotus dichotomus propagation journey, gather these essentials:
- Sharp, clean pruning shears or a sharp knife: For making clean cuts that heal faster.
- A well-draining potting mix: I like a blend of equal parts peat moss, perlite, and coarse sand. This ensures good aeration and prevents waterlogging. You can also find specialized cactus and succulent mixes that work well.
- Small pots or trays: Clean ones, please! Small terracotta pots are fantastic as they allow the soil to breathe.
- Rooting hormone (optional but recommended): This can significantly speed up the rooting process. Look for one that contains IBA.
- A watering can with a fine rose or a spray bottle: For gentle watering.
- Labels and a marker: To keep track of what you’ve propagated and when!
- Plastic bags or a propagator: To create a humid environment.
Propagation Methods
Thysanotus dichotomus is most commonly and successfully propagated from stem cuttings. Let’s get these little beauties started!
Stem Cuttings:
- Select Your Cutting: Find a healthy, non-flowering stem. Look for a section that has at least two or three sets of leaves.
- Make the Cut: Using your sharp shears or knife, make a clean cut just below a leaf node (the point where a leaf attaches to the stem). Aim for cuttings that are roughly 4-6 inches long.
- Prepare the Cutting: Gently remove the lower leaves from the cutting, leaving just the top set or two. This reduces moisture loss and prevents them from rotting in the soil.
- Apply Rooting Hormone (If Using): Dip the cut end of the stem into your rooting hormone, tapping off any excess. Make sure the dipped end is moist so the powder adheres well.
- Plant the Cutting: Create a small hole in your well-draining potting mix using a pencil or your finger. Gently insert the cut end of the stem into the hole, ensuring that at least one leaf node is below the soil surface.
- Water Gently: Water the soil lightly. You want it to be moist but not soggy.
- Create Humidity: Place the pot and cutting into a clear plastic bag, loosely tied, or place it in a propagator. This will create a mini greenhouse effect, keeping the humidity high which is crucial for cutting success. Make sure the leaves aren’t pressing directly against the plastic.
- Placement: Put the pot in a bright spot but out of direct sunlight. Too much sun can scorch the delicate cuttings.
- Wait and Watch: Keep an eye on your cuttings. They typically take 3-6 weeks to develop roots. You can gently tug on a cutting – if there’s resistance, it’s a good sign roots are forming.
The “Secret Sauce” (Pro Tips)
Alright, here are a few little tricks I’ve learned over the years that make a big difference:
- Bottom Heat is Your Friend: If you can, place your pots on a heated propagation mat. This gentle warmth encourages root development from the bottom up, giving your cuttings a real head start. It’s like a spa treatment for your future plants!
- Don’t Drown Your Dreams (or Your Cuttings): The most common mistake is overwatering. When you water, water thoroughly but infrequently. Let the top inch of soil dry out a bit between waterings. Soggy soil is a fast track to rot.
- Air Circulation Matters: While humidity is key, occasional airing out is also important. Open the plastic bag or propagator lid for an hour each day to allow for fresh air exchange. This helps prevent fungal diseases.
Aftercare & Troubleshooting
Once you see those lovely new roots forming – congratulations! This is where the real magic begins.
- Gradual Acclimation: When your cuttings have started to show new growth (a sign of good root development), it’s time to gradually acclimate them to normal humidity. Slowly increase the time you leave the plastic bag or propagator open over a week or so.
- Repotting: Once the plant seems well-established and is growing happily, you can repot it into a slightly larger container with fresh potting mix.
- Signs of Trouble: The most common issue you’ll encounter is rot. If your cutting turns mushy, black, or starts to fall apart, it’s likely due to overwatering or poor drainage. Sadly, a rotted cutting is usually a goner. Another sign of trouble is wilting that doesn’t recover. This could be due to a lack of roots or too much direct sun. Don’t be too hard on yourself if a few don’t make it. It happens to the best of us!
Keep nurturing your new little Thysanotus dichotomus, and you’ll have a beautiful, thriving plant in no time. Remember, gardening is all about patience and learning. So relax, enjoy the process, and get ready to be amazed by nature’s incredible ability to create new life! Happy propagating!
Resource:
https://identify.plantnet.org/k-world-flora/species/Thysanotus%20dichotomus%20(Labill.)%20R.Br./data