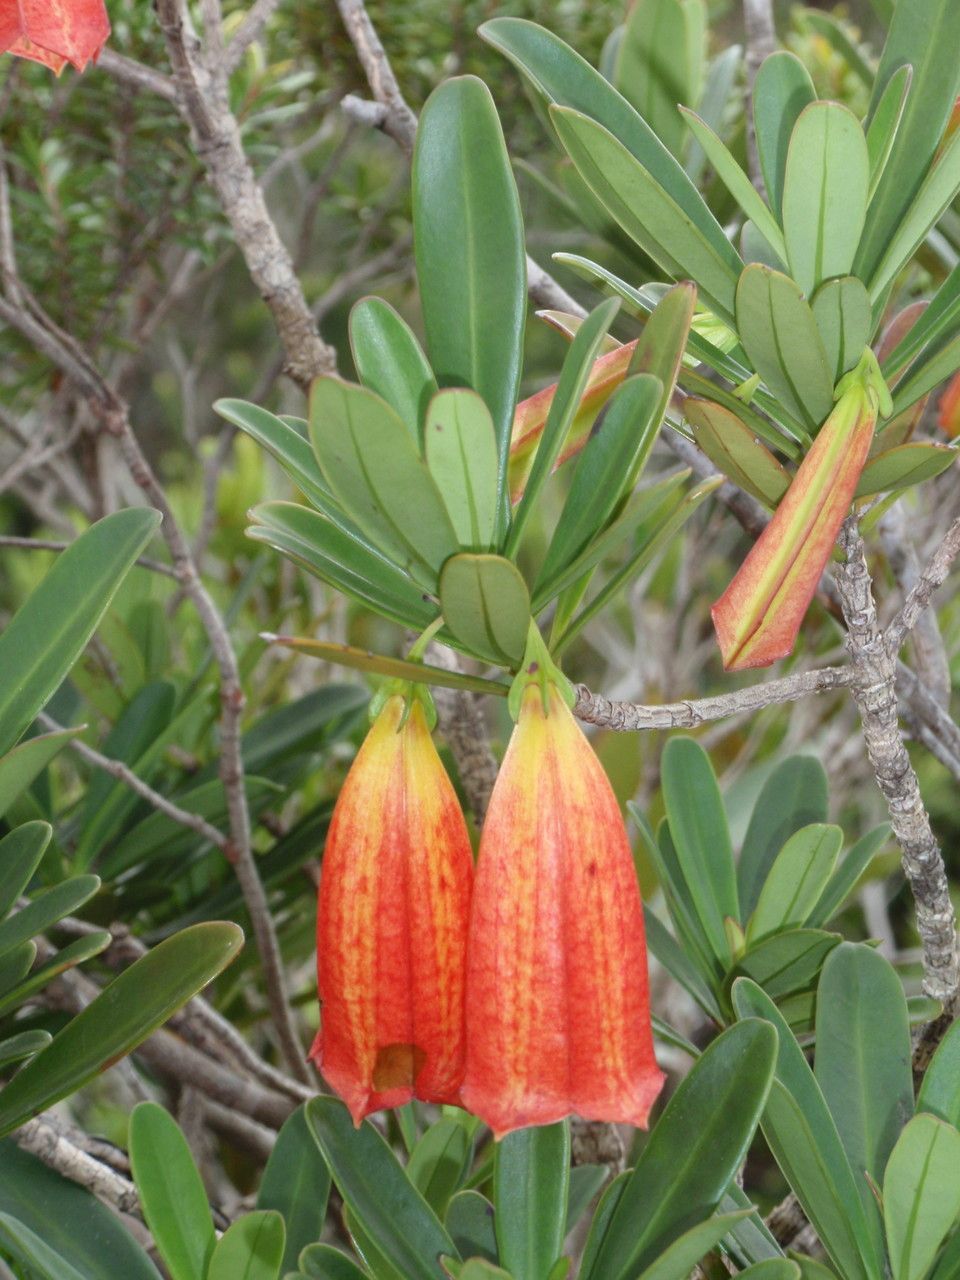
Hello fellow plant lovers! I’m so excited to talk to you today about a truly delightful plant: Thiollierea campanulata. If you’re looking for something with charming bell-shaped flowers and a bit of garden sparkle, this is it. And the best part? You can easily multiply it yourself! Propagating Thiollierea campanulata is a really satisfying way to fill your garden with more of these beauties or to share them with friends.
Now, for the honest truth: is it beginner-friendly? I’d say it’s in the intermediate category. It’s not the absolute easiest plant to propagate, but with a little patience and following these steps, you’ll be well on your way to success.
The Best Time to Start
When it comes to getting the best results, timing is everything. For Thiollierea campanulata, I always recommend starting your propagation efforts in late spring or early summer. This is when the plant is actively growing and has plenty of healthy, vigorous stems to work with. You want to select stems that are growing well, not those that are old or woody. Think of it as taking cuttings from a plant that’s feeling its best!
Supplies You’ll Need
Gathering your tools beforehand makes the whole process so much smoother. Here’s what you’ll want to have on hand:
- Sharp Pruning Shears or a Clean Knife: For taking clean cuts that heal well. Sterilize them with rubbing alcohol before and after use!
- Rooting Hormone (Powder or Gel): This is super helpful for encouraging faster and stronger root development.
- Well-Draining Potting Mix: A good starting point is a 50/50 mix of perlite and seed-starting mix or peat moss. You want something airy that won’t hold too much moisture.
- Small Pots or Seedling Trays: Clean pots are crucial to prevent disease.
- Plastic Bags or a Propagation Dome: To create a humid environment for your cuttings.
- Watering Can with a Fine Rose: For gentle watering.
- Optional: Heat Mat: Especially helpful in cooler environments.
Propagation Methods
I’ve found the most reliable way to propagate Thiollierea campanulata is through stem cuttings. Here’s how I do it:
- Select Your Cuttings: Look for healthy, non-flowering stems. Aim for cuttings that are about 4-6 inches long. Make your cut just below a leaf node (where the leaves attach to the stem). This is where the magic happens for rooting.
- Prepare the Cuttings: Gently remove the lower leaves from your cuttings, leaving just a couple of leaves at the very top. This prevents them from rotting in the soil.
- Apply Rooting Hormone: Dip the cut end of each stem into your rooting hormone, tapping off any excess.
- Pot Them Up: Fill your small pots or trays with your prepared potting mix. Make a small hole in the center with your finger or a pencil.
- Insert Cuttings: Gently place the coated end of the cutting into the hole and firm the soil around it.
- Water Gently: Water the soil thoroughly but be careful not to disturb the cuttings.
The “Secret Sauce” (Pro Tips)
Here are a couple of things I’ve learned over the years that really make a difference:
- Humidity is Key, But Not Soggy: While you want to create a humid environment by covering your pots with a plastic bag or dome, make sure the leaves of your cuttings aren’t directly touching the damp plastic. Lift the bag slightly or poke a few small holes if needed. Excess moisture on leaves can lead to fungal issues.
- Warm Feet, Happy Roots: If you live in a cooler climate or it’s not consistently warm, using a heat mat under your pots can significantly speed up root formation. It provides that gentle warmth the cuttings crave.
Aftercare & Troubleshooting
Once your cuttings are in their new homes, keep them in a bright spot that gets indirect sunlight. Avoid direct sun, as it can scorch those tender new cuttings.
Water them sparingly, only when the top inch of soil feels dry. You want the soil to be consistently moist but never waterlogged. Mist the leaves occasionally if your home is very dry.
How do you know they’re rooting? You’ll start to see new growth appearing at the top of the cutting. You can also give a very gentle tug; if there’s resistance, roots have formed! This can take anywhere from 4 to 8 weeks, sometimes longer. Be patient!
The biggest enemy here is rot. If you see your cuttings turning black and mushy, it’s usually a sign of too much moisture and not enough air circulation. If you catch it early, you might be able to salvage a healthier section, but often it’s best to discard the rotted cutting and start fresh with your remaining ones.
A Little Patience Goes a Long Way
Watching those tiny roots begin to grow is one of the most rewarding parts of gardening. Don’t be discouraged if not every cutting makes it. Gardening is all about learning and experimenting. Enjoy the process, celebrate your successes, and soon you’ll have a whole collection of Thiollierea campanulata to brighten your spaces! Happy propagating!
Resource: