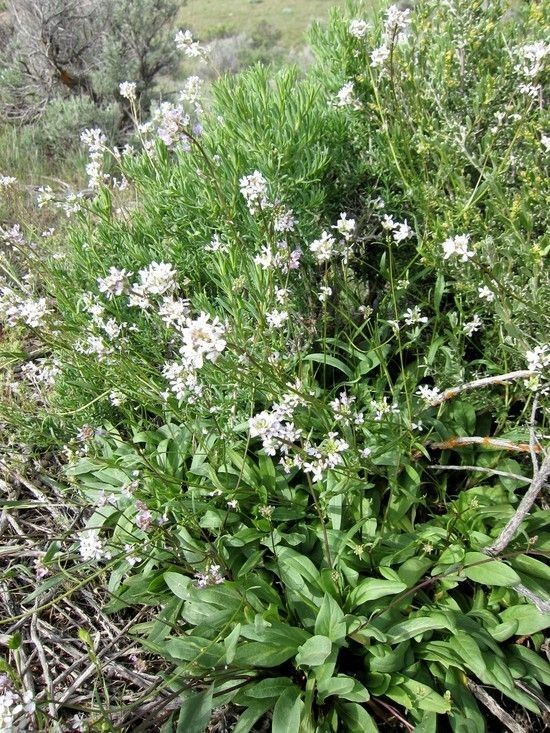
Oh, hello there! Grab a mug of your favorite brew, and let’s chat about a truly special native plant: Thelypodium flexuosum, often called the Wavy-Leaf Mustard. I’ve been growing and fussing over these beauties for years, and they have this wonderful, delicate charm that just brightens up any corner of the garden. Their wispy, almost ethereal blooms are a delight, and the architectural form they take is just stunning.
Propagating Thelypodium flexuosum can be an incredibly rewarding journey. It’s a way to multiply those lovely plants without a hefty trek to the nursery, and seeing that first little root emerge is just pure magic. Honestly, for most gardeners, it’s a moderately easy plant to get started with, especially if you’re familiar with basic propagation techniques. Don’t be intimidated – we’ll walk through it together!
The Best Time to Start
For the highest success rates with Thelypodium flexuosum, I find that late spring or early summer, just as the plant is hitting its active growth phase, is the absolute sweet spot. You want to be working with fresh, healthy material. This is when the stems have good energy, and they’re more willing to put out roots. Waiting until the plant has flowered and set seed and is starting to slow down significantly can make the process a bit more challenging.
Supplies You’ll Need
Here’s what you should have on hand before you start:
- Sharp Pruning Shears or a Clean Knife: For making clean cuts.
- Rooting Hormone (Optional but Recommended): A powdered or liquid form can give your cuttings a helpful boost.
- Well-Draining Potting Mix: A blend of perlite, vermiculite, and peat moss or coco coir works wonders. You can also use a specific seed-starting or propagation mix.
- Small Pots or Seedling Trays: Clean containers with drainage holes are essential.
- Plastic Bags or a Propagator Lid: To create a humid environment.
- Watering Can with a Fine Rose or Spray Bottle: For gentle watering.
- Labels and a Marker: To keep track of what you’ve planted!
Propagation Methods
I’ve found two main methods work best for Thelypodium flexuosum: stem cuttings and seed propagation.
Stem Cuttings
This is my go-to method for a reason – it’s efficient and often yields quite good results!
- Take Your Cuttings: In late spring or early summer, select healthy, non-flowering stems. Look for sections that are about 4-6 inches long. Using your sharp shears or knife, make a clean cut just below a leaf node (where a leaf attaches to the stem).
- Prepare the Cuttings: Gently remove the lower leaves from the cutting, leaving just a few at the top. This prevents them from rotting when buried in the soil.
- Dip in Rooting Hormone (Optional): If you’re using rooting hormone, dip the cut end of each stem into the powder or liquid, tapping off any excess.
- Plant the Cuttings: Fill your small pots or trays with your prepared potting mix. Make a small hole in the center of each pot with your finger or a pencil. Insert the cut end of the stem into the hole, ensuring the leaf nodes where you removed leaves are below the soil surface. Gently firm the soil around the cutting.
- Water Gently: Water the soil thoroughly but gently. You want it moist, but not waterlogged.
- Create Humidity: Cover the pots or tray with a plastic bag or a propagator lid. This is crucial for keeping the cuttings from drying out. Secure it with a rubber band or ensure the lid fits snugly.
Seed Propagation
While cuttings are my preference, you can also try growing from seed.
- Collect Seeds: If you’re lucky enough to have seed pods form, collect them when they turn brown and start to dry.
- Stratification (Important!): Thelypodium flexuosum seeds often benefit from a period of cold, moist stratification. This mimics winter conditions and helps break dormancy. Mix the seeds with a bit of damp (not wet) peat moss or vermiculite in a plastic bag. Store this in the refrigerator for 4-6 weeks.
- Sow the Seeds: After stratification, you can sow the seeds. Fill your seed trays with a light, sterile seed-starting mix. Sow the seeds thinly on the surface and lightly press them into the soil. Don’t bury them too deeply – they need light to germinate.
- Water and Cover: Water gently and cover the tray with a plastic dome or bag to maintain humidity.
- Germination: Keep the trays in a bright location, but out of direct, scorching sun. Germination can be a bit slow and sporadic, sometimes taking several weeks.
The “Secret Sauce” (Pro Tips)
Alright, here are a couple of things I’ve learned over the years that can really make a difference:
- Bottom Heat is Your Friend: For cuttings, placing your pots on a gentle heat mat can significantly speed up root formation. A temperature around 70-75°F (21-24°C) is ideal. This little bit of warmth encourages root development from below.
- Watch for Airflow: While humidity is key, you don’t want stagnant air. Briefly open the plastic bag or propagator lid for about 15-30 minutes each day to allow for some air circulation. This helps prevent fungal issues.
- Patience with the Pods: When collecting seeds, don’t harvest them too early. Wait until they are truly dry and start to split open. If you’re unsure, it’s better to leave them on the plant a bit longer.
Aftercare & Troubleshooting
Once you see signs of new growth or feel a gentle tug when testing for roots (around 3-6 weeks for cuttings, sometimes longer for seeds), it’s time for a little extra TLC.
- Acclimatize Gradually: Slowly reduce the humidity over a week or two by opening the bag or propagator more and more. This helps your new plants adjust to drier air.
- Move to Potting Soil: Once they have a decent root system, you can transplant them into individual pots with a good quality potting mix. Keep them in a bright, but sheltered spot, out of direct sun, for another few weeks.
- Signs of Trouble: The most common issue is rot. If your cuttings turn mushy or black, it’s usually a sign of too much moisture and poor airflow. If you see this, try to increase airflow and be more judicious with watering. For seeds, if they appear to sprout and then collapse, it can be ‘damping off,’ a fungal disease, often caused by overwatering and lack of air. Using sterile soil and not overwatering are your best defenses.
Don’t get discouraged if not every single cutting or seed takes. Gardening is a journey, and propagation is an art form that takes a little practice. The key is to be patient, observe your plants closely, and enjoy the process. Watching those tiny roots emerge and a new plant unfurl is one of the most satisfying feelings a gardener can have. Happy propagating!
Resource:
https://identify.plantnet.org/k-world-flora/species/Thelypodium%20flexuosum%20B.L.Rob./data