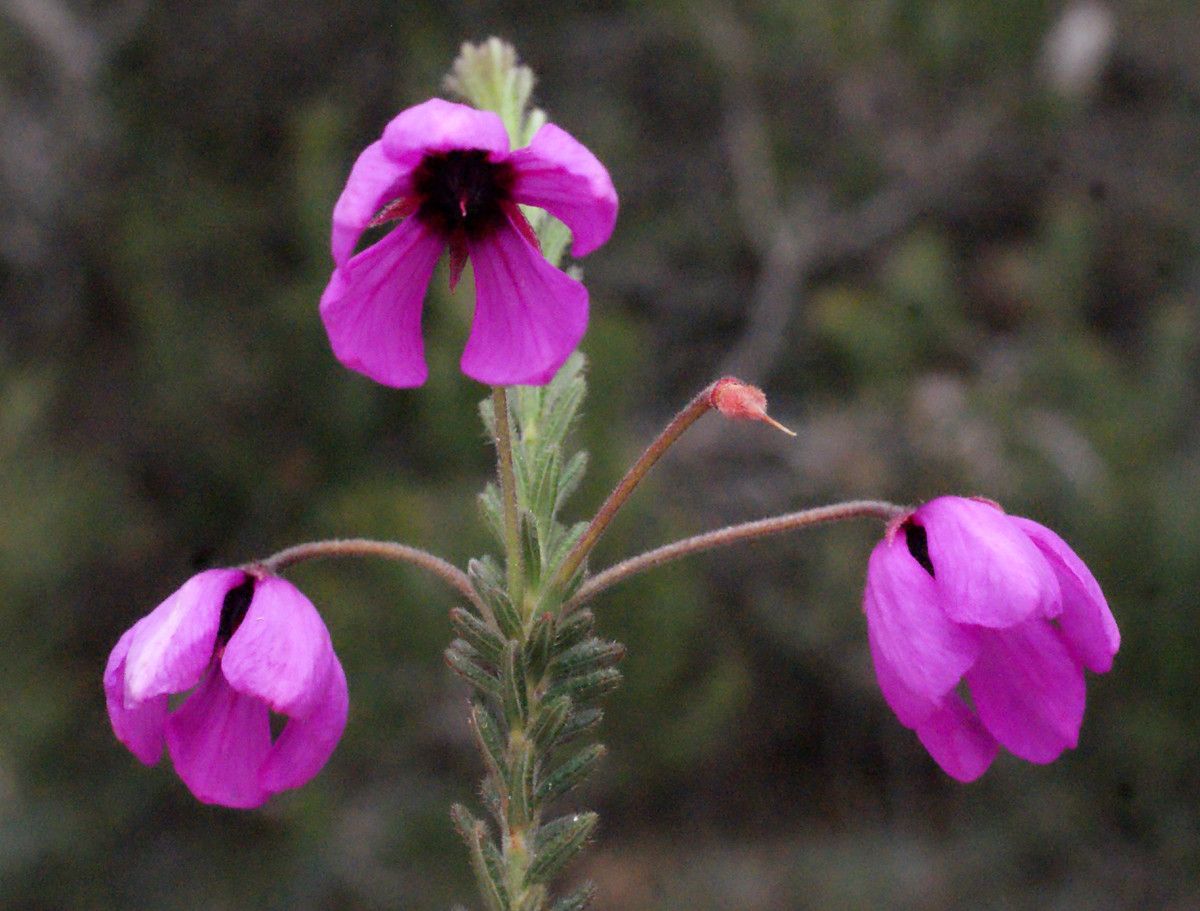
Oh, hello there! I’m so glad you’re interested in Tetratheca confertifolia. This little beauty, with its delicate pink to purple bell-shaped flowers and delightful starry display, is a true gem in any garden. It reminds me of a miniature cosmos, just bursting with charm, especially when it’s in full bloom. Sharing cuttings with friends is one of my favorite garden joys, and propagating it is a wonderfully rewarding process. Now, for beginners, I’d say Tetratheca confertifolia can be a little bit of a character, but with a few key pointers, you’ll be well on your way to success.
The Best Time to Start
The absolute sweet spot for taking cuttings from your Tetratheca confertifolia is usually late spring to early summer. This is when the plant is actively growing, and the stems are semi-hardwood – not too soft and floppy, but not yet tough and woody. Think of it as the plant being full of vibrant energy, ready to dive into new beginnings.
Supplies You’ll Need
Don’t worry, it’s not an extensive list! You likely have most of these things already tucked away in your shed or potting bench:
- Sharp pruning shears or a clean, sharp knife: For making clear, precise cuts.
- Rooting hormone (optional but recommended): A little boost can make a big difference.
- Small pots or seed trays: With good drainage holes, of course!
- A well-draining potting mix: I like a mix of equal parts perlite and peat moss or coco coir. You can also buy specific propagation mixes, which work wonders.
- A plastic bag or propagator lid: To create a humid environment.
- Watering can with a fine rose: For gentle watering.
- Labels and a permanent marker: So you don’t forget what you’ve planted!
Propagation Methods
Now, let’s get our hands dirty! For Tetratheca confertifolia, stem cuttings are my go-to method.
- Select Your Cuttings: Look for healthy, non-flowering stems that are about 3-4 inches long. You want to find those semi-hardwood pieces. Gently bend a stem; if it snaps cleanly, it’s probably a good candidate.
- Make the Cut: Using your sharp pruning shears or knife, make a clean cut just below a leaf node. This is where roots are most likely to form.
- Prepare the Cuttings: Carefully remove the lower leaves from the cutting, leaving just a few at the top. This helps prevent them from rotting in the soil. If the remaining leaves are large, you can even trim them in half to reduce water loss.
- Apply Rooting Hormone (Optional): Dip the cut end of the stem into your rooting hormone powder or gel, tapping off any excess.
- Plant Your Cuttings: Fill your small pots with your prepared potting mix. Make a hole with a pencil or your finger, about an inch deep. Gently insert the cutting into the hole, firming the soil around it.
- Water Gently: Water the soil thoroughly but gently. You want it moist, but not waterlogged.
The “Secret Sauce” (Pro Tips)
Here are a few little tricks I’ve picked up over the years that often help turn a good cutting into a happy new plant:
- Sterilize Everything: Before you start, give your tools and pots a quick wipe down with rubbing alcohol. This helps prevent any nasty fungal infections that can scupper your efforts.
- Bottom Heat is Your Friend: If you can, place your pots on a heated propagator mat. This gentle warmth from below encourages root development without drying out the leaf tips. It’s like a cozy little sunbath for your cuttings!
- Don’t Be Afraid of a Snip: When you’re preparing your cuttings, and you see a tiny bud forming, you can carefully pinch it off. While it’s tempting to let it grow, the plant puts a lot of energy into flowering. Removing it redirects that energy towards root growth, which is exactly what we want right now.
Aftercare & Troubleshooting
Once your cuttings are planted, it’s time to create a little microclimate. Cover the pot with a clear plastic bag (making sure the leaves don’t touch the plastic) or place it inside a propagator with a lid. Put them in a bright spot out of direct sunlight. Mist them lightly every few days to keep the humidity up.
You’ll know your cuttings are rooting when you see new growth appearing. Be patient; this can take anywhere from 4 to 8 weeks, sometimes longer. Gently tug on a cutting; if you feel resistance, roots are forming!
Sometimes, things don’t go as planned. The most common issue is rot. If you see your cuttings turning mushy or black, it’s usually a sign of too much moisture and not enough air circulation. Try to improve drainage and reduce watering. Ensure your potting mix is airy enough. If a cutting looks truly sad and rotten, it’s best to discard it to prevent it from affecting others.
A Gentle Encouragement
Propagating plants is such a wonderful way to connect with nature and deepen your gardening passion. It’s a journey that requires a bit of patience, observation, and a whole lot of love. Don’t be discouraged if your first few attempts aren’t perfect. Every gardener has lost a cutting or two! Just keep trying, keep learning, and most importantly, enjoy the process. Soon enough, you’ll have a whole new collection of your own charming Tetratheca confertifolia to admire and share. Happy propagating!
Resource:
https://identify.plantnet.org/k-world-flora/species/Tetratheca%20confertifolia%20Steetz/data