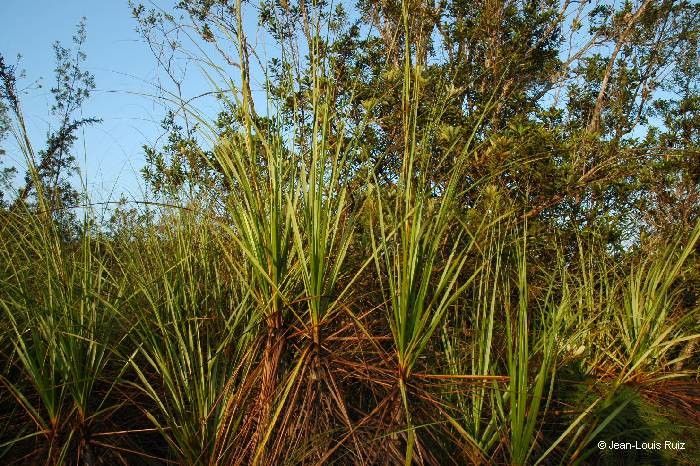
Hey there, fellow plant enthusiasts! I’m so glad you’ve stopped by. Today, we’re diving into the world of a truly stunning grass – Tetraria arundinacea. Its elegant, architectural form and graceful, arching leaves bring a touch of wild beauty to any garden design. And you know what’s even more rewarding than admiring it? Creating more of it yourself!
Why Propagate Tetraria arundinacea?
There’s something deeply satisfying about taking a part of a beloved plant and coaxing it to grow into its own independent life. It’s a way to fill your garden with more of what you love, share with friends, or even start your own little nursery. Some plants can be a bit fussy when it comes to propagation, but honestly, Tetraria arundinacea is a pretty rewarding plant to work with. It’s not the easiest for an absolute beginner, but with a little care and attention, you’ll likely have success.
The Best Time to Start Your Propagation Journey
For Tetraria arundinacea, the spring and early summer are your golden windows. This is when the plant is in its active growing phase. New shoots are emerging, and any cuttings or divisions taken now will have the best energy reserves to establish roots. Avoid taking cuttings in the heat of summer or the cold of winter; you want your little ones to focus on growing, not surviving extreme temperatures.
Your Propagation Toolkit
Gathering the right supplies upfront makes the whole process smoother. Here’s what you’ll want to have on hand:
- Sharp, clean pruning shears or a sharp knife: Essential for making clean cuts that heal well.
- Small pots or trays: For your cuttings to root in. Make sure they have drainage holes!
- Well-draining potting mix: I usually use a blend of peat moss or coir, perlite or vermiculite, and a bit of coarse sand. This prevents soggy roots.
- Rooting hormone (optional but recommended for cuttings): A powder or gel that encourages root development.
- Watering can or spray bottle: For gentle watering.
- Labeling stakes: So you don’t forget what you planted where!
- A plastic bag or propagation dome: To create a humid environment for cuttings.
Ready to Get Growing? Propagation Methods
There are a couple of ways to go about propagating Tetraria arundinacea, and both can be quite successful.
Method 1: Division (My Personal Favorite for This Grass)
This is often the easiest and most successful method for established clumps of Tetraria arundinacea.
- Gently excavate the plant: Dig around the base of the established clump. You want to lift the entire plant out of its pot or out of the ground with as much of the root ball intact as possible.
- Shake off excess soil: Gently tease away some of the soil from the roots to get a better look at the rhizomes and crowns.
- Identify natural divisions: Look for sections of the plant where new shoots are emerging from the base, with their own set of roots. You can often see where the plant naturally wants to split.
- Make the cut: Using your sharp pruning shears or knife, carefully divide the clump. Make sure each new division has a healthy section of roots and at least a few shoots.
- Pot up your new plants: Plant each division into its own pot filled with your well-draining potting mix. Water them in well.
Method 2: Stem Cuttings (A Bit More Patience Required)
While division is often preferred, you can also take cuttings, especially from younger, vigorous growth.
- Select healthy stems: Choose a stem that looks plump and healthy, preferably with new growth.
- Make a clean cut: Using your sharp shears, cut a section that is about 4-6 inches long. Make the cut just below a node (where a leaf attaches to the stem).
- Prepare the cutting: Remove the lower leaves from the cutting, leaving only the top few leaves. This prevents them from rotting in the soil.
- Dip in rooting hormone (optional): If you’re using rooting hormone, gently dip the cut end into it. Tap off any excess.
- Plant the cutting: Make a small hole in your potting mix with a pencil or your finger. Insert the cutting, ensuring the node where you removed leaves is below the soil surface. Gently firm the soil around it.
- Create humidity: Water the pot gently. Then, cover the pot with a plastic bag or place it in a propagation dome to maintain high humidity around the cutting. You can secure the bag loosely with a twist tie.
Our Little “Secret Sauces”
Here are a few things I’ve learned over the years that really make a difference:
- Don’t drown your cuttings: When watering your cuttings, err on the side of caution. You want the soil to be consistently moist, not waterlogged. Soggy soil is the fastest way to invite rot, and that’s a sad ending for any new plant.
- Bottom heat is your friend: For stem cuttings, placing them on a heat mat designed for propagation can significantly speed up root development. It mimics the warmth of spring soil and really gives them a boost.
- Raffia for the patient: If you’re doing divisions, especially if a clump is tough to pull apart, I sometimes use a piece of soft raffia to gently tie the more delicate root sections together. This helps keep them from breaking as you work and reduces stress on the young roots.
Aftercare and What to Watch For
Once your new Tetraria arundinacea divisions or cuttings are planted, they’ll need a bit of TLC to get established.
- Keep them moist: Check the soil regularly. For cuttings, you want the soil to stay evenly moist. For divisions, water them thoroughly when the top inch of soil starts to feel dry.
- Provide bright, indirect light: Avoid harsh, direct sun, which can scorch delicate new growth. A bright windowsill or a spot under shade cloth is ideal.
- Patience with cuttings: It can take several weeks to a few months for cuttings to develop a strong enough root system to be moved. You can gently tug on a cutting; if there’s resistance, it’s likely rooting.
- Watch for rot: The main culprit for failure is rot. If your cuttings start to turn mushy, black, or develop fuzzy mold, it’s a sign of too much moisture and poor air circulation. If you see this, try to remove the affected part, reduce watering, and improve ventilation. Brown, crispy leaves on cuttings usually mean they’re too dry or getting too much sun.
Go Forth and Multiply!
Propagating plants like Tetraria arundinacea is one of the most fulfilling aspects of gardening. Don’t be discouraged if your first attempt isn’t perfect. Every gardener has had their share of failures – it’s all part of the learning process! Enjoy the journey, be patient with your new little plants, and soon you’ll be surrounded by even more of this beautiful grass. Happy gardening!
Resource: