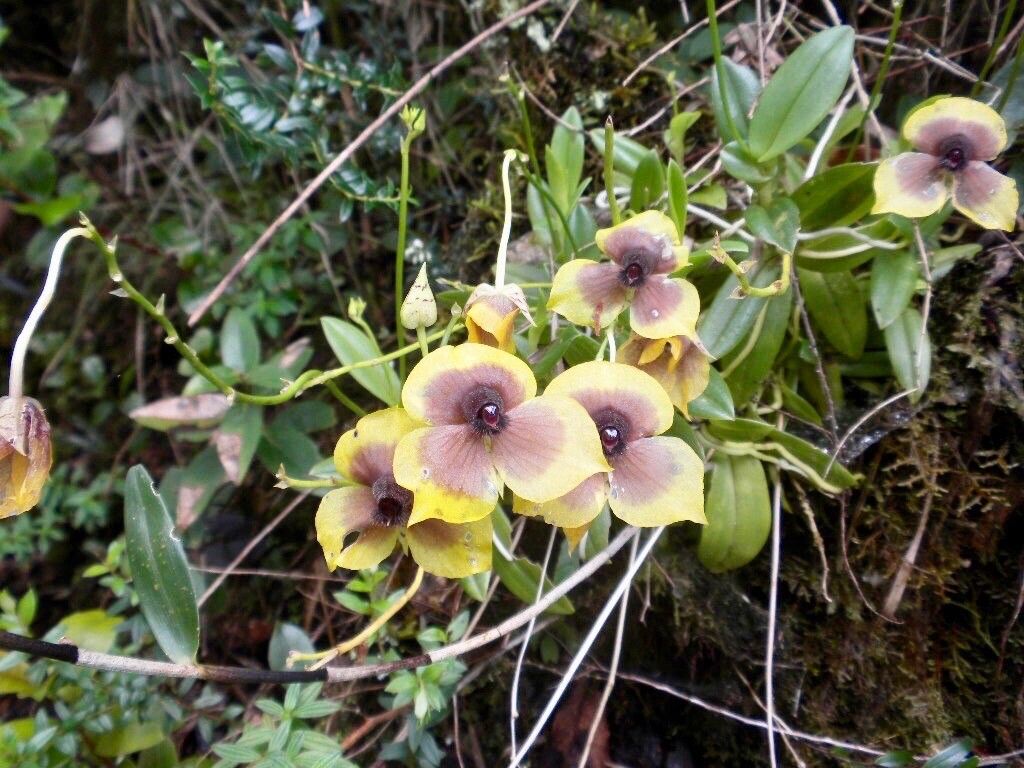
Oh, Telipogon costaricensis! If you’ve ever seen one of these beauties in bloom, you know exactly why I’m so excited to talk about propagating them. Their intricate, almost otherworldly flowers are a showstopper, a real testament to nature’s artistry. Sharing this orchid through propagation is such a rewarding way to spread that beauty. Now, between you and me, Telipogon costaricensis isn’t the absolute easiest orchid to start with for a complete beginner. It has its quirks, but with a little attention and patience, you’ll be celebrating your own little successes.
The Best Time to Start
For most orchids, including Telipogon costaricensis, spring is your golden ticket. As the plants emerge from their winter dormancy and begin their active growth phase, they have the energy reserves to put into developing new roots and shoots. You’ll want to look for signs of new growth, like tiny green nubs emerging from the base of the plant or along the stem.
Supplies You’ll Need
Gathering your tools beforehand makes the whole process smoother. Here’s what I usually have on hand:
- Sharp, sterile pruning shears or a clean knife: For making clean cuts. I always sterilize mine with rubbing alcohol.
- Orchid bark mix: A well-draining blend is crucial. Look for mixes designed for epiphytic orchids, often containing bark, charcoal, and perlite.
- Sphagnum moss: Can be used for some methods, but make sure it’s good quality and not waterlogged.
- Rooting hormone (optional but recommended): A little boost can help speed things up.
- Small pots or containers: Whatever you choose, ensure they have excellent drainage.
- Clear plastic bags or a propagation box: To maintain humidity.
- Waterproof labels and a marker: To keep track of your new babies!
Propagation Methods
Telipogon costaricensis is best propagated through division. This is where you carefully separate a mature plant into smaller, viable sections.
Division:
- Gently remove the plant from its pot. You might need to run a knife around the edge if it’s really stuck.
- Clean off excess potting medium from the roots. You want to be able to see what you’re doing.
- Examine the plant for natural divisions. Look for where a new growth point (a pseudobulb or a stem with leaves) has emerged from the main plant and has its own set of roots. You’re essentially looking for a natural separation point.
- Using your sterile shears or knife, carefully cut between the divisions. Be sure each piece has at least one or two healthy pseudobulbs (if present) and a good root system. Sometimes, you might have to sacrifice a bit of root to get a clean separation, but try to preserve as much as possible.
- Allow the cut surfaces to callus over for a few hours to a day in a dry, airy spot. This helps prevent rot.
- Pot up your divisions. Place them in their new, well-draining orchid mix. Don’t pot them too deeply; the base of the pseudobulbs should be at or slightly above the surface.
The “Secret Sauce”
Here are a few tricks I’ve learned over the years that can make a big difference:
- During the initial recovery phase, avoid letting the leaves of your division touch the surface of the potting mix, especially if you’re using something like sphagnum. Trapped moisture can lead to rot. Make sure there’s good air circulation around the base.
- Bottom heat is your friend! Placing your newly potted divisions on a seedling heat mat can significantly encourage root development. Just a gentle warmth, not scorching heat, makes a world of difference for many difficult-to-propagate plants.
- Don’t be afraid to trim back any old, weak, or dead growth from the mother plant before you start. This allows the plant to focus its energy on producing new, strong divisions.
Aftercare & Troubleshooting
Once your divisions are potted, they’ll need a period of recovery and encouragement.
- Humidity is key initially: Place the potted divisions in a clear plastic bag or a propagation box. Lightly mist the inside of the bag to create a humid environment, but ensure there’s still some air circulation to prevent fungal issues.
- Water sparingly: Don’t overwater! Let the potting medium dry out slightly between waterings. You’re not looking to drown them; you’re encouraging new roots to seek out moisture.
- Bright, indirect light: Keep them in a spot that receives plenty of bright, filtered light, but avoid direct sunlight, which can scorch young leaves.
Now, what if things go wrong? The most common culprit is rot. You’ll see leaves wilting, turning yellow and mushy, and a general lack of vigor. If you suspect rot, gently unpot the division and remove any rotted tissue with your sterile knife. You can then try repotting in fresh, dry media or even attempting to root a healthy piece in water if the roots are completely gone (but this is a last resort for orchids). Always ensure your potting medium has excellent drainage and you’re not overwatering.
A Encouraging Closing
Propagating Telipogon costaricensis might take a little patience, but seeing those first tiny new roots emerge and eventually a new bloom appear from a plant you nurtured yourself is incredibly gratifying. Don’t get discouraged if your first attempt isn’t perfect. Gardening is a journey of learning, and every plant you grow teaches you something new. So, get your hands dirty, enjoy the process, and happy growing!
Resource:
https://identify.plantnet.org/k-world-flora/species/Telipogon%20costaricensis%20Schltr./data