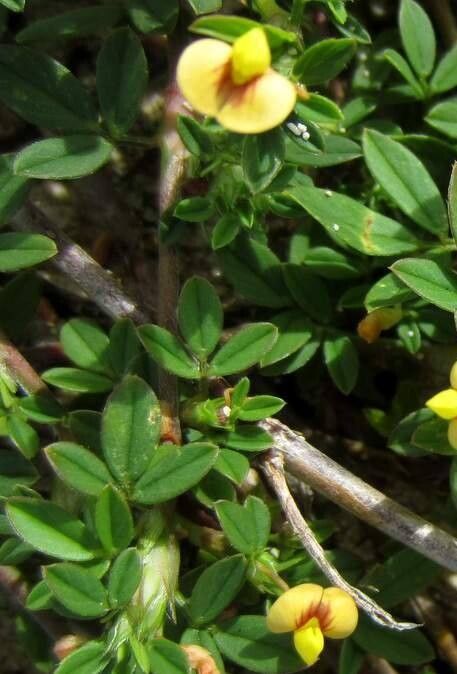
Hey there, fellow plant lovers! It’s so great to have you here today. I want to chat about a truly delightful plant that’s been capturing my heart for years: Stylosanthes hamata. You might know it by its common name, “Scarlet Sage” or “Tropical Sage,” and oh my, does it earn that name! Its vibrant, scarlet flower spikes are an absolute magnet for pollinators – hummingbirds adore it, bees can’t get enough, and honestly, who wouldn’t? It just brings a certain oomph to any garden space.
Now, you might be wondering if this beauty is a fussy diva or more of a laid-back friend. I’m happy to report that propagating Stylosanthes hamata is surprisingly approachable, even for those just dipping their toes into the wonderful world of plant propagation. It’s definitely a rewarding endeavor that lets you expand your garden’s charm without breaking the bank.
The Best Time to Start
For the absolute best results with Stylosanthes hamata, I always aim to get my propagation underway in late spring or early summer. This is when the plant is in its active growth phase. The stems are usually robust and full of life, meaning they have a good amount of energy to put into developing roots. Waiting until the plant is well into its blooming season is perfect.
Supplies You’ll Need
Gathering your tools before you start makes the whole process so much smoother. Here’s what I typically have on hand:
- Sharp Pruning Shears or a Clean Knife: For taking clean cuts.
- Small Pots or Seed Trays: Anything that can hold your potting mix and snuggle a new cutting.
- Well-Draining Potting Mix: A good base is crucial. I often use a blend of peat moss and perlite, or a high-quality seed starting mix.
- Rooting Hormone (Optional but Recommended): This really helps speed things up and encourages stronger root development.
- Watering Can or Spray Bottle: For gentle watering.
- Plastic Bags or a Propagator (Optional): To create a humid environment.
- Labels and a Marker: So you don’t forget what you planted where!
Propagation Methods
Stylosanthes hamata is wonderfully versatile, and I find success with a couple of different methods.
Stem Cuttings: My Go-To Method
This is my absolute favorite for Stylosanthes hamata. It’s straightforward and yields great results.
- Select Your Cuttings: Look for healthy, non-flowering stems from your mature plant. You want stems that are about 4-6 inches long. Try to choose stems that are actively growing, not woody or old.
- Make the Cut: Using your clean shears or knife, take a cutting just below a leaf node. This is the spot where a leaf attaches to the stem, and it’s where roots tend to emerge. I usually remove the bottom leaves, leaving just a few at the top.
- Apply Rooting Hormone (If Using): Dip the cut end of the stem into your rooting hormone. Gently tap off any excess.
- Plant Your Cuttings: Fill your small pots or trays with the well-draining potting mix. Make a small hole with your finger or a pencil and insert the cutting. Gently firm the soil around the stem to ensure good contact.
- Water Gently: Water thoroughly but gently. You want the soil to be moist, not waterlogged.
- Create a Humid Environment: I like to place a clear plastic bag loosely over the pot, or even better, pop the pots into a propagator. This traps humidity, which is vital for cuttings as they haven’t developed roots to take up water yet. Make sure the leaves don’t touch the sides of the bag if possible to prevent rot.
- Provide Light and Warmth: Place your cuttings in a bright spot but out of direct, hot sun. A little warmth from below, like on a heated propagator mat, can really speed things up.
Water Propagation (A Fun Alternative)
While I lean towards soil, water propagation can be a fun way to watch the roots develop.
- Take Cuttings: Follow steps 1 and 2 from the stem cutting method.
- Place in Water: Put the cuttings in a jar or glass of clean water.
- Positioning is Key: Make sure the leaves are NOT submerged in the water. Only the bottom part of the stem should be in the water. Leaves sitting in water are a recipe for rot.
- Change Water Regularly: Change the water every few days to keep it fresh and prevent bacterial growth.
- Watch for Roots: You’ll start to see little white roots forming from the nodes. Once the roots are about an inch long, they’re ready to be planted in soil.
The “Secret Sauce” (Pro Tips)
Here are a couple of things I’ve learned over the years that really make a difference:
- Bottom Heat is Your Friend: I mentioned it briefly, but I can’t stress enough how much a little gentle bottom heat can accelerate root formation. It mimics the warm soil of summer and tells the plant “it’s time to grow!”
- Don’t Over-Water! This is probably the most common mistake. Cuttings have no roots yet, so they can’t take up excess moisture. Consistently damp, not soggy, soil is the goal. If you see water pooling, your mix might be too heavy or you’re watering too much.
- A Little Air Circulation Helps: Even with a humidity dome, occasional ventilation is good. Take the plastic bag off for an hour a day, or open the propagator vents. This helps prevent fungal diseases.
Aftercare & Troubleshooting
Once you see roots appearing – hooray! This usually takes a few weeks.
- Acclimatize Your Cuttings: If you used a plastic bag, gradually start to introduce your new plants to the drier air. Open the bag for longer periods each day over a week before removing it entirely.
- Potting Up: When your rooted cuttings have a decent root system (you can gently tug on them, and they feel secure), you can pot them up into larger individual pots. Use a good quality potting mix.
- Watering: Continue to water your new plants regularly, ensuring the soil dries out slightly between waterings.
- Troubleshooting – Rot: The most common sign of failure is rotting. If your cuttings turn mushy and black, it’s usually a sign of too much moisture and not enough air circulation. Discard the rotted cutting to prevent it from spreading.
- Troubleshooting – Wilting: If your cuttings wilt and don’t perk up after watering, they likely haven’t formed enough roots yet to hydrate themselves. Increase humidity and be patient. Make sure they aren’t in too hot a spot.
A Little Patience Goes a Long Way
See? Not so daunting, is it? Propagating Stylosanthes hamata is a beautiful way to multiply the beauty in your garden. Watch for those tiny roots, provide them with what they need, and celebrate each success. Don’t get discouraged if you lose a few along the way – it’s all part of the learning curve. Most importantly, enjoy the process of nurturing these new lives from your beloved plant. Happy propagating!
Resource:
https://identify.plantnet.org/k-world-flora/species/Stylosanthes%20hamata%20(L.)%20Taub./data