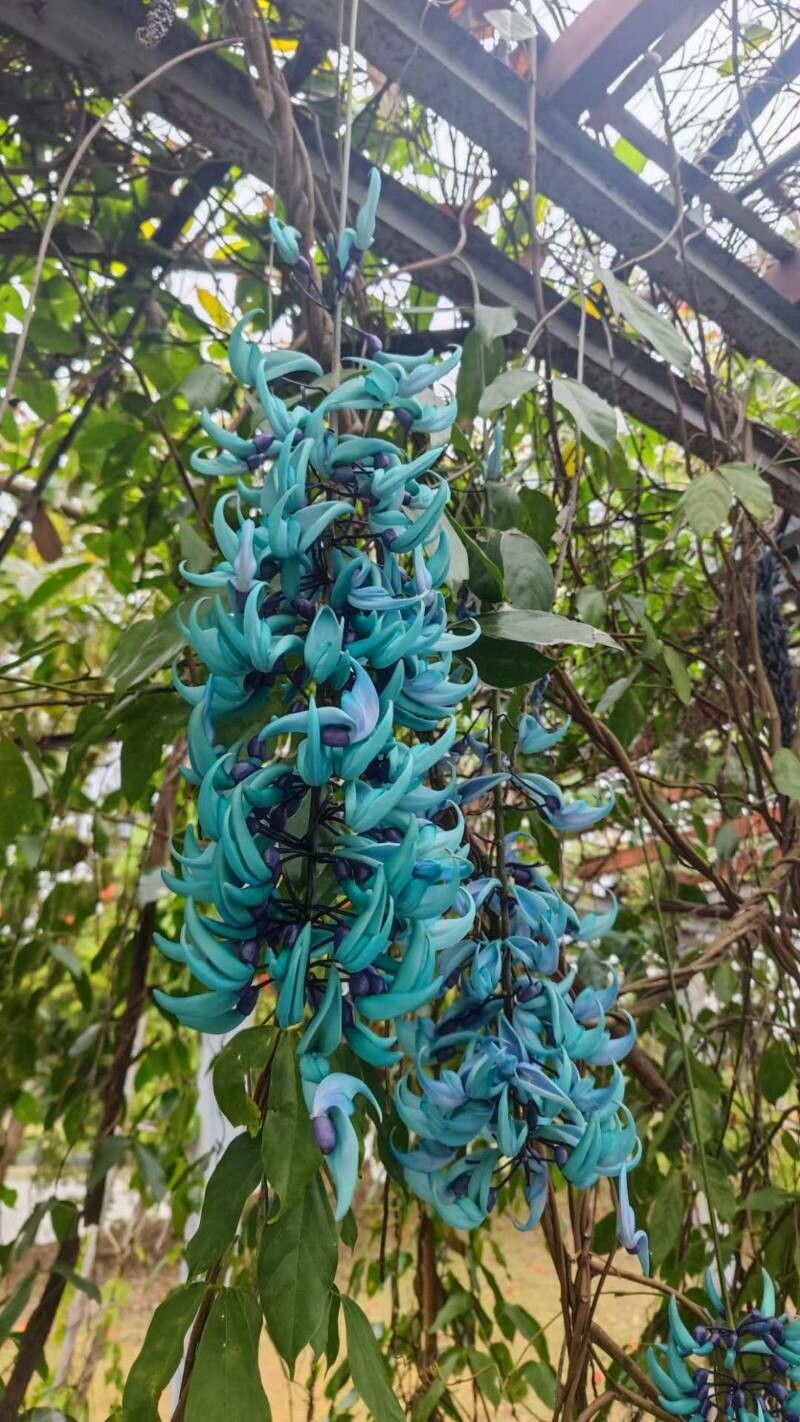
Oh, the Jade Vine! That stunning cascade of teal, turquoise, and jade. Strongylodon macrobotrys is truly a showstopper, isn’t it? When those breathtaking blossoms unfurl, it feels like magic. And the idea of coaxing more of that magic into existence yourself? So, so rewarding.
Now, let’s be honest. Propagating the Jade Vine isn’t usually the easiest plant to get started with for absolute beginners. It’s a bit of a diva sometimes, and it likes things just so. But with a little patience and the right approach, you absolutely can succeed. I’ve had wonderful luck, and I know you can too!
The Best Time to Start
For Strongylodon macrobotrys, the sweet spot for propagation is typically during its active growing season. This usually means late spring and summer. You’re looking for healthy, vigorous new growth – stems that are firm but not woody. Trying to propagate when the plant is dormant is just asking for disappointment. So, watch for those fresh, bright green shoots appearing after the last frost.
Supplies You’ll Need
Gathering your supplies upfront will make the whole process smoother. Here’s what I find essential:
- Sharp, clean pruning shears or a sharp knife: Essential for making clean cuts to prevent disease.
- Rooting hormone powder or gel: This significantly boosts your chances of root development. I prefer a powder for ease of use.
- Well-draining potting mix: A good blend of perlite, peat moss, and maybe a little coarse sand works wonders. A commercial cactus or succulent mix often does the trick.
- Small pots or containers: Clean nursery pots or even sturdy plastic cups with drainage holes will work.
- Plastic bags or a clear propagation dome: To create a humid environment.
- Optional: Bottom heat mat: This can be a game-changer, especially if your home is on the cooler side.
Propagation Methods: Stem Cuttings
Stem cuttings are my go-to method for Jade Vines. It’s reliable and yields great results when done correctly.
- Select your cutting: Look for a stem that is about 6-12 inches long and has at least 2-3 nodes (the little bumps where leaves emerge). Ensure it’s from healthy, established growth. Avoid anything too soft or too hard and woody.
- Make the cut: Using your clean shears or knife, make a clean cut just below a node. This is where roots are most likely to form.
- Prepare the cutting: Gently remove the leaves from the bottom half of the stem. You want to expose at least one or two nodes where roots will sprout. Leave a couple of leaves at the top to help with photosynthesis.
- Apply rooting hormone: Dip the cut end of the stem into your rooting hormone, tapping off any excess.
- Plant the cutting: Fill your small pots with your well-draining potting mix. Make a small hole in the center of the soil with your finger or a pencil. Gently insert the cutting into the hole, ensuring at least one node is buried beneath the soil surface. Firm the soil gently around the stem.
- Water and cover: Water the potting mix gently until it’s evenly moist but not soggy. Then, cover the pot with a plastic bag or place it under a propagation dome to maintain high humidity. You can prop up the bag with a few stakes if needed to keep it from touching the leaves.
The “Secret Sauce” (Pro Tips)
Here are a couple of things I’ve learned over the years that really make a difference:
- Don’t let the leaves touch the water (if you were to attempt water propagation): While stem cuttings in soil are my preference, if you ever try water rooting, make absolutely sure the leaves stay above the water line. Rot happens fast when you immerse leaves in water.
- Bottom heat is your best friend: As I mentioned, a gentle bottom heat mat can significantly speed up root formation. It mimics the warmth of spring soil and encourages those roots to get going. Aim for a temperature around 70-75°F (21-24°C).
- Patience is key for the node: When you’re taking cuttings, always try to get a node buried in the soil. That’s where the magic happens – the roots emerge from these nodal points.
Aftercare & Troubleshooting
Once your cuttings are planted, the waiting game begins! Keep the soil consistently moist but not waterlogged. You’ll want to open the bag or dome for a few minutes each day to allow for air circulation and prevent fungal issues.
You’ll know roots are developing when you gently tug on the cutting and feel resistance, or when you see new leaf growth. This can take anywhere from 4-12 weeks, so don’t be discouraged if it takes a while!
The main problem to watch for is rot. If the stem starts to look mushy and black, it’s likely too much moisture and not enough airflow. If this happens, sadly, you’ll probably need to discard the cutting and start again, making sure your soil drains very well and your airflow is adequate. Yellowing leaves on a cutting can sometimes indicate it’s struggling, but new growth is usually a very good sign.
A word of encouragement
Propagating the beautiful Jade Vine can feel like a bit of an art form. There will be times you’ll have to try again. But each attempt teaches you something new. Keep them in a warm, bright spot (but avoid direct scorching sun), be patient, and celebrate every tiny bit of progress. You’re nurturing new life, and that’s a truly wonderful thing. Happy propagating!
Resource:
https://identify.plantnet.org/k-world-flora/species/Strongylodon%20macrobotrys%20A.Gray/data