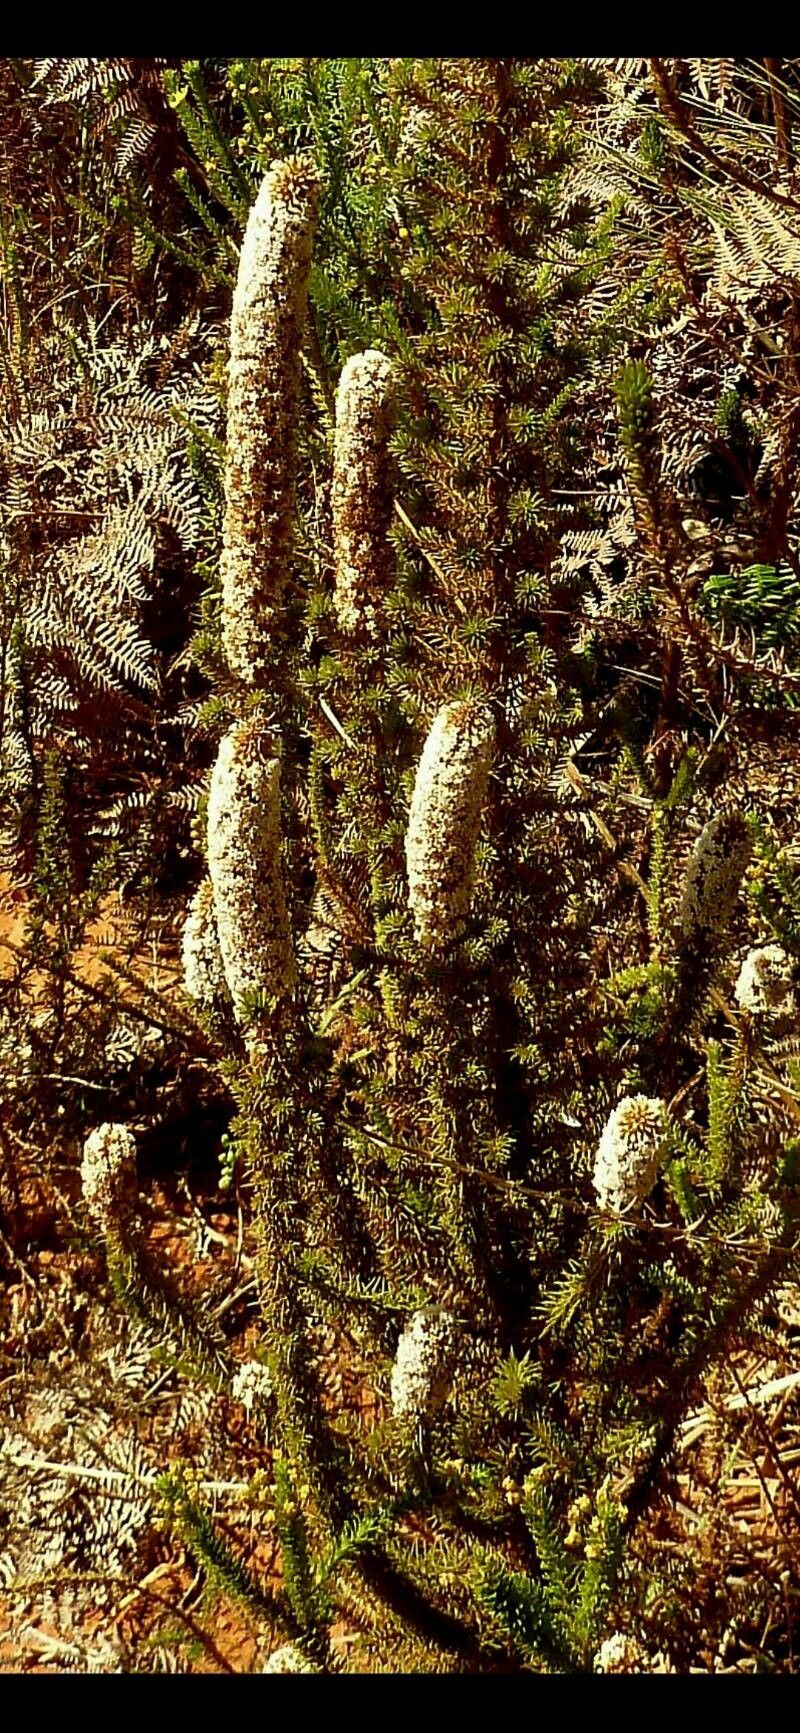
Oh, hello there! Grab a mug of your favorite drink; we’re going to chat about a little gem in the plant world: Stoebe alopecuroides. If you’ve ever admired its unique, feathery foliage and those charming, almost fox-tail-like flower spikes, you’re not alone. I’ve been captivated by this beauty for years. Propagating it is such a joy, a wonderful way to multiply that charm and share it with friends (or just fill your own garden!). For beginners, I’d say it’s moderately easy. A little patience and a few key steps will get you there.
The Best Time to Start
Generally, the sweet spot for propagating Stoebe alopecuroides is late spring to early summer. You want to catch it as it’s in a good growth spurt. This is when the plant is actively producing new, healthy stems that have the best chance of rooting. Avoid trying to propagate from very old, woody stems, as they’re less likely to take.
Supplies You’ll Need
Here’s what I keep handy when I’m ready to get my propagation on:
- Sharp Pruning Shears or a Craft Knife: Cleanliness is key!
- Rooting Hormone (Optional, but Recommended): A good quality powder or gel will give your cuttings a significant boost.
- Well-Draining Potting Mix: I like a blend of equal parts perlite, coarse sand, and peat moss or coco coir. Or, a good succulent/cactus mix works well too.
- Small Pots or Seed Trays: Clean ones, of course! Something with drainage holes is essential.
- Plastic Bags or a Propagator Lid: To create a humid environment.
- Watering Can or Spray Bottle: For gentle watering.
- Labels and a Pen: Don’t forget to label your precious babies!
Propagation Methods: Let’s Get Our Hands Dirty!
The most reliable way I’ve found to propagate Stoebe alopecuroides is through stem cuttings. It’s straightforward and yields great results.
Here’s how I do it:
- Select Your Cuttings: Look for healthy, non-flowering stems that are about 4-6 inches long. Gently twist or carefully cut them from the parent plant using your clean shears or knife.
- Prepare the Cuttings: Remove the lower leaves from the cutting, leaving just a few at the top. This prevents them from rotting in the soil and encourages root development. If the stem is a bit floppy, you can trim it to about 3 inches.
- Apply Rooting Hormone (Optional): Dip the cut end of the stem into your rooting hormone. Tap off any excess. This step really helps accelerate root formation.
- Plant the Cuttings: Make a hole in your prepared potting mix using a pencil or your finger. This prevents the rooting hormone from being rubbed off. Insert the cut end of the stem into the hole and firm the soil gently around it.
- Water Gently: Water the soil lightly, just enough to moisten it thoroughly. You don’t want soggy soil.
- Create Humidity: Place the pot into a clear plastic bag, or cover it with a propagator lid. This traps moisture around the cuttings. Make sure the leaves aren’t touching the plastic. If they are, you might need to prop up the bag with a few sticks.
- Find a Bright Spot: Place your cuttings in a bright location that receives indirect sunlight. Direct sun will scorch them.
The “Secret Sauce” (Pro Tips)
Over the years, I’ve picked up a few tricks that seem to make all the difference:
- Bottom Heat is Your Friend: If you can, place your pots on a gentle heated propagation mat. This warmth from below really encourages root development from the base of the cutting. It’s like a cozy little foot massage for your future plants!
- Don’t Be Afraid to Mist: While sealing them in a bag provides humidity, a light misting of the cuttings and the inside of the bag every few days can also be beneficial, especially if your environment is a bit dry.
- Patience with the “Firming”: When you insert your cutting, you want the soil to be firm enough to hold it upright, but not so compacted that air cannot circulate or roots struggle to emerge. It’s a delicate balance – just firm enough to avoid wobbles!
Aftercare & Troubleshooting
Once your cuttings have been planted, the waiting game begins. Keep them in that humid environment and check the soil moisture regularly. You’re looking for signs of new growth – little leaves unfurling or maybe even seeing roots peeking out the drainage holes. This usually takes 4-8 weeks, sometimes longer.
When you see a good root system developing, it’s time to gradually introduce them to less humid conditions. Open the plastic bag a little each day for a week, or lift the propagator lid. Once they seem sturdy and have developed a decent root system, you can transplant them into their own small pots with your regular well-draining potting mix.
The most common issue you’ll encounter is rot. This usually happens if the soil stays too wet, or if you don’t have adequate drainage. If you notice a cutting turning mushy or black, it’s usually a lost cause. Remove it immediately to prevent any spread. Sometimes, stems just fail to root; this is part of the process, so don’t get discouraged.
A Little Encouragement to Finish
Growing new plants from cuttings is one of those magical gardening experiences. It connects you more deeply with your plants and the natural world. It takes a bit of care, a sprinkle of patience, and a willingness to learn. So, give it a go with your Stoebe alopecuroides. Enjoy the process, celebrate every tiny success, and remember, even the most experienced gardeners have cuttings that don’t make it. Happy propagating!
Resource:
https://identify.plantnet.org/k-world-flora/species/Stoebe%20alopecuroides%20(Lam.)%20Less./data