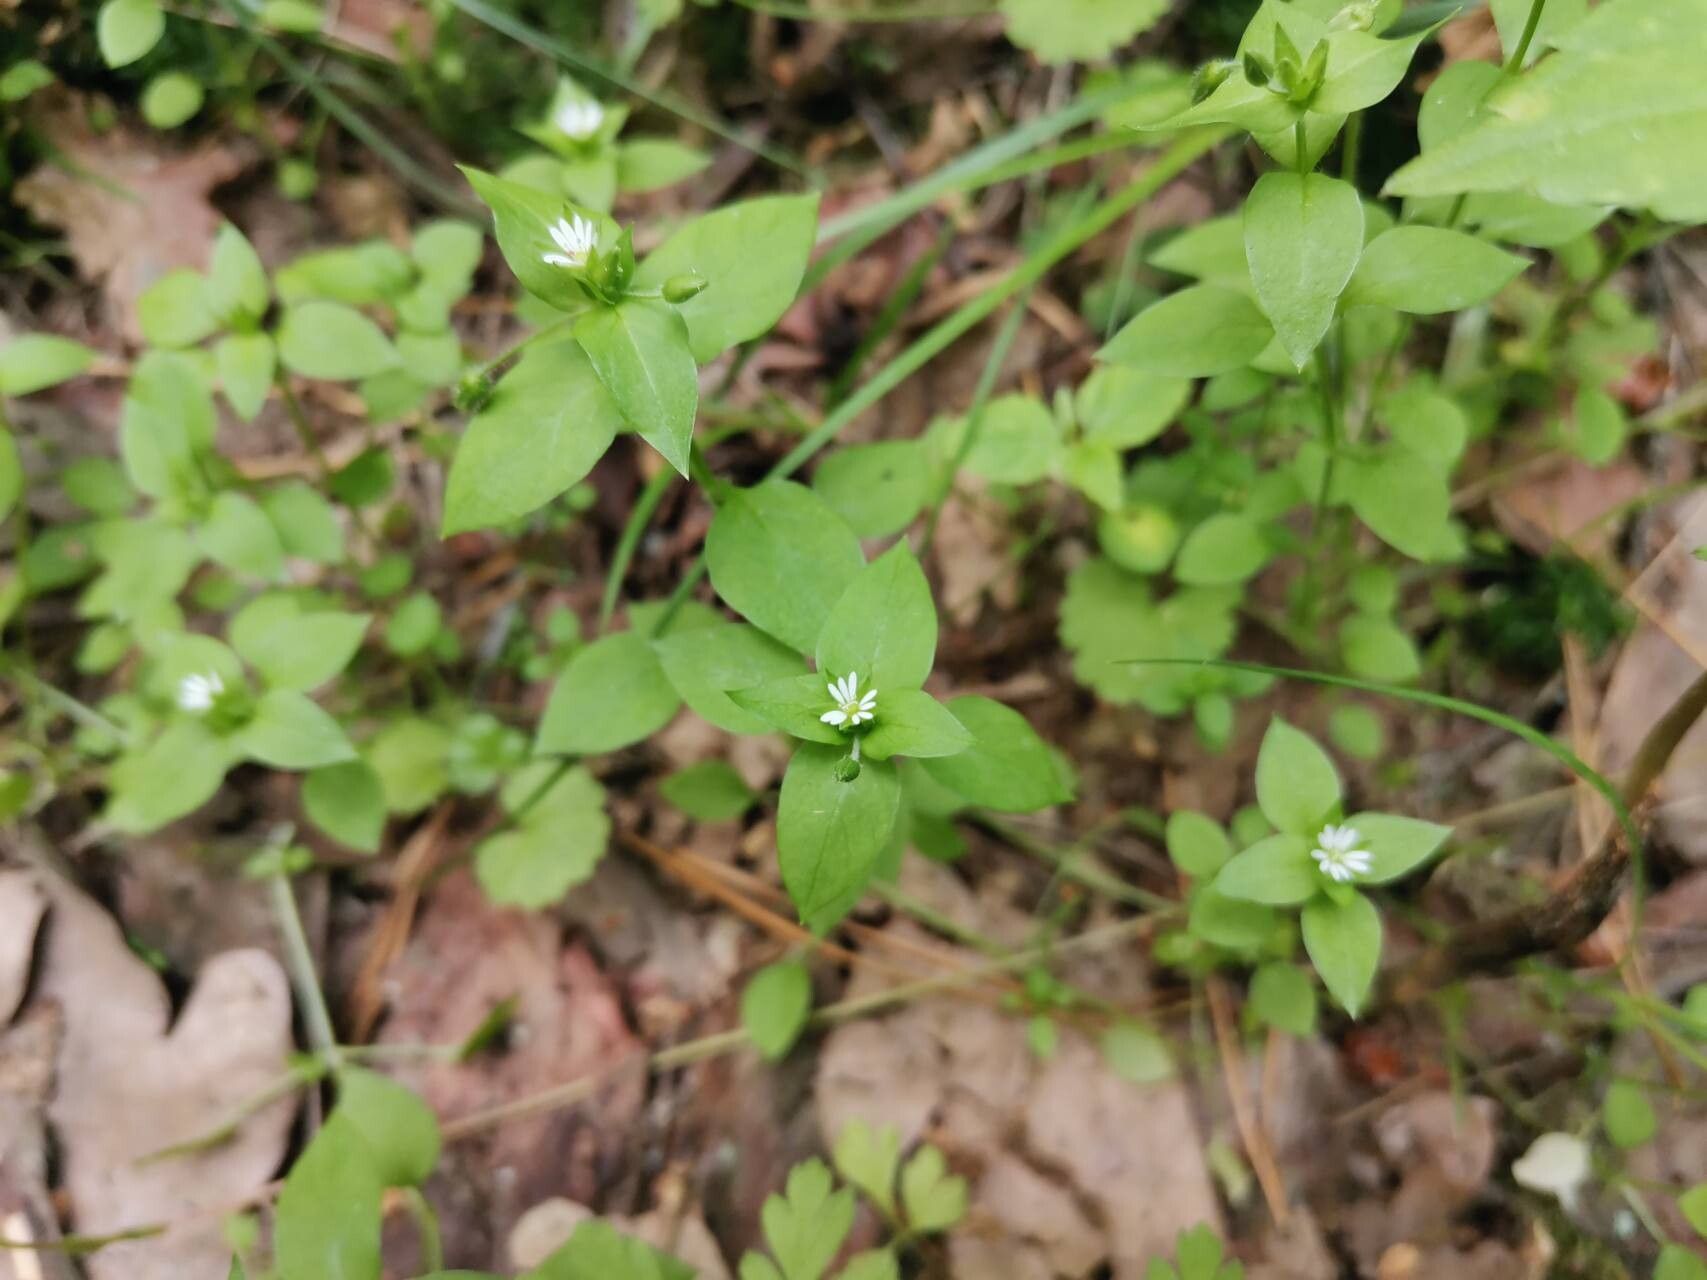
Hello, fellow plant lovers! Today, I want to chat about a truly wonderful little plant that often gets overlooked: Stellaria neglecta, or what we commonly call Greater Chickweed. This cheerful little creeper, with its delicate star-shaped white flowers, is an absolute delight in any garden. It creates a lovely, soft carpet, especially wonderful spilling over the edges of pots or softening rockeries. And the best part? It’s incredibly rewarding to multiply! If you’re just starting out with propagating plants, I’ve got good news: Stellaria neglecta is blessedly easy to propagate. You’ll be making new friends for your garden in no time.
The Best Time to Start
When it comes to coaxing new life from your Stellaria neglecta, spring and early summer are your golden windows. That’s when the plant is actively growing, full of vigor, and just bursting to share its energy. You can also have success with cuttings in late summer if you provide them with a little extra TLC. Look for young, healthy stems that haven’t yet flowered.
Supplies You’ll Need
Gathering your tools makes the whole process smoother. Here’s what I usually have on hand:
- Sharp pruning shears or a clean knife: For taking clean cuts.
- Small pots or seed trays: With drainage holes, of course!
- A good quality potting mix: I like a blend of peat-free compost and perlite to ensure excellent drainage. About a 2:1 ratio works wonders.
- Rooting hormone (optional but helpful): A little powder or gel can give your cuttings a boost.
- Watering can with a fine rose: To avoid disturbing your precious new plants.
- Plastic bags or a propagator lid: To create a humid environment.
Propagation Methods
Stellaria neglecta is quite obliging, and you can propagate it using a few straightforward methods. I find stem cuttings to be the most reliable and easiest for beginners.
Method: Stem Cuttings
- Take your cuttings: In spring or early summer, select healthy, non-flowering stems that are about 3-4 inches long. Using your clean shears or knife, make a clean cut just below a leaf node. A leaf node is where a leaf or bud sprouts from the stem. This is where the magic of root development happens.
- Prepare the cuttings: Gently remove the lower leaves from the cutting, leaving just a few at the top. This prevents them from rotting in the soil and encourages the plant to focus its energy on root production.
- Apply rooting hormone (optional): If you’re using rooting hormone, dip the cut end of the stem into the powder or gel. Tap off any excess.
- Plant your cuttings: Fill your small pots or trays with your prepared potting mix. Gently insert the cut end of each stem into the soil, about an inch deep. You can tuck 2-3 cuttings into a smaller pot, giving them a little space to grow.
- Water gently: Water thoroughly after planting, making sure the soil is moist but not waterlogged.
- Create humidity: Cover the pots loosely with a plastic bag or propagator lid. This creates a humid environment, which is crucial for cuttings while they develop roots. Pop them in a bright spot, but out of direct sunlight.
The “Secret Sauce” (Pro Tips)
Here are a few of my little secrets that I’ve picked up over the years that can really help your Stellaria neglecta cuttings thrive:
- Don’t let the leaves touch the water: If you happen to be experimenting with water propagation (which is also doable with Stellaria!), make sure no leaves are submerged. They will rot, and that’s the quickest way to lose a cutting. Only the stem should be in the water.
- Bottom heat is your friend: If you have a heat mat designed for seedlings and cuttings, placing your pots on it can significantly speed up root development. It mimics the warmth of spring soil and gives those root hormones a real kickstart.
- The “sniff test”: Before you assume a cutting has failed, give it a gentle tug. If it resists and feels firm, it’s likely rooted. Rotting cuttings will feel soft and mushy.
Aftercare & Troubleshooting
Once you start seeing signs of new growth or feel that gentle resistance when you tug a cutting, congratulations! Your plant has rooted.
- Acclimatize slowly: Gradually remove the plastic bag or lid over a few days to help your new plants adjust to normal humidity levels.
- Watering: Keep the soil consistently moist but not soggy. Water when the top inch of soil feels dry to the touch.
- Transplanting: Once the new plants have a good root system and are producing a few leaves, you can gently transplant them into their own pots or into the garden.
Now, what about problems? The most common issue you’ll encounter is rot. This is usually due to overwatering or poor drainage. If you see a cutting turning brown and mushy, sadly, it’s probably a goner. Remove it promptly to prevent any fungal spread. Fungal gnats can also be a nuisance; they’re attracted to damp soil. Letting the top layer of soil dry out slightly between waterings can help deter them.
A Heartwarming Closing
Propagating plants is such a beautiful way to connect with nature and to share the joy of gardening. Don’t get discouraged if a few cuttings don’t make it – it happens to us all! Be patient, keep an eye on your little charges, and celebrate every success. Before you know it, you’ll have a garden brimming with cheerful Stellaria neglecta, all thanks to your own green thumb. Happy propagating!
Resource:
https://identify.plantnet.org/k-world-flora/species/Stellaria%20neglecta%20(Lej.)%20Weihe/data