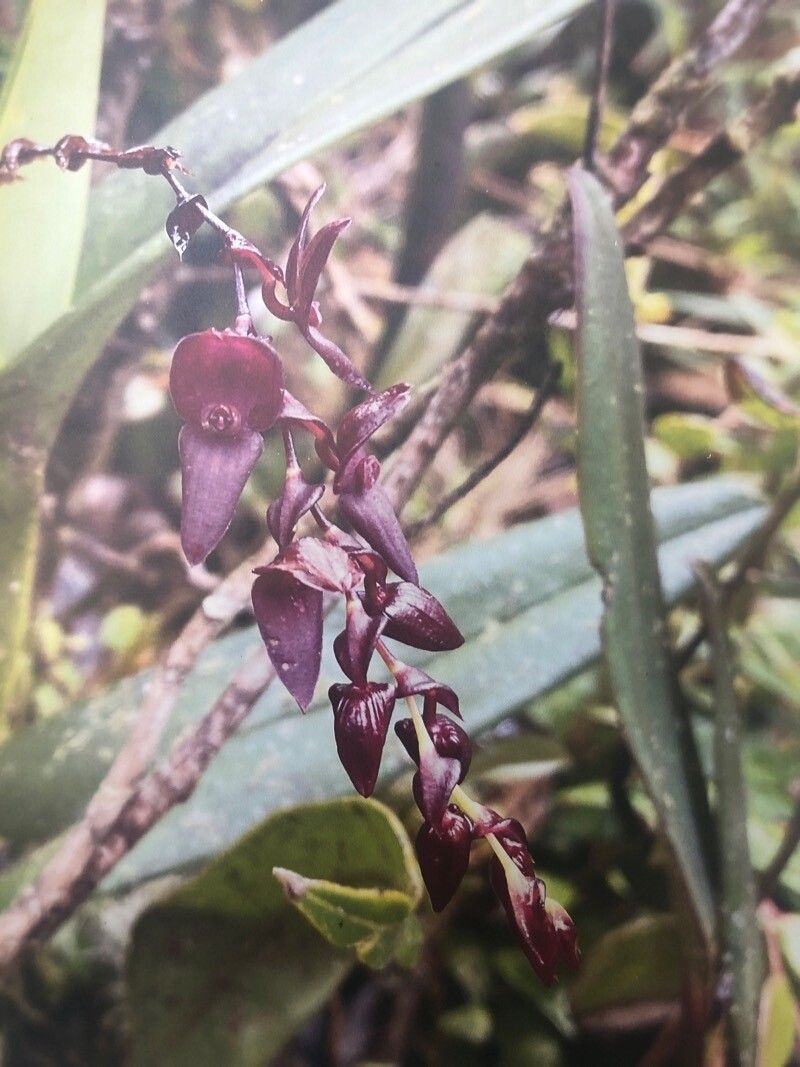
Hello fellow plant lovers! Today, we’re diving into the wonderful world of propagating Stelis maxima. If you’ve ever admired the unique charm of these orchids, with their often intricately patterned leaves and delicate blooms, you know why they capture our hearts. Growing more of them yourself is such a deeply satisfying experience. Now, I won’t sugarcoat it; Stelis maxima can be a bit more on the challenging side, especially if you’re completely new to orchid propagation. But with a little patience and the right approach, you absolutely can succeed!
The Best Time to Start
Timing is everything in the garden, and for Stelis maxima, the ideal window is during its active growth phase. This usually means late spring through summer. You’ll often see new roots and shoots emerging around this time, which tells you the plant has the energy reserves to put into making new babies. Trying to propagate when the plant is resting is like asking your oven to bake cookies without any heat – it’s just not going to happen!
Supplies You’ll Need
Before you get your hands dirty (or, in this case, mossy!), let’s gather our essentials:
- Sharp, sterile cutting tool: This could be a razor blade, a scalpel, or even a very clean pair of pruning shears. Sterilize with rubbing alcohol!
- Orchid potting mix: A good blend for epiphytic orchids is key. I like a mix of fine bark, perlite, and sphagnum moss.
- Small pots or containers: Orchid pots with good drainage are ideal. Small seedling trays work too.
- Rooting hormone (optional but helpful): A powder or gel can give your cuttings a little boost.
- Water: Use filtered or distilled water whenever possible. Tap water can sometimes contain minerals that build up.
- Clear plastic bag or propagation dome: This creates a humid environment for your cuttings.
- Labels and a waterproof marker: Don’t forget to name your precious new plants!
Propagation Methods
Stelis maxima is most commonly propagated through division. This is essentially separating a mature plant into smaller, independent sections.
Division Method:
- Gently remove the plant from its pot. If it’s been in there a while, you might need to loosen the edges with a knife.
- Carefully inspect the root ball. Look for natural breaks where a new pseudobulb and roots are already forming. The goal is to divide the plant into sections, each with at least one healthy pseudobulb and some good roots.
- Using your sterile cutting tool, carefully separate the divisions. If the roots are tangled, you can gently tease them apart with your fingers. Sometimes, a clean cut is necessary. Make sure each division has a good base and some roots attached.
- Remove any dead or damaged leaves or roots. Trim them back.
- Allow the cuts to callus over. This is important! Let the divided sections sit for a day or two in a dry, airy spot. This helps prevent rot.
- Pot up your new divisions. Use your fresh orchid mix in your chosen pots. Plant them so the base of the pseudobulb is at or just slightly above the surface of the mix.
- Water lightly. Just enough to settle the mix.
The “Secret Sauce” (Pro Tips)
Here are a couple of things I’ve learned over the years that can really make a difference:
- Don’t overwater after dividing. This is probably the biggest mistake people make. The new divisions don’t have a strong root system yet, so they can’t absorb much water. Too much moisture will lead to rot. Think “slightly damp” rather than “wet.”
- Humidity is your friend, but ventilation is crucial. That plastic bag or propagation dome is great for holding in humidity, which new roots love. However, you must provide some air circulation. Open the bag daily for a few minutes to let fresh air in and prevent fungal issues.
Aftercare & Troubleshooting
Once your divisions are potted, place them in a bright,indirect light location. Keep the humidity high but ensure good air movement. Avoid direct sunlight, as it can easily scorch their leaves. Water sparingly when the potting medium feels almost dry.
Be patient! It can take several weeks, even months, for a division to establish itself and show new growth. The most common issue you’ll encounter is rot. If you see mushy, dark brown or black areas on the pseudobulbs or roots, it’s a sign of too much moisture and/or poor air circulation. In this case, you might need to repot into drier media or trim away the affected parts and let any remaining healthy sections callus again. If a division just seems to shrivel up and doesn’t grow, it might not have had enough viable roots to begin with. Don’t be disheartened by losses; they happen to every gardener!
A Warm Closing
Propagating Stelis maxima is an exercise in observation and patience. It’s a journey that connects you even more deeply with these beautiful plants. Don’t be afraid to try, and even if your first few attempts aren’t perfect, you’ll learn so much along the way. Enjoy the magic of watching a new plant emerge from something you nurtured! Happy propagating!
Resource:
https://identify.plantnet.org/k-world-flora/species/Stelis%20maxima%20Lindl./data