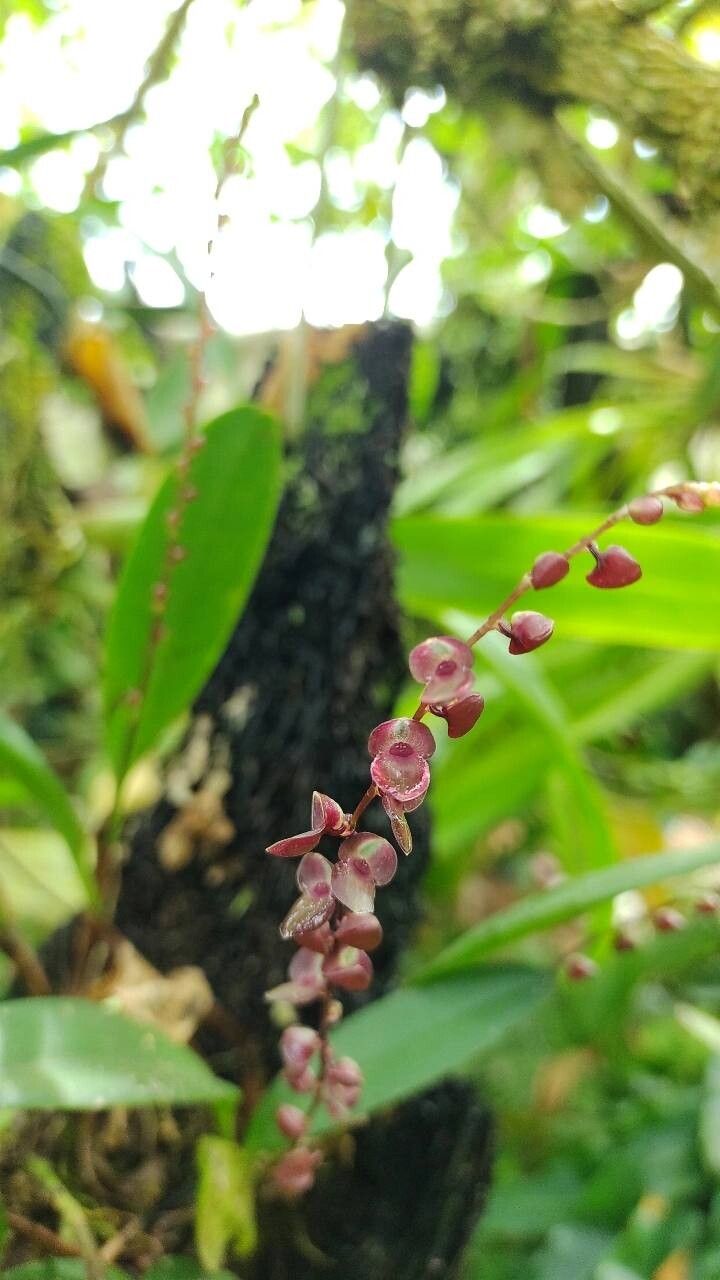
Hello, fellow garden enthusiasts! Today, we’re diving into the delightful world of Stelis lankesteri. These little gems, with their delicate, often jewel-toned flowers, are a true joy to behold. If you’ve ever admired one in a friend’s collection or a local nursery and thought, “I wish I could have that!” – then propagating them is precisely how to make that happen.
While Stelis lankesteri can be a bit more demanding than, say, a common begonia, don’t let that deter you. It’s absolutely achievable, and the reward of nurturing a new life from a single leaf or a tiny division is simply immense. Think of it as a wonderful challenge that sharpens your green thumb.
The Best Time to Start
For Stelis lankesteri, the absolute sweet spot for propagation is when the plant is actively growing, which typically means spring and early summer. After the plant has had a good rest over winter, it’s full of vigor and ready to put out new shoots. You’ll see the most success when you propagate from healthy, vigorous pieces, so wait until you have plenty of growth to work with.
Supplies You’ll Need
Before we get our hands dirty, let’s gather our tools. Having everything ready makes the process so much smoother:
- Clean, sharp pruning shears or a razor blade: For making clean cuts.
- Rooting hormone (optional but recommended): A gentle rooting powder can give your cuttings a boost.
- A well-draining potting mix: I like a blend of fine orchid bark, perlite, and a little bit of sphagnum moss. You want it airy and quick-draining.
- Small pots or community trays: Appropriate size for your cuttings.
- Clear plastic bags or a propagator: To create a humid environment.
- Labels and a marker: To keep track of your precious new plants!
- A watering can with a fine rose: For gentle watering.
Propagation Methods
Let’s get down to business! For Stelis lankesteri, the most reliable methods are division and, with a little care, stem cuttings.
Division (My Favorite for Stelis)
This is often the most straightforward way to propagate Stelis lankesteri. When your plant becomes crowded, or you simply want more, dividing it is the way to go.
- Gently remove the plant from its pot.
- Carefully tease apart the root ball with your fingers or a chopstick. If it’s very tightly matted, you might need to use a clean, sharp knife to cut through the rhizomes. Aim to divide the plant into sections, each with at least 2-3 pseudobulbs and healthy roots.
- Inspect your divisions. Remove any dead or damaged leaves or roots.
- Pot each division into its own small pot using your prepared potting mix. Make sure the top of the roots are just at or slightly below the soil surface.
- Water lightly to settle the mix. Don’t saturate it.
Stem Cuttings (A Bit More Patience Required)
This method is a bit trickier for Stelis as they don’t always root as readily as some other plants, but it’s definitely worth a try if you have a particularly lush specimen.
- Select a healthy stem with at least two sets of leaves.
- Using your clean shears or razor, make a clean cut just below a leaf node. You’re aiming for a cutting that is a few inches long.
- Remove the bottom leaf to expose the node. This is where the roots will emerge.
- Dip the cut end into your rooting hormone, tapping off any excess.
- Gently insert the cutting into your moist, well-draining potting mix. Ensure the leaf node is buried.
- Water very lightly.
After preparing your divisions or cuttings, cover the pots loosely with a clear plastic bag or place them in a propagator to maintain high humidity. This is crucial for newly propagating plants.
The “Secret Sauce” (Pro Tips)
Here are a couple of things I’ve learned over the years that really make a difference:
- Don’t overwater, ever. This is probably the single biggest killer of delicate cuttings and divisions, especially for plants like Stelis that dislike soggy roots. Think of it as “damp, not drenched.” Wait until the potting mix is almost dry before watering again.
- Bottom heat is your friend. If you’re struggling with cuttings or divisions to root, placing them on a propagation mat set to a gentle warmth (around 70-75°F or 21-24°C) can significantly speed up root development. It mimics the cozy warmth of spring soil.
Aftercare & Troubleshooting
Once you see new growth or feel a gentle tug when you lightly pull on a cutting, you know roots are forming! That’s the exciting part.
Caring for your new plant:
- Gradually reduce humidity. As the plant establishes itself, slowly open the plastic bag or propagator over a week or two.
- Continue with gentle watering. Let the potting mix dry out between waterings.
- Avoid direct sunlight. Place your new plant in bright, indirect light.
- Hold off on fertilizer for a few weeks until you see definite new growth.
Troubleshooting:
- Rot: The most common issue is rot, identified by mushy, black stems or leaves. This is almost always due to overwatering. If you catch it early, you might be able to salvage a healthy piece by cutting away the rot and repotting in fresh, dry mix.
- No root development: If after several weeks you see no progress and the cutting or division looks healthy, it might just need more time, especially if it’s cool. Bottom heat can help here. If it starts to look unhealthy, it’s likely best to discard it and try again with fresh material.
Happy Propagating!
Propagating Stelis lankesteri is a rewarding journey that connects you deeper with your plants. Be patient, observe your cuttings closely, and enjoy the process of bringing new life into your home. With a little care and these tips, you’ll soon have a small army of these beautiful blooms to share!
Resource:
https://identify.plantnet.org/k-world-flora/species/Stelis%20lankesteri%20Ames/data