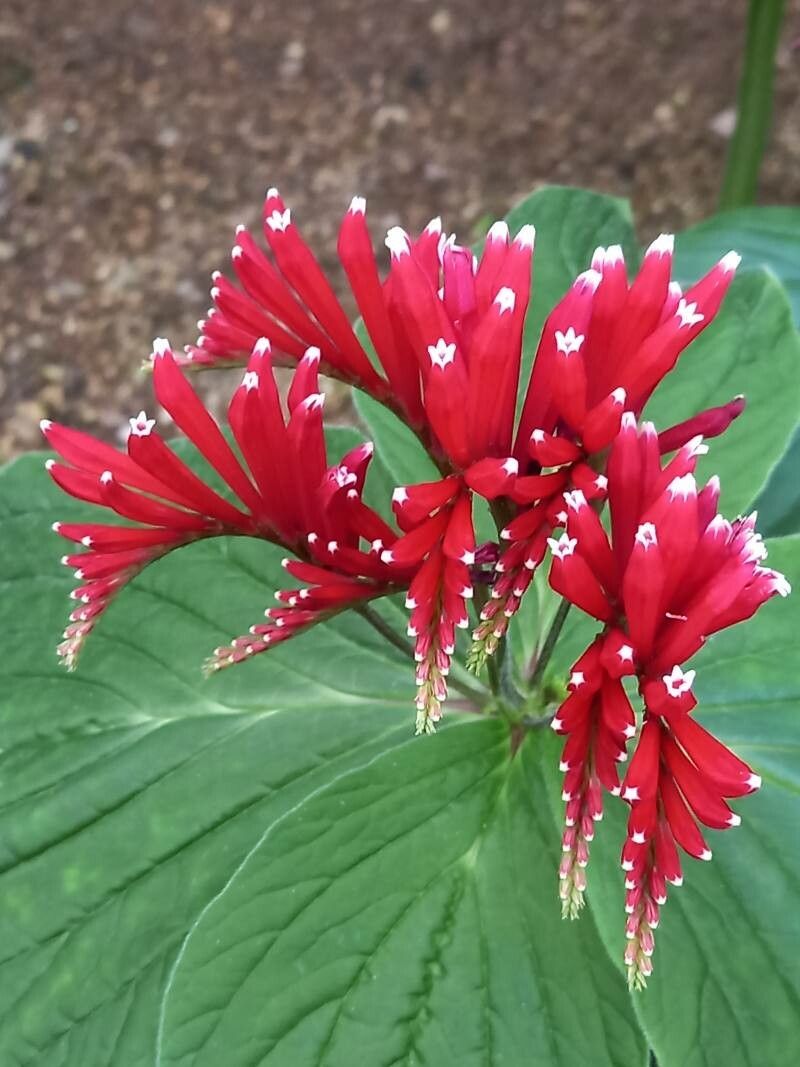
Oh, hello there! Come on in and grab a mug of something warm. Today, we’re going to talk about one of my absolute favorite garden treasures: Spigelia splendens, often called the Indian Pink. If you’ve ever seen this little beauty in bloom, you’ll know why. Those vibrant, trumpet-shaped scarlet flowers with their starry white interiors are just breathtaking. They pop against the deep green foliage, and hummingbirds just adore them.
Now, I won’t lie to you; Spigelia splendens can be a tiny bit fussy. It’s not the absolute easiest plant to propagate for a complete beginner, but with a little patience and these steps, I promise you, it’s incredibly rewarding to make more of this garden gem. Seeing those little roots form is such a thrill, isn’t it?
The Best Time to Start
For Spigelia splendens, I find the late spring to early summer is your golden period. This is when the plant is actively growing and has plenty of energy to push out new roots. I usually wait until after the initial flush of spring blooms has faded a bit, but before the intense heat of mid-summer sets in. You want healthy, vigorous new growth to work with.
Supplies You’ll Need
Gathering your supplies beforehand makes the whole process so much smoother. Here’s what I always have on hand:
- Sharp Pruning Shears or a Clean Knife: For making precise cuts.
- Rooting Hormone (Optional, but helpful!): A powdered or gel form.
- Potting Mix: A very well-draining mix is crucial. I like to use a blend of peat moss, perlite, and a little bit of compost. You can also buy a specific succulent or cactus mix and amend it slightly.
- Small Pots or Seedling Trays: Clean ones, of course! Small pots are often better for cuttings than large ones.
- Plastic Bags or a Propagator: To create a humid environment.
- Watering Can with a Fine Rose: For gentle watering.
Propagation Methods
There are a couple of ways we can coax new Spigelia plants into existence, but my go-to method is stem cuttings.
Stem Cuttings
- Select Your Cuttings: Look for healthy, non-flowering stems. I’m usually aiming for cuttings that are about 4-6 inches long. Make sure each cutting has at least two or three sets of leaves.
- Make the Cut: Using your sharp shears, make a clean cut just below a leaf node. This is where the plant’s magic happens, where it’s most likely to sprout roots.
- Prepare the Cutting: Gently remove the lower leaves from the bottom inch or so of the cutting. You want a clean stem to dip into the rooting hormone and then into the soil.
- Apply Rooting Hormone (If Using): Lightly dip the cut end of the stem into your rooting hormone, tapping off any excess.
- Plant Your Cuttings: Fill your small pots with your pre-moistened potting mix. Make a small hole in the center with your finger or a pencil. Carefully insert the cutting into the hole, ensuring the leaf node is buried. The soil should be snug around the stem.
- Water Gently: Water thoroughly but gently, allowing excess water to drain away.
- Create Humidity: Place the potted cuttings inside a clear plastic bag or a propagator. Seal it up to create a mini-greenhouse. This is vital for preventing the cuttings from drying out. You can also place them in a larger clear plastic tote.
The “Secret Sauce” (Pro Tips)
Here are a couple of things I’ve learned over the years that really make a difference:
- Don’t Let Those Lower Leaves Touch Soil: This might sound odd, but if the leaves you left on the upper part of the cutting are touching the damp soil, they can rot before the roots even have a chance to form. Keep them elevated a bit.
- Bottom Heat is Your Friend: Spigelia loves a bit of warmth from below. If you have a seedling heat mat, placing your pots on it can significantly speed up the rooting process. It mimics that lovely, warm soil temperature they crave.
Aftercare & Troubleshooting
Once your cuttings are potted and tucked into their humid little environments, find a bright spot out of direct sunlight. Consistent moisture is key, but avoid soggy soil. You want the soil to be consistently moist, like a wrung-out sponge, not waterlogged.
Signs of Rotting: If you see your cutting turning mushy, black, or slimy, that’s a sign of rot. This usually means too much moisture and not enough air circulation. You might need to remove it to prevent it from spreading.
When to Check for Roots: Be patient! It can take anywhere from 4 to 8 weeks, sometimes longer, for roots to develop on Spigelia. You can gently tug on the cutting after a few weeks. If you feel resistance, you’ve got roots! You can also look for new leaf growth, which is a good indicator.
Once you see good root development, you can gradually acclimate your new plant to normal room humidity by opening the plastic bag or propagator a little each day over a week or so before transplanting into its own pot.
A Encouraging Closing
Propagating plants is like a little experiment in patience and observation. Don’t get discouraged if one or two don’t make it. Celebrate the successes! The joy of nurturing a tiny cutting into a full, blooming plant is truly something special. So go ahead, give it a try. Your garden, and your Hummingbird friends, will thank you for it!
Resource:
https://identify.plantnet.org/k-world-flora/species/Spigelia%20splendens%20Hook./data