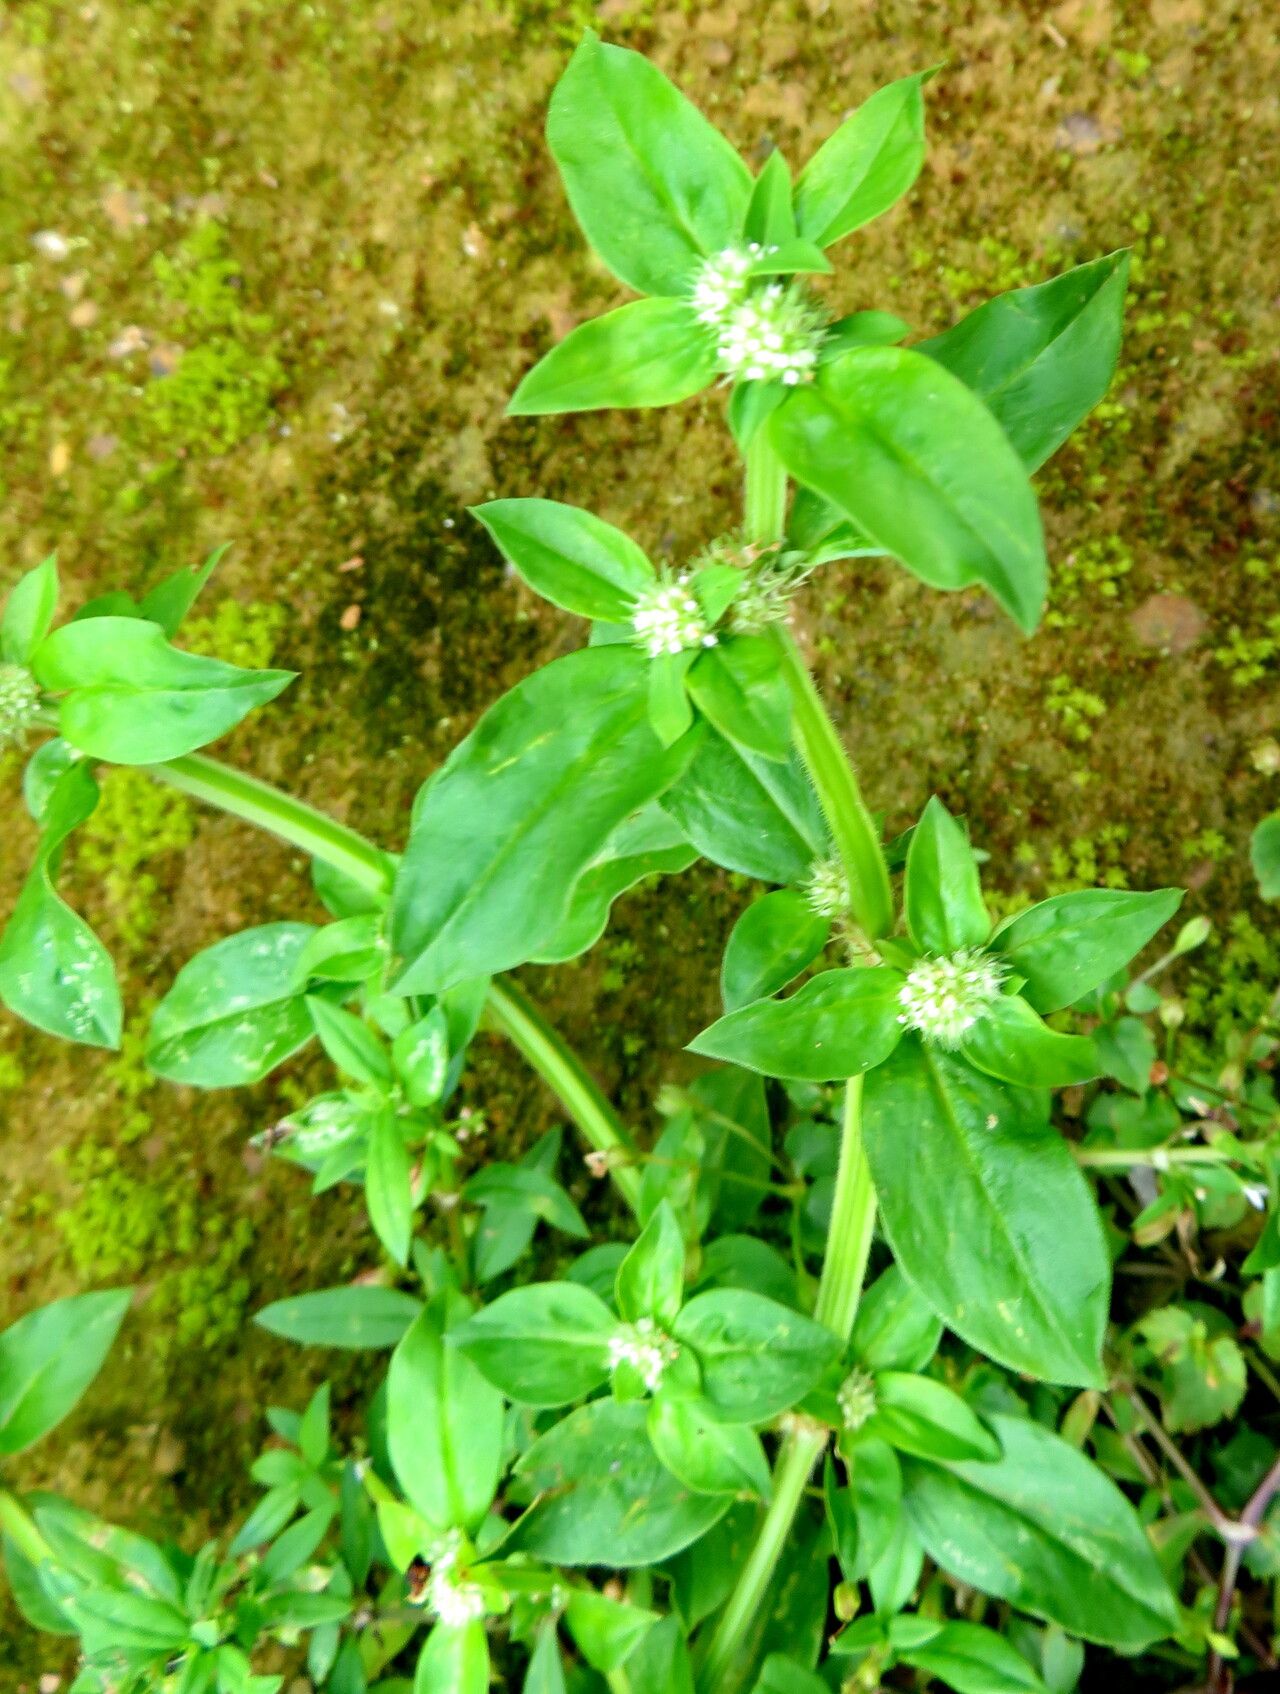
Hello, fellow plant lovers! Today, we’re diving into the wonderful world of Spermacoce exilis. I’ve been tinkering with plants for two decades now, and I can tell you, there’s a special kind of joy in coaxing a new plant into existence. Spermacoce exilis, with its delicate blooms and charming presence, is a real gem. Propagating it is not only possible but also incredibly rewarding, and I’m happy to report that it’s a fairly straightforward process, even for those just starting their plant journey.
The Best Time to Start
For the absolute highest success rate, aim to take cuttings in late spring or early summer. This is when the plant is actively growing and has plenty of energy to fuel root development. Think of it as catching your plant at its most vigorous!
Supplies You’ll Need
Gathering your supplies ahead of time makes the whole process much smoother. Here’s what I usually have on hand:
- Sharp pruning shears or a clean knife:Sterilize them with rubbing alcohol to prevent disease.
- Well-draining potting mix: A blend of equal parts peat moss or coco coir, perlite, and a bit of compost works wonders.
- Small pots or propagation trays: Make sure they have drainage holes!
- Rooting hormone (optional but helpful): A powder or gel form is fine.
- Plastic bags or a propagation dome: This helps maintain humidity.
- Watering can with a fine rose: For gentle watering.
Propagation Methods
I find that stem cuttings are the most reliable and easiest way to propagate Spermacoce exilis.
-
Take the Cuttings: Gently select a healthy stem from your established plant. Look for a piece that’s about 4-6 inches long and has plenty of leaves. Make a clean cut just below a leaf node – that’s the point where a leaf attaches to the stem. This is where the magic of root formation happens! Remove the lower leaves, leaving just a few at the top.
-
Apply Rooting Hormone (Optional): If you’re using rooting hormone, dip the cut end of the stem into it, tapping off any excess. This gives the cutting a little boost to get started.
-
Plant the Cuttings: Moisten your potting mix so it’s damp but not soggy. Make a small hole in the soil with your finger or a pencil. Carefully insert the cut end of the stem into the hole, ensuring it’s firm.
-
Create a Humid Environment: Water the soil gently. Then, cover the pot with a clear plastic bag or place it under a propagation dome. This creates a mini-greenhouse effect, keeping the moisture levels high, which is crucial for cuttings.
-
Provide Light and Warmth: Place the pot in bright, indirect light. Avoid direct sun, which can scorch the delicate cuttings. A little warmth from below, like a heat mat, can really speed up the rooting process, though it’s not strictly necessary.
The “Secret Sauce” (Pro Tips)
After years of trial and error, I’ve learned a few tricks that often make all the difference:
- Don’t Let Those Leaves Touch the Water! If you opt for water propagation (which is also viable for Spermacoce!), be sure to remove all leaves that would sit submerged in the water. Rot sets in quickly if leaves are constantly wet.
- Patience is a Virtue, Especially with Bottom Heat: While I mentioned it earlier, I can’t stress enough how much applied bottom heat can accelerate root formation. It mimics the warmth of spring soil. Even a slightly warmer windowsill can help.
- When in Doubt, Take More: Propagation is a numbers game! Take several cuttings at once from your healthy parent plant. Not every single one will make it, but by taking multiples, you significantly increase your chances of success.
Aftercare & Troubleshooting
Once you start to see tiny white roots emerging from the drainage holes, it’s a good sign that your cutting has successfully rooted! At this point, you can remove the plastic bag or dome gradually to help the new plant adjust to normal humidity. Continue to keep the soil consistently moist but not waterlogged.
The most common issue you might encounter is rot. If your cutting turns mushy or develops black spots, it’s likely a sign of too much moisture and not enough air circulation. In this case, unfortunately, it’s best to discard it and start fresh with a new cutting. You might also see wilting, which can be due to a lack of roots or too much direct sun.
A Encouraging Closing
Propagating plants is a journey of learning and observation. Don’t get discouraged if your first try isn’t perfect. Each attempt teaches you something new. Celebrate every little new leaf and every tiny root that appears. Enjoy the process, and soon you’ll have a whole family of Spermacoce exilis to share with friends or just enjoy in your own garden! Happy gardening!
Resource: