Oh, hello there! Come on in, pull up a chair. I’ve got a fresh pot of coffee brewing, and I wanted to chat with you about a rather special plant: Sorbus coxii.
Unlocking the Magic of Sorbus coxii
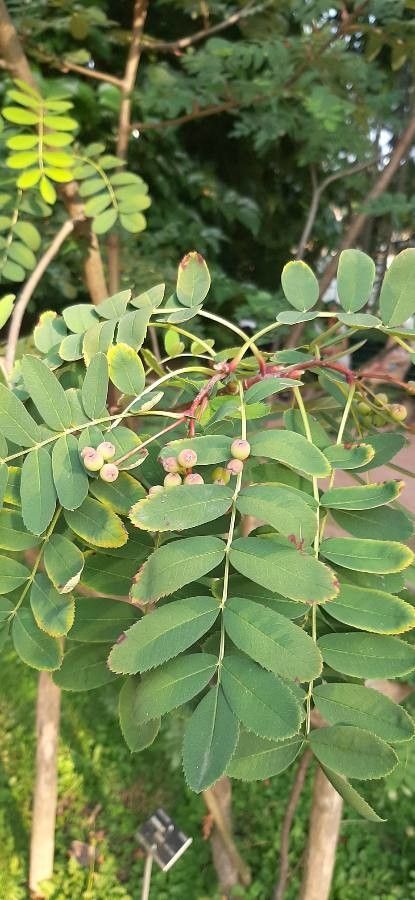
You know, Sorbus coxii has this quiet charm, doesn’t it? With its delicate, fern-like foliage and then, come autumn, those gorgeous little clusters of vibrant berries… it’s a real winner in my book. And the thought of creating more of these beauties from just one? That’s where the real magic lies for a gardener. It’s incredibly rewarding to nurture something new into existence. Now, for beginners, I’d say Sorbus coxii can be a little on the trickier side. It’s not impossible, mind you, but it does appreciate a bit of know-how. Stick with me, and you’ll be well on your way.
When to Bring Forth New Life
The sweet spot for propagating Sorbus coxii is really late spring to early summer. This is when the new growth is young and flexible, but has had a chance to firm up just a touch – what we call semi-hardwood cuttings. You want stems that are bending but not snapping easily when you give them a gentle crease. This stage offers the best of both worlds: enough youthful energy to root, and enough maturity to hold its own.
Your Propagation Toolkit
Alright, let’s gather our supplies so we’re ready to roll:
- Sharp Pruning Shears or a Clean Knife: Essential for making clean cuts. Blurry cuts can invite disease.
- Rooting Hormone: A crucial helper, especially for trickier plants like this. Look for one with a good concentration of IBA.
- A Well-Draining Potting Mix: I like a blend of equal parts perlite, peat moss, and a little bit of coarse sand. If you can find a ready-made seed starting or propagation mix, that’s a good start too. Avoid anything too heavy that will hold excess moisture.
- Small Pots or Seedling Trays: Clean ones, of course! Drainage holes are non-negotiable.
- A Plastic Bag or Clear Dome: To create a humid environment for your cuttings.
- Gravel or Small Stones: To add to the bottom of your pots, if your pots lack drainage holes (though I always recommend pots with drainage!).
Methods to Multiply Your Sorbus coxii
I find stem cuttings to be the most reliable method for Sorbus coxii. It gives you a good chance of success.
Taking and Preparing the Cuttings:
- Select Your Stems: Look for healthy, strong shoots that are about 4-6 inches long.
- Make the Cut: Using your sharp shears, make a clean cut just below a leaf node (where a leaf attaches to the stem). This is where a lot of rooting activity happens.
- Strip Lower Leaves: Gently remove any leaves from the bottom half of the cutting. You want at least two leaf nodes submerged in the rooting medium.
- Dip in Rooting Hormone: Dip the cut end of the stem into your rooting hormone powder. Give it a gentle tap to shake off any excess.
Planting Your Cuttings:
- Prepare Your Pots: Fill your clean pots with your prepared, slightly damp potting mix.
- Make a Hole: Use a pencil or your finger to make a small hole in the center of the potting mix. This prevents the rooting hormone from rubbing off when you insert the cutting.
- Insert the Cutting: Gently place the cutting into the hole, ensuring the leaf nodes you cleared are below the soil surface.
- Firm the Soil: Gently firm the soil around the base of the cutting to ensure good contact.
- Water Gently: Water the potting mix thoroughly but gently. You don’t want to dislodge your carefully placed cuttings.
Creating the Humid Environment:
- Cover Up: Place a clear plastic bag over the pot, or use a clear dome. Make sure the leaves aren’t touching the plastic if possible. If using a bag, you can support it with stakes or chopsticks so it doesn’t crush the cuttings.
- Find a Spot: Place the pot in a bright location, but out of direct, hot sunlight. A north-facing window or a bright spot on a covered porch works wonderfully.
The “Secret Sauce” for Success
Having done this more times than I can count, here are a few little tricks I’ve learned that make a big difference:
- Bottom Heat is Your Friend: If you can, place your pots on a seedling heat mat. This provides gentle warmth to the roots, encouraging them to develop much faster. It’s like giving them a cozy little foot spa!
- Don’t Drench, Just Damp: It’s easy to overwater, and that’s the kiss of death for cuttings. The soil should feel consistently moist to the touch, but never waterlogged. I like to check it by lightly pressing my finger into the soil. If it springs back nicely, it’s usually about right.
- Air It Out: Every couple of days, lift the plastic bag or dome for a few minutes to allow for fresh air circulation. This helps prevent fungal diseases from taking hold.
Aftercare and Troubleshooting
Once your cuttings are happily rooting – you’ll see little white nubs emerging from the cut end, or new leaves starting to unfurl – you can gradually acclimate them.
Transitioning Your New Plants:
- Reduce Humidity: Slowly remove the plastic bag or dome over a week or so, letting the plant get used to less humid air.
- Water Carefully: Continue to water when the top inch of soil feels dry.
- Fertilize Lightly: Once you see strong new growth, you can start feeding them with a diluted, balanced liquid fertilizer every 4-6 weeks.
Watch Out For…
The most common pitfalls are rot and drying out. If the stem turns black and mushy, that’s rot – usually from too much moisture and not enough air circulation. If the leaves start to wilt and dry up, it’s likely too dry. Don’t despair if a few don’t make it; it’s part of the learning process. Keep monitoring, adjust your watering, and ensure good airflow.
Happy Propagating!
You’ve got this! Experimenting with Sorbus coxii is a journey, and each cutting you nurture is a little victory. Be patient, observe your plants closely, and enjoy the wonderful process of bringing more beauty into your garden. It’s truly one of the most satisfying aspects of gardening. Now, let me top up your coffee!
Resource:
https://identify.plantnet.org/k-world-flora/species/Sorbus%20coxii%20McAll./data