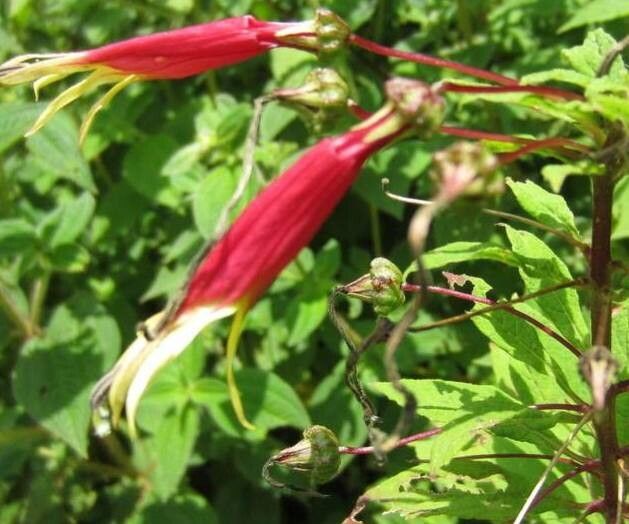
Hello fellow garden enthusiasts! Today, we’re diving into the wonderful world of a plant that brings such a joyful splash of color and delicate charm to any space: Siphocampylus argentinus. If you’ve ever admired its trumpet-shaped, often vibrant flowers, you’re probably like me and have thought, “How can I get more of these beauties?” Well, good news! Propagating Siphocampylus argentinus is a truly rewarding endeavor, and I’m here to walk you through it. Don’t worry, it’s not as daunting as it might sound. With a little patience and the right approach, you’ll be well on your way to a whole new generation of these lovely plants.
The Best Time to Start
For the best chance of success, aim to propagate your Siphocampylus argentinus during its active growing season. This usually means late spring through early summer. At this time, the plant is energized and has the resources to put into developing new roots. Starting with healthy, vigorous stems from a plant that’s already thriving will always give you a head start.
Supplies You’ll Need
To get your propagation station set up, here’s a handy list of what you’ll want to have on hand:
- Clean, sharp pruning shears or a sharp knife: For taking clean cuts.
- Small pots or seedling trays: With drainage holes, of course!
- Well-draining potting mix: A mix of peat moss, perlite, and a bit of compost works beautifully. I often use a seedling starter mix specifically designed to keep things light and airy.
- Rooting hormone (optional but recommended): This helps encourage faster and stronger root development. Look for one containing indole-3-butyric acid (IBA).
- Clear plastic bags or a propagator lid: To create a humid environment.
- A spray bottle: For misting.
- Labels and a permanent marker: To keep track of what you’ve planted!
Propagation Methods
Siphocampylus argentinus is most commonly and successfully propagated from stem cuttings. It’s a straightforward method that yields great results.
-
Taking the Cuttings: Gently select a healthy, non-flowering stem from your mature plant. Using your clean, sharp shears, cut a piece about 4-6 inches long. Make the cut just below a leaf node (the point where a leaf attaches to the stem). This is where the magic happens for root formation.
-
Preparing the Cuttings: Carefully remove the lower leaves from your cutting, leaving just two or three at the very top. This prevents them from rotting in the soil and directs the plant’s energy towards rooting. If your cuttings are extra long, you can also cut larger leaves in half to reduce water loss.
-
Applying Rooting Hormone (Optional): If you’re using rooting hormone, dip the cut end of the stem into the powder or gel. Tap off any excess.
-
Planting the Cuttings: Fill your small pots or trays with your dampened potting mix. Using a pencil or your finger, make a small hole in the center of each pot. Insert the prepared cutting into the hole, ensuring that at least one leaf node is buried beneath the surface. Gently firm the soil around the base of the cutting.
-
Creating Humidity: This is a crucial step! Water the soil lightly so it’s moist but not waterlogged. Then, cover the pots with a clear plastic bag or place them under a propagator lid. This traps moisture and creates the humid environment cuttings need to thrive. Make sure the leaves don’t touch the plastic if possible; if they do, you can prop up the bag with small stakes.
The “Secret Sauce” (Pro Tips)
Here are a couple of little tricks that have made a big difference for me over the years:
- Bottom Heat is Your Friend: While not strictly necessary, placing your pots on a heated propagation mat can significantly speed up root development. It mimics the warmth of the soil in summer and gives those roots a real boost.
- Don’t Let Them Drown: Water is essential, but soggy soil is the enemy of cuttings. Ensure your pots have excellent drainage, and only water when the top inch of soil feels dry. Overwatering is the most common reason for cuttings to fail, often leading to rot.
Aftercare & Troubleshooting
Once your cuttings are planted, place them in a bright spot, but out of direct, harsh sunlight. Keep an eye on that humidity dome – if you see a lot of condensation, vent the bag or lid for a few hours each day to allow for airflow and prevent fungal issues.
After a few weeks, gently tug on a cutting. If you feel resistance, congratulations! Roots have formed. You can then gradually acclimate your new babies to normal humidity by slowly opening the plastic bag or propagator lid over a week or so. Once they’re looking robust, you can pot them up into slightly larger individual containers.
Signs of failure usually appear as yellowing leaves, wilting, or a mushy, dark stem at the soil line – these are often indicators of rot. If you see this, unfortunately, that cutting is likely lost. Don’t get discouraged! Take note of what might have gone wrong (too much water? too much sun?) and try again.
A Rewarding Journey
Propagating Siphocampylus argentinus is a deeply satisfying experience. It’s like getting to know your plants on a whole new level. Be patient with the process, celebrate every little sign of growth, and most importantly, enjoy the journey of creating more beauty for your garden. Happy propagating!
Resource: