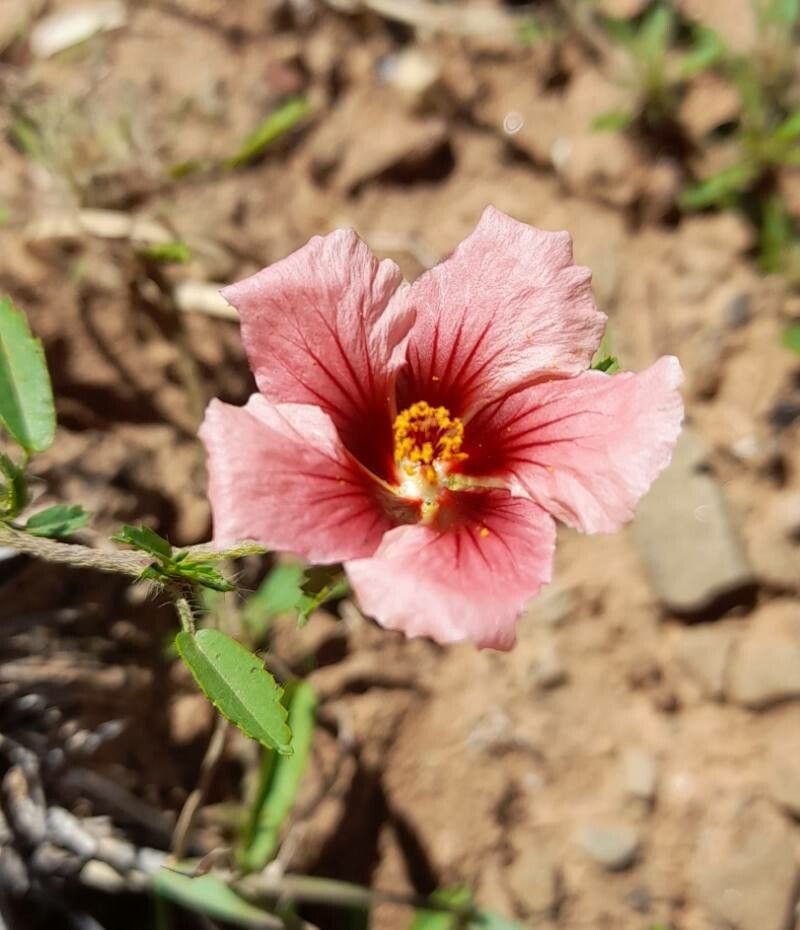
Hello fellow garden enthusiasts! I’m so thrilled to share a little bit of my passion with you today. We’re going to dive into the wonderful world of Sida ciliaris, a plant that brings such delightful charm to any garden. Its cheerful, often bright flowers are a real treat, and propagating it yourself is incredibly rewarding. And the best part? For most of you, this is a wonderfully beginner-friendly plant to work with. You’ll be adding more of these beauties to your collection in no time!
The Best Time to Start
When it comes to getting that propagation ball rolling, I always find the late spring or early summer to be your absolute best bet for Sida ciliaris. This is when the plant is in full swing with its growth spurt, meaning it has plenty of energy to put into developing new roots. You’ll want to look for healthy, new growth – those bright green, non-woody stems are your golden tickets. Avoid anything that looks old or stressed.
Supplies You’ll Need
Gathering your tools beforehand makes the whole process so much smoother. Here’s what I usually have on hand:
- Sharp pruning shears or a clean knife: For making clean cuts.
- Seed-starting mix or a well-draining potting mix: Something light and airy is key. I often mix in a bit of perlite for extra drainage.
- Rooting hormone (optional but helpful): Especially for those new to this, it can give your cuttings a good boost.
- Small pots or trays: With drainage holes, of course!
- Clear plastic bags or a small propagator: To create a humid environment.
- Water: For watering and potentially water propagation.
- Labels or markers: To keep track of what you’ve planted and when.
Propagation Methods
For Sida ciliaris, my hands-down favorite and most reliable method is stem cuttings. It’s straightforward and gives you a great success rate.
- Take Your Cuttings: With your clean shears, select a healthy, non-flowering stem that’s about 4-6 inches long. Make a clean cut just below a leaf node (where a leaf attaches to the stem). Remove the lower leaves, leaving just a few at the top. This prevents them from rotting in the soil or water.
- Prepare the Cuttings: If you’re using rooting hormone, dip the cut end of each stem into the powder. Tap off any excess.
- Plant Your Cuttings: Fill your small pots with your prepared potting mix. Make a small hole in the center of each pot with your finger or a pencil. Gently insert the cutting into the hole, ensuring that at least one leaf node is below the soil surface. Firm the soil gently around the stem.
- Water Gently: Water the soil lightly. You want it to be moist, but not waterlogged.
- Create Humidity: Place the pot inside a clear plastic bag, or cover it with a propagator lid. This will trap moisture and create that humid microclimate cuttings love. You can prop the bag up with a stick if it touches the leaves.
Water Propagation is also a neat option if you’re feeling adventurous, though I find stem cuttings in soil slightly more foolproof for this particular plant.
- Prepare Your Cuttings: Similar to stem cuttings, take 4-6 inch cuttings from healthy stems, removing the lower leaves.
- Place in Water: Put the cuttings in a glass or jar filled with clean water. Make sure the leaf nodes are submerged, but don’t let the leaves themselves touch the water. This can lead to rot.
- Find a Spot: Place the jar in a bright spot with indirect sunlight.
- Change Water Regularly: Change the water every few days to keep it fresh and prevent bacterial growth. You’ll start seeing little white roots appear in a few weeks. Once the roots are about an inch long, you can carefully transplant them into pots with soil.
The “Secret Sauce” (Pro Tips)
Here are a few little tricks I’ve picked up over the years that can really make a difference:
- Bottom Heat is Your Friend: If you can, placing your pots on a heat mat designed for seedlings can significantly speed up root development. Sida ciliaris just loves that gentle warmth from below!
- Don’t Be Afraid to Pinch Back: Once your cuttings have successfully rooted and started to grow, gently pinching off the very tip of the stem will encourage branching. This leads to a fuller, bushier plant sooner rather than later. It feels counterintuitive, but trust me, it works wonders.
- Patience with Potting: When transferring propagated plants into larger pots, be super gentle with those new, delicate roots. Don’t pack the soil too tightly. They’re still getting established, and a light touch goes a long way.
Aftercare & Troubleshooting
Once you see new growth peeking out from the soil, or if you’ve transferred water-propagated cuttings, it’s time to transition to a bit more standard care. Keep the soil consistently moist but not soggy. Gradually remove the plastic bag or propagator lid over a few days to help the plant adjust to normal humidity. Place it in a bright location, but avoid direct, scorching sun for the first week or two.
The most common issue you might encounter is rot. If you see a stem turning black and mushy, it’s a sign of too much moisture and not enough air circulation. Unfortunately, that particular cutting is likely lost. To prevent this, ensure excellent drainage and don’t overwater. Yellowing leaves can sometimes mean it needs a bit more light, or if they’re weak and leggy, more light is definitely the answer.
A Encouraging Closing
Growing new plants from cuttings is such a satisfying experience. It’s a little bit of magic, really, watching a tiny stem transform into a whole new plant. Be patient with the process, celebrate every little success, and don’t be discouraged if a few don’t make it. Each attempt is a learning opportunity, and soon you’ll have a whole garden filled with your own propagated Sida ciliaris. Happy gardening!
Resource:
https://identify.plantnet.org/k-world-flora/species/Sida%20ciliaris%20L./data