Hello, my fellow plant enthusiasts! Today, we’re diving into the fascinating world of Sarracenia psittacina, the parrot pitcher plant. If you’ve ever marveled at its unique, bird-like traps, you know why it’s a standout in any bog garden or terrarium. Propagating these beauties can seem a little daunting, but trust me, with a little know-how and patience, you can expand your collection and share these wonders with friends. While not as straightforward as some common houseplants, Sarracenia psittacina is definitely achievable, especially if you follow some key steps.
The Best Time to Start
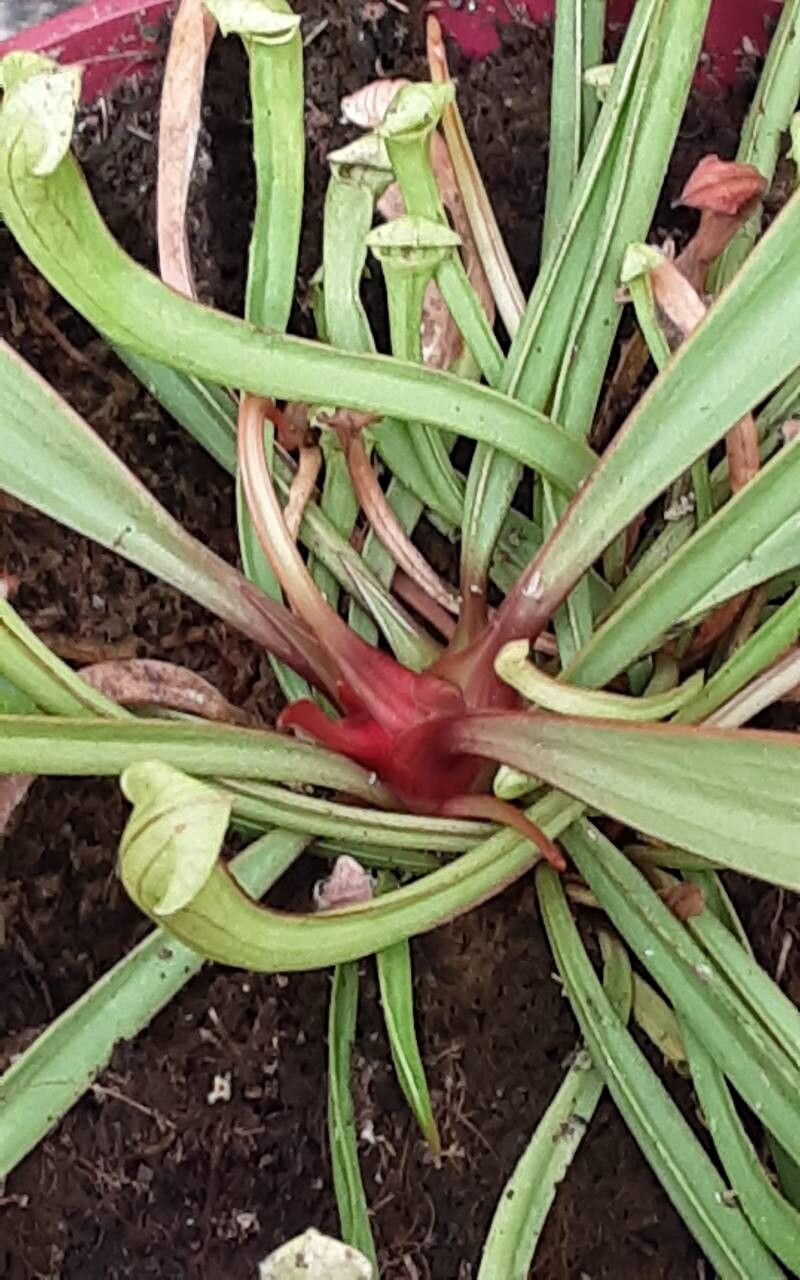
For Sarracenia psittacina, the magic happens in spring, just as the plant is waking up from its winter dormancy and beginning its active growth phase. You’re looking for new growth emerging, often indicated by plump, developing pitchers or new leaves unfurling. This is when the plant has the most energy to dedicate to new roots and shoots. Trying to propagate too late in the season, when growth is slowing down, can lead to lower success rates.
Supplies You’ll Need
Gathering your tools beforehand makes the whole process smoother. Here’s what I usually have on hand:
- Peat moss and perlite: A 50/50 mix is ideal for Sarracenia. It needs to be airy and retain moisture without becoming waterlogged. Ensure your peat moss is sphagnum peat moss, free from any added fertilizers.
- Sharp, clean pruning shears or a hobby knife: For making clean cuts. Sterilize them with rubbing alcohol between uses.
- Small pots or trays: Whatever you have available for your cuttings or divisions.
- Distilled water, rainwater, or reverse osmosis (RO) water: Crucial for all carnivorous plants. Tap water will kill them!
- Optional: Rooting hormone: While not strictly necessary for divisions, some growers find it helpful for cuttings.
- Optional: Heating mat: This can significantly speed up root development, especially for cuttings.
Propagation Methods
There are two main ways I successfully propagate Sarracenia psittacina. Division is generally the easiest and most reliable for beginners.
1. Division (My Go-To Method)
This is essentially like splitting a clump of flowers into smaller, independent plants.
- Gently unpot your Sarracenia psittacina in early spring. Be careful not to damage the root ball.
- Inspect the rhizome (the thick, underground stem). You’ll see where natural divisions have formed, often with new growth points.
- Using your clean shears or knife, carefully separate these divisions. Aim for each division to have at least one healthy pitcher or growth point and some attached roots. It’s okay if you don’t get a ton of roots on each piece; they’ll grow more.
- Pot each division into its own pot filled with your peat moss and perlite mix. Plant it at the same depth it was previously growing.
- Water thoroughly with your distilled water, ensuring the soil is moist but not waterlogged.
2. Stem Cuttings (More Advanced)
This method is a bit trickier and success can vary, but it’s very rewarding when it works!
- Identify a healthy, mature pitcher or growth shoot in spring.
- Using your sterilized knife or shears, make a clean cut at the base of the selected stem, just above the rhizome. You’re essentially taking a stem cutting.
- Remove any lower leaves or smaller pitchers that might touch the water or soil surface.
- Optional: Dip the cut end in your rooting hormone.
- Pot the cutting into a pot filled with your Sarracenia soil mix. Make a small hole and insert the cutting so it stands upright.
- Water gently with your distilled water.
- Provide good humidity and warmth. This is where a heating mat is a real game-changer. You can also place the pot inside a plastic bag or a propagator to increase humidity, but ensure good ventilation to prevent mold.
The “Secret Sauce” (Pro Tips)
After years of trial and error, a few little tricks have really boosted my propagation success:
- Think about airflow: Even with divisions, where you place them matters. Good air circulation around newly potted divisions helps prevent fungal issues. Avoid placing them in stagnant, damp corners.
- Don’t rush the water level: For divisions, I like to keep the soil consistently moist but not waterlogged. For cuttings, if you’re using water propagation (which I don’t typically recommend for Sarracenia unless it’s a very shallow layer for humidity, as they are prone to rot), ensure absolutely no part of the cutting touches the water above the immediate soil level. They rot easily!
- Bottom heat is your friend (especially for cuttings): For stem cuttings, a gentle bottom heat between 70-80°F (21-27°C) will dramatically speed up root formation. It mimics the warmth of spring soil.
Aftercare & Troubleshooting
Once your new Sarracenia babies are potted, the real waiting game begins.
- Watering: Keep them consistently moist. I like to place pots in shallow trays of distilled water so they can wick up moisture as needed. Let the tray dry out slightly between waterings.
- Light: Place them in a bright location with plenty of indirect sunlight. As they establish, you can gradually introduce them to more direct sun, but be cautious as they can scorch.
- Patience: Rooting can take anywhere from a few weeks to a few months. Resist the urge to dig them up and check for roots! You’ll get a feel for when they’re ready. The appearance of new growth is usually the best sign.
The most common issue you might face is rot. This usually happens if the mix is too wet, lacks drainage, or if there’s poor airflow, especially with cuttings. If you see a cutting turning black and mushy, unfortunately, it’s likely a goner. For divisions, if a pitcher seems to be dying off, don’t panic; the rhizome might still be healthy and developing new growth underneath. Just ensure the conditions are right and keep an eye on it.
A Little Encouragement
Propagating carnivorous plants like Sarracenia psittacina is a journey, and like any good gardening adventure, it involves learning and a bit of trial and error. Don’t be discouraged if your first attempt isn’t perfect. Celebrate the successes, learn from the failures, and most importantly, enjoy the process of nurturing these incredible plants. Happy propagating!
Resource:
https://identify.plantnet.org/k-world-flora/species/Sarracenia%20psittacina%20Michx./data