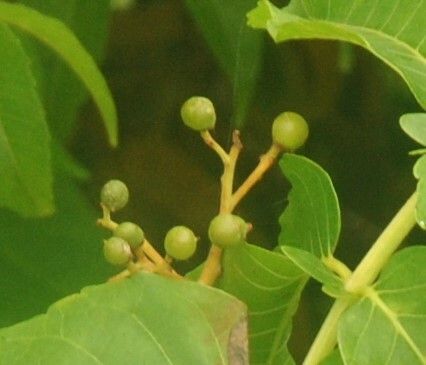
Hello fellow plant lovers! Today, we’re diving into the wonderful world of Sapindus rarak, or as we often lovingly call it, Soapberry. If you’re charmed by its lovely foliage, its fascinating fruit, and the promise it holds for a unique addition to your garden, you’re in for a treat. Propagating your own Soapberry is incredibly rewarding, and while it might seem a tad mysterious at first glance, I promise, with a little know-how and patience, you’ll be well on your way. For beginners, I’d say it’s moderately easy – definitely achievable with a good understanding of the process.
The Best Time to Start
When it comes to getting your Soapberry cuttings to root, spring is your best friend. Think late spring, just as the plant is really getting into its active growing season. This is when the plant has abundant energy, and your cuttings have the best chance to take off. You’re looking for new, healthy growth – not too soft and floppy, but not yet woody and old. A good rule of thumb is to feel the stem; it should be slightly flexible but firm.
Supplies You’ll Need
Gathering your tools before you begin makes the whole process smoother. Here’s what I like to have on hand:
- Sharp pruning shears or a clean, sharp knife: for taking clean cuts.
- Rooting hormone powder or gel: this is a game-changer for encouraging root development.
- Well-draining potting mix: I often use a 50/50 blend of peat moss and perlite, or a store-bought succulent/cactus mix. Good aeration is key!
- Small pots or seed trays: with drainage holes, of course!
- Plastic bag or propagator lid: to create a humid environment.
- Watering can with a fine rose: for gentle watering.
Propagation Methods
The most successful way I’ve found to propagate Sapindus rarak is through stem cuttings. It’s reliable and gives you a great head start.
- Select Your Cuttings: Head out to your healthy Soapberry plant and choose a healthy, non-flowering stem about 6-8 inches long. You want a section that has a few leaves, but isn’t completely covered.
- Make the Cut: Using your sharp shears or knife, make a clean cut just below a leaf node (where a leaf attaches to the stem). This is where roots are most likely to form.
- Prepare the Cutting: Gently remove the leaves from the bottom half of the cutting. If the remaining leaves are very large, you can even cut them in half horizontally – this reduces water loss through transpiration.
- Apply Rooting Hormone: Dip the cut end of the stem into your rooting hormone powder or gel, making sure it’s evenly coated. Gently tap off any excess.
- Plant Your Cuttings: Fill your small pots or trays with your well-draining potting mix. Make a small hole in the center with your finger or a pencil.
- Insert and Water: Carefully insert the treated end of the cutting into the hole, ensuring the node where you removed the leaves is well below the soil surface. Gently firm the soil around the cutting. Water thoroughly but gently until you see water draining from the bottom.
- Create Humidity: Cover the pot with a clear plastic bag, securing it with a rubber band around the rim, or place it under a propagator lid. This creates a mini-greenhouse effect, keeping the humidity high, which is crucial for cuttings.
The “Secret Sauce” (Pro Tips)
After years of trial and error, I’ve picked up a few tricks that really make a difference.
- Don’t let leaves touch the water in your initial setup if you were considering water propagation (though for Soapberry, soil is usually best). If any leaves are submerged, they’ll just rot and potentially infect your cutting before it even has a chance to root. Think clean and clear!
- Bottom heat is your friend! If you have a heat mat designed for seedlings, placing your pots on top of it can significantly speed up the rooting process. This warmth encourages root development from below.
- Be patient with dormancy! Sometimes, cuttings can look like they’re doing nothing for weeks. Don’t be tempted to pull them up too early. Give them at least 6-8 weeks before you gently tug to check for resistance, which indicates root growth.
Aftercare & Troubleshooting
Once your cuttings have developed a good root system – you might see them poking through the drainage holes or feel that resistance when you gently tug – it’s time to give them a bit more space and a different environment.
Transitioning: Gradually acclimate your new plants to less humid conditions by lifting the plastic bag or propagator lid for longer periods over a week or two. Eventually, remove it entirely. Water them regularly, but always allow the top inch of soil to dry out between waterings.
Troubleshooting: The most common issue you might face is rot. This usually happens from overwatering or poor drainage. If you see your cutting looking limp and black at the base, it’s likely too late. Prevention is key: use that well-draining mix, ensure good airflow, and don’t overwater. Yellowing leaves can sometimes indicate too much direct sun or inconsistent watering. Adjust as needed!
A Little Encouragement
Watching a new plant emerge from a simple cutting is one of the most magical parts of gardening. It’s a testament to nature’s resilience and your own green thumb. Don’t get discouraged if not every cutting takes – it’s all part of the learning process. Celebrate the successes, learn from the challenges, and most importantly, enjoy the journey of bringing new Soapberry plants into the world! Happy propagating!
Resource:
https://identify.plantnet.org/k-world-flora/species/Sapindus%20rarak%20DC./data