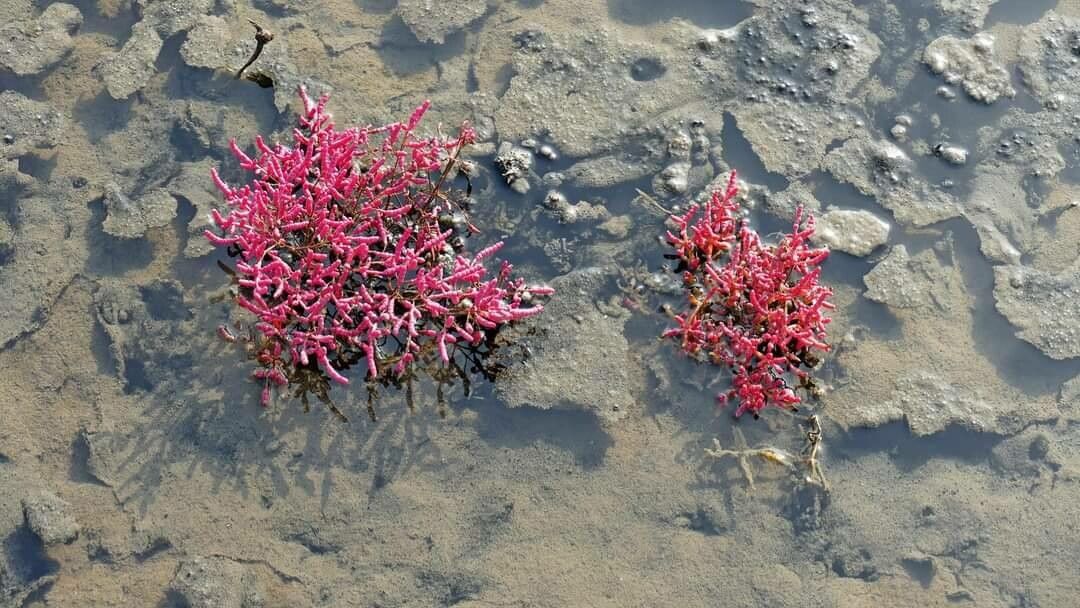
Oh, hello there, fellow plant enthusiast! I’m so glad you’ve stumbled upon this corner of my garden blog. Today, we’re diving into the wonderful world of Salicornia rubra, or as many of us affectionately call it, red glasswort. If you love a plant that brings a unique splash of color and texture to your garden, especially a coastal or rock garden setting, then this is one for you. It’s got this fantastic, juicy, segmented look and a beautiful reddish hue, particularly in cooler weather.
Now, I know some plants can feel a bit intimidating to propagate, but I’m here to tell you that Salicornia rubra is actually a fantastic choice, even for beginners. It’s pretty forgiving, and the reward of seeing those little cuttings take off is just immense. Let’s get growing, shall we?
The Best Time to Start
My absolute favorite time to get Salicornia rubra cuttings is in the late spring or early summer. The plant is typically in full swing, putting on new growth, and those fresh shoots are full of vitality. You want to wait until the plant has established itself for the season, not when it’s still waking up from winter or feeling stressed by the summer heat. This gives the cuttings the best chance to root before the cooler weather sets in.
Supplies You’ll Need
Gathering your supplies beforehand makes the whole process so much smoother. Here’s what I always have on hand:
- Sharp Pruning Shears or a Clean Knife: For making clean cuts.
- Rooting Hormone (Optional, but recommended): A powdered or liquid form can give your cuttings a helpful boost.
- Well-Draining Potting Mix: A succulent or cactus mix is perfect, or you can amend regular potting soil with perlite or coarse sand.
- Small Pots or Seed Starting Trays: Clean containers are key to preventing disease.
- Watering Can or Spray Bottle: For gentle watering.
- Labels and a Marker: To keep track of your cuttings!
Propagation Methods
Salicornia rubra is wonderfully versatile, and for me, the easiest way to get more plants is through stem cuttings. It’s straightforward and usually yields great results.
Stem Cuttings:
- Select Your Cuttings: Look for healthy, non-flowering stems. You want pieces that are about 3-5 inches long. Gently twist or snip them cleanly from the mother plant. Try to get stems that have at least a couple of nodes (the little joints where leaves grow).
- Prepare the Cuttings: If there are any lower leaves that might be submerged in soil or water, carefully pinch or trim them off. This prevents rot.
- Apply Rooting Hormone (Optional): Dip the cut end of the stem into your rooting hormone powder, tapping off any excess.
- Plant Them Up: Make small holes in your well-draining potting mix with a pencil or your finger. Gently insert the cut end of the Salicornia cutting about an inch deep into the soil. Make sure the nodes are buried, as this is where roots will form.
- Water Gently: Give the soil a light watering. You want it moist but not waterlogged. A spray bottle can be helpful here to avoid disturbing the cuttings.
- Provide the Right Environment: Place your pots in a bright spot that gets indirect sunlight. Avoid harsh, direct sun, which can scorch those tender new cuttings.
The “Secret Sauce” (Pro Tips)
Now, for a few little tricks I’ve picked up over the years that can really make a difference:
- Don’t Over-Water! This is crucial for Salicornia. They are succulents, after all. A common mistake is treating them like thirsty annuals. Let the soil dry out slightly between waterings. It’s better to underwater than to overwater when you’re trying to root cuttings.
- Bottom Heat is Your Friend: If you have a heat mat designed for seedlings, placing your pots on it can significantly speed up root development. It mimics the warmth of summer soil, giving those roots a cozy place to establish.
- Patience is Key: I know, I know – easier said than done! But Salicornia can be a bit slow to show signs of rooting. Don’t be discouraged if you don’t see new growth for a few weeks. Resist the urge to pull them up to check for roots!
Aftercare & Troubleshooting
Once you start seeing signs of new growth – tiny new shoots or leaves emerging from the tip or along the stem – you know your cuttings have successfully rooted. You can then begin to treat them a little more like a mature plant. Gradually introduce them to more light (still avoiding intense, scorching sun) and water only when the top inch of soil feels dry.
Now, what if things don’t go as planned? The most common issue you’ll encounter is rot. If your cuttings turn mushy, black, or translucent, it’s almost always a sign of overwatering. This is why that well-draining soil and careful watering are so important. If you catch it early, you might be able to salvage a cutting by taking a fresh, healthy piece from further up the stem and trying again.
A Encouraging Closing
Propagating Salicornia rubra is a truly satisfying endeavor. It’s a chance to connect with your plants on a deeper level and multiply the beauty in your garden. Be patient with the process, trust your instincts, and enjoy watching those little cuttings transform into vibrant new plants. Happy gardening!
Resource:
https://identify.plantnet.org/k-world-flora/species/Salicornia%20rubra%20A.Nelson/data