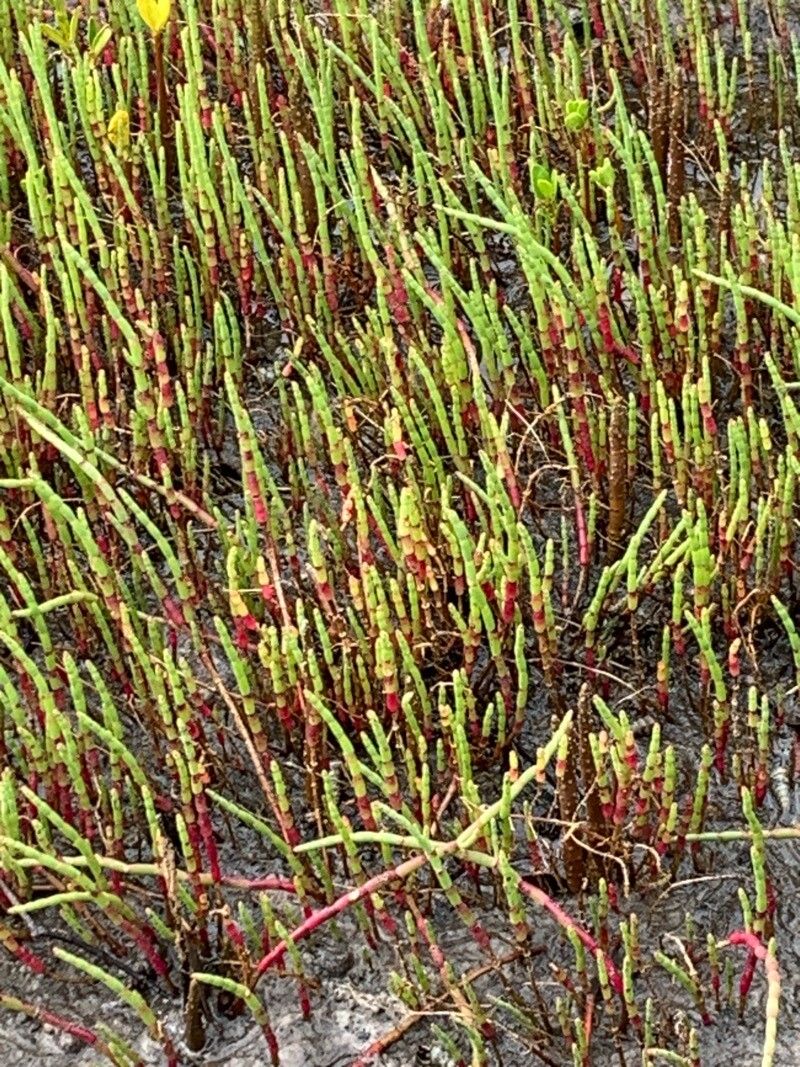
Hello, fellow plant lovers! Today, we’re diving into the wonderfully salty world of Salicornia bigelovii, or as many of us affectionately call it, beach pickleweed. This unique succulent, with its crunchy, briny stems, is a fantastic conversation starter and a surprisingly versatile ingredient in the kitchen. If you’ve ever admired its resilience and thought, “I’d love to grow more of that!”, you’re in for a treat. Propagating Salicornia is incredibly rewarding, and I’m happy to say, it’s quite beginner-friendly! You’ll be amazed at how quickly you can expand your pickleweed patch.
The Best Time to Start
For the absolute best results, I find that spring and early summer are your prime windows for propagating Salicornia. This is when the plant is actively growing and has the most energy to put into developing roots. Look for healthy, vigorous stems that are at least 3-4 inches long. Avoid taking cuttings from plants that look stressed or are flowering – we want robust material to work with!
Supplies You’ll Need
Here’s what you’ll want to have on hand to get your Salicornia propagation underway:
- Sharp Pruning Shears or a Knife: Cleanliness is key to preventing disease.
- Rooting Hormone (Optional, but Recommended): Powdered forms work well.
- Well-Draining Potting Mix: A mix designed for succulents or cacti is ideal. You can also create your own by combining equal parts perlite, coarse sand, and potting soil.
- Small Pots or Trays: Clean containers will do.
- Watering Can or Spray Bottle: For gentle watering.
- A Sunny Location: Bright, indirect light is best initially.
- Optional: Heat Mat: For increased success in cooler environments.
Propagation Methods
Let’s get our hands dirty with a couple of tried-and-true methods for multiplying your Salicornia.
Stem Cuttings
This is by far the easiest and most popular way to propagate Salicornia.
- Select Your Cuttings: Choose healthy, mature stems that are at least 3-4 inches long.
- Make the Cut: Using your sharp shears or knife, make a clean cut just below a node (where a leaf attaches to the stem). A node is where new roots will emerge from.
- Prepare the Cutting: Gently remove the lower leaves from about an inch of the stem. This exposes the nodes where roots can form.
- Apply Rooting Hormone (Optional): Dip the cut end of the stem into rooting hormone powder, tapping off any excess.
- Plant Your Cuttings: Fill your pots or trays with your well-draining potting mix. Make a small hole in the soil with your finger or a pencil.
- Insert the Cuttings: Place the cut end of the Salicornia stem into the hole, ensuring the nodes are buried in the soil. Gently firm the soil around the base of the cutting to hold it in place. You can place multiple cuttings in the same pot, spaced a few inches apart.
- Water Gently: Lightly water the soil. You want it to be moist, not waterlogged. A spray bottle is excellent for this initial watering to avoid disturbing the cuttings.
Water Propagation (for the Patient Gardener!)
While stem cuttings in soil are my go-to, you can also try propagating Salicornia in water, though it requires a bit more attention.
- Prepare Your Cuttings: Follow steps 1 and 2 from the stem cutting method.
- Remove Lower Leaves: Make sure all leaves that would be submerged in water are removed.
- Place in Water: Find a clean glass jar or vase. Fill it with a small amount of fresh water (just enough to cover the nodes you’ve exposed).
- Submerge the Nodes: Place the cuttings in the water, ensuring the nodes are submerged but the remaining stem and leaves are above the water line.
- Change Water Regularly: This is crucial! Change the water every 2-3 days to keep it fresh and prevent bacterial growth.
- Watch for Roots: You should start to see tiny white roots emerging from the nodes within a few weeks. Once the roots are about an inch long, you can carefully transplant them into potting mix.
The “Secret Sauce” (Pro Tips)
Here are a couple of things I’ve learned over the years that really give your Salicornia propagation a boost:
- Don’t Let Leaves Touch the Water (in water propagation): This is a classic mistake that leads to rot. Any submerged foliage will quickly decay, introducing harmful bacteria to your cuttings and preventing root formation. Keep those nodes clean and dry above the waterline!
- Bottom Heat is Your Friend: Especially if you’re propagating in cooler months or your home isn’t particularly warm, a gentle warmth from below can significantly speed up root development. Place your pots on a seedling heat mat set to a low temperature (around 70-75°F or 21-24°C). It makes a surprising difference!
- Don’t Overcrowd: While it’s tempting to pack as many cuttings as possible into a pot, give them a little breathing room. This allows for better air circulation, which helps prevent fungal issues and gives developing roots space to grow.
Aftercare & Troubleshooting
Once your Salicornia cuttings have started to root (you’ll see new growth or feel resistance when you gently tug), you’re on the home stretch!
- Watering: Continue to water sparingly. Allow the top inch of soil to dry out before watering again. Salicornia prefers to be on the drier side, so overwatering is your biggest enemy.
- Light: Gradually introduce your new plants to brighter light. They love sunshine!
- Fertilizing: Once they’ve established and are showing good growth, you can feed them with a diluted liquid fertilizer formulated for succulents or sea vegetables.
Troubleshooting:
- Wilting or Blackening Stems: This is usually a sign of overwatering and rot. If you catch it early, you can try to salvage the cutting by trimming away the rotten parts and repotting in fresh, dry soil. Ensure good drainage and reduce watering frequency.
- No Root Formation: Be patient! Some cuttings take longer than others. Always check the nodes for any signs of swelling or tiny root nubs. If the stem looks healthy and green, it’s still worth waiting. If it turns yellow, mushy, or black, it’s likely time to try again.
A Little Patience Goes a Long Way
Watching a new plant emerge from a simple cutting is one of the most satisfying parts of gardening. Salicornia is a forgiving plant, and with these simple steps, you’ll soon have more of this fascinating succulent to enjoy. Don’t get discouraged if a few don’t make it – it’s all part of the learning process. Happy propagating, and may your beach pickleweed thrive!
Resource:
https://identify.plantnet.org/k-world-flora/species/Salicornia%20bigelovii%20Torr./data