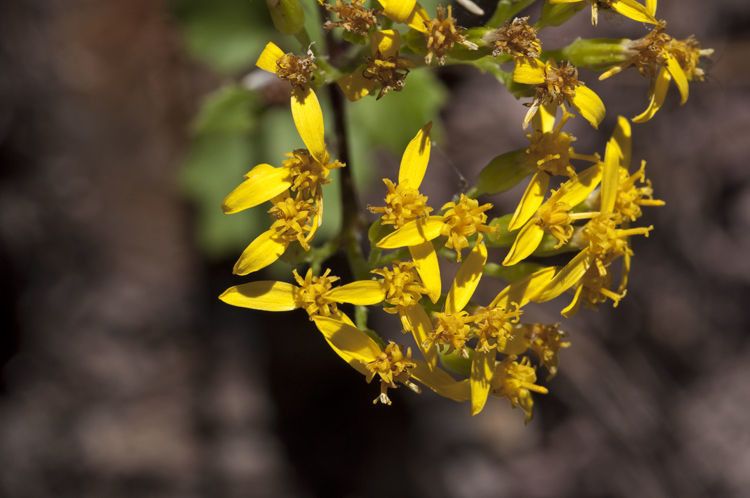
Oh, hello there! I’m so glad you’re interested in Roldana hartwegii. This little gem, often called Mexican Daisy or just Roldana, is just delightful. Its cheerful, daisy-like flowers bring such a burst of sunshine to any spot, and the fuzzy leaves have this lovely texture. Honestly, propagating your own Roldana plants is incredibly rewarding. You get to see life literally spring from a small piece of what you already have. And the best part? If you’re new to this whole plant propagation game, you’ll be happy to know Roldana hartwegii is a very forgiving plant. It’s a great one to start with!
Now, when it comes to giving Roldana the best chance to put down roots, spring is your golden ticket. Specifically, I like to start just as the plant is waking up from its winter rest and beginning its vigorous spring growth. You can also have success later in the summer, but I find that new plants have a better chance of establishing themselves before the cooler weather sets in if started in spring. Look for healthy, actively growing stems.
To get started, you won’t need much, but having the right things makes all the difference. Here’s what I usually gather:
- Clean, sharp pruning shears or a craft knife: For making nice, clean cuts.
- Small pots or seedling trays: About 3-4 inches wide are perfect.
- Rooding hormone (optional but helpful): I like to use a powder kind.
- Well-draining potting mix: A mix designed for succulents and cacti works beautifully here, or you can make your own with equal parts potting soil, perlite, and coarse sand.
- Small watering can or spray bottle: For gentle watering.
- Plastic bags or a propagation lid: To create a mini greenhouse effect.
I find that Roldana hartwegii is happiest when propagated from stem cuttings. It’s straightforward and usually gives fantastic results.
Here’s how I do it:
- Take Your Cuttings: Using your clean shears, select a healthy stem that’s about 4-6 inches long. Make a clean cut just below a leaf node (that little bump where a leaf grows from the stem). Remove the lower leaves, leaving just a couple at the top.
- Prepare the Cutting: If you’re using rooting hormone, dip the cut end into the powder, tapping off any excess.
- Planting Time: Fill your small pots with your well-draining soil mix. Make a small hole in the center with your finger or a pencil. Gently insert the cut end of your Roldana stem into the hole. Firm the soil around it to support the cutting.
- Water Gently: Give the soil a light watering. You want it moist, but not soggy. A spray bottle is great for this initial watering to avoid disturbing the soil too much.
- Create a Humid Environment: Cover the pot with a clear plastic bag or place it in a tray with a propagation lid. This traps humidity, which helps the cuttings stay hydrated while they develop roots. Make sure the leaves aren’t directly touching the plastic. Tuck the edges of the bag under the pot.
Now, for a few things I’ve learned over the years that really seem to help these little ones thrive. Think of these as my gardener’s secrets!
- Bottom Heat is Your Friend: While not strictly necessary, giving your cuttings a bit of gentle warmth from below can really speed up root development. A seedling warming mat set on low is perfect for this. Place your pots on top of it.
- Patience with Light: Don’t be tempted to put your new cuttings in direct, harsh sunlight. A bright spot that gets indirect sunlight is ideal. Too much sun can scorch those delicate baby leaves before they’re ready.
- Air Circulation is Key: Even though we want humidity, don’t suffocate your cuttings! Lift the plastic bag or lid daily for a few minutes to allow for fresh air exchange. This helps prevent fungal issues.
Once you start to see new growth – tiny leaves unfurling or a gentle tug on the cutting revealing some resistance – that’s a good sign that roots are forming! When your cuttings have a good root system, you can transplant them into slightly larger pots. Continue to keep them in bright, indirect light and water them when the top inch of soil feels dry.
Occasionally, you might notice a cutting going limp or turning mushy, especially if it sits in too much water. This is usually a sign of rot. If you see this, unfortunately, that particular cutting is probably a goner. Don’t get discouraged! The best thing to do is remove the rotten cutting immediately to prevent it from spreading and try again with a fresh one. Sometimes, especially with stem cuttings, they might just fail to root. It happens to the best of us! Just learn from it and give it another go.
So, there you have it! Propagating Roldana hartwegii is a wonderful way to expand your collection and share the joy of gardening. Be patient with your new little plants, keep them happy, and enjoy watching them grow. Happy propagating!
Resource: