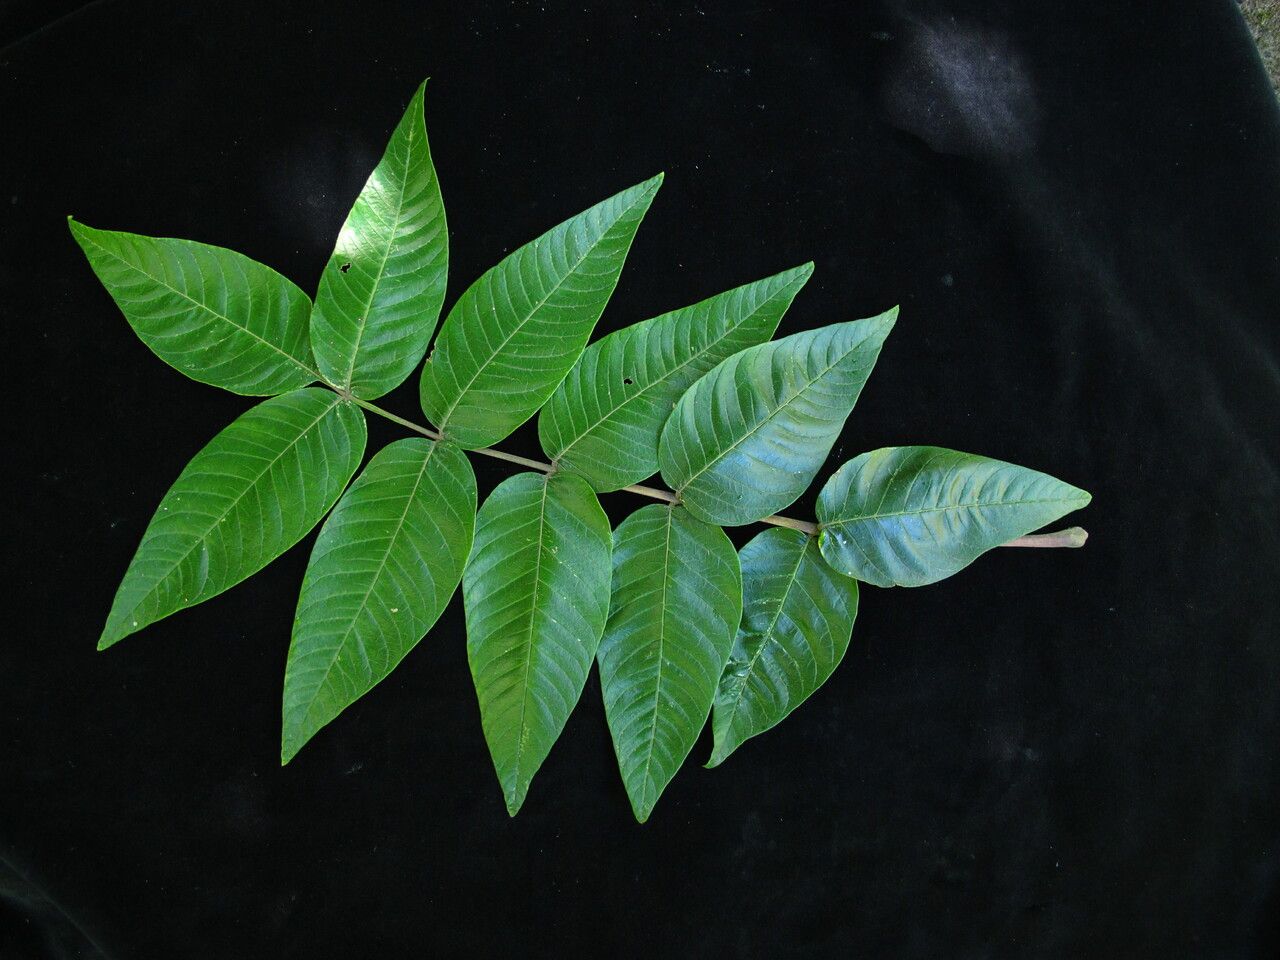
Oh, hello there! Come on in, grab a mug. Today, we’re diving into the wonderful world of Rhus punjabensis, also known as the Himalayan Sumac. If you haven’t had the pleasure yet, let me tell you, it’s a stunner. Its elegant, compound leaves unfurl in a vibrant green, turning fiery shades of red and orange in the fall. It’s unfussy, hardy, and brings such a wild, natural beauty to any garden. And guess what? Propagating it is incredibly rewarding. Honestly, it’s a pretty forgiving plant, so even if you’re just starting out, you’ll likely find success.
The Best Time to Start
For the highest success rate with Rhus punjabensis, I always recommend late spring or early summer. This is when the plant is actively growing, and the new shoots are just beginning to harden off. They have plenty of energy to put into developing roots. Waiting until after your last frost, but before the scorching mid-summer heat, is key.
Supplies You’ll Need
Here’s what you’ll want to have on hand before you begin:
- Sharp pruning shears or a clean knife
- Rooting hormone (powder or liquid) – this is a great little boost
- A well-draining potting mix. I like a blend of equal parts peat moss, perlite, and a bit of compost.
- Clean pots or trays with drainage holes
- A spray bottle for misting
- Optional: A heat mat if you want to give your cuttings an extra edge
Propagation Methods
We’ll focus on the most common and successful method for Rhus punjabensis: stem cuttings.
Stem Cuttings:
- Select Your Cuttings: Look for healthy, non-flowering shoots that are about 4-6 inches long. These should be semi-hardwood – meaning they are flexible but starting to feel a bit firm, not soft and green, and not old and woody.
- Make the Cut: Using your clean shears or knife, make a clean cut just below a leaf node (where a leaf attaches to the stem). This is where the plant’s magic happens for root development.
- Prepare the Cuttings: Gently remove the lower leaves from the cutting, leaving just a few at the top. If you’re using larger leaves, you can even cut them in half to reduce water loss.
- Dip in Rooting Hormone: Dip the cut end of the stem into your rooting hormone, tapping off any excess. This step really helps to encourage strong root growth.
- Plant Your Cuttings: Fill your pots or trays with your prepared potting mix. Make a pilot hole with a pencil or finger, and then gently insert the cutting, firming the soil around it. Make sure none of the leaves are buried in the soil.
- Water and Cover: Water the soil gently until it’s moist but not waterlogged. You can then cover the pots loosely with a plastic bag or place them in a propagator to maintain a humid environment.
The “Secret Sauce” (Pro Tips)
Now, here are a couple of tricks I’ve picked up over the years that can really make a difference:
- Don’t let the leaves touch the water in your propagation trays. If you’re using a tray system, ensure the leaves of your cuttings are well above the surface of the soil or any water reservoir. This prevents rot and fungal issues.
- Bottom heat is your friend. While not strictly necessary for Rhus punjabensis, placing your pots on a gentle heat mat can significantly speed up root formation. It mimics the warmth of spring soil, encouraging those roots to get busy.
- Be patient with the pruning shears. When you think your cutting might have roots, give it a gentle tug. If you feel resistance, you’ve likely got roots! If it pulls out easily with no resistance, it hasn’t rooted yet. Don’t dig around too much.
Aftercare & Troubleshooting
Once you see signs of new growth – little leaves unfurling or a gentle tug resisting – it’s a good sign your cuttings have rooted!
Continue to keep the soil consistently moist but not soggy. Mist them regularly, especially if they aren’t in a covered propagator. As they become more established, you can gradually acclimatize them to drier air by opening up the cover or removing the plastic bag for longer periods. Once they have a decent root system, you can pot them up into individual, slightly larger pots.
The most common issue you’ll encounter is rot. This is usually caused by overwatering or poor drainage. If a cutting goes limp, turns black, or smells ‘off’, unfortunately, it’s probably rotted and you should discard it. Don’t be discouraged; it happens to all of us!
A Encouraging Closing
Propagating plants is a journey, a conversation with nature. It takes a little practice, a bit of patience, and a whole lot of love. Enjoy the process, celebrate each little success, and don’t be afraid to experiment. Soon you’ll have your very own Rhus punjabensis babies to share or to fill your garden with! Happy planting!
Resource: