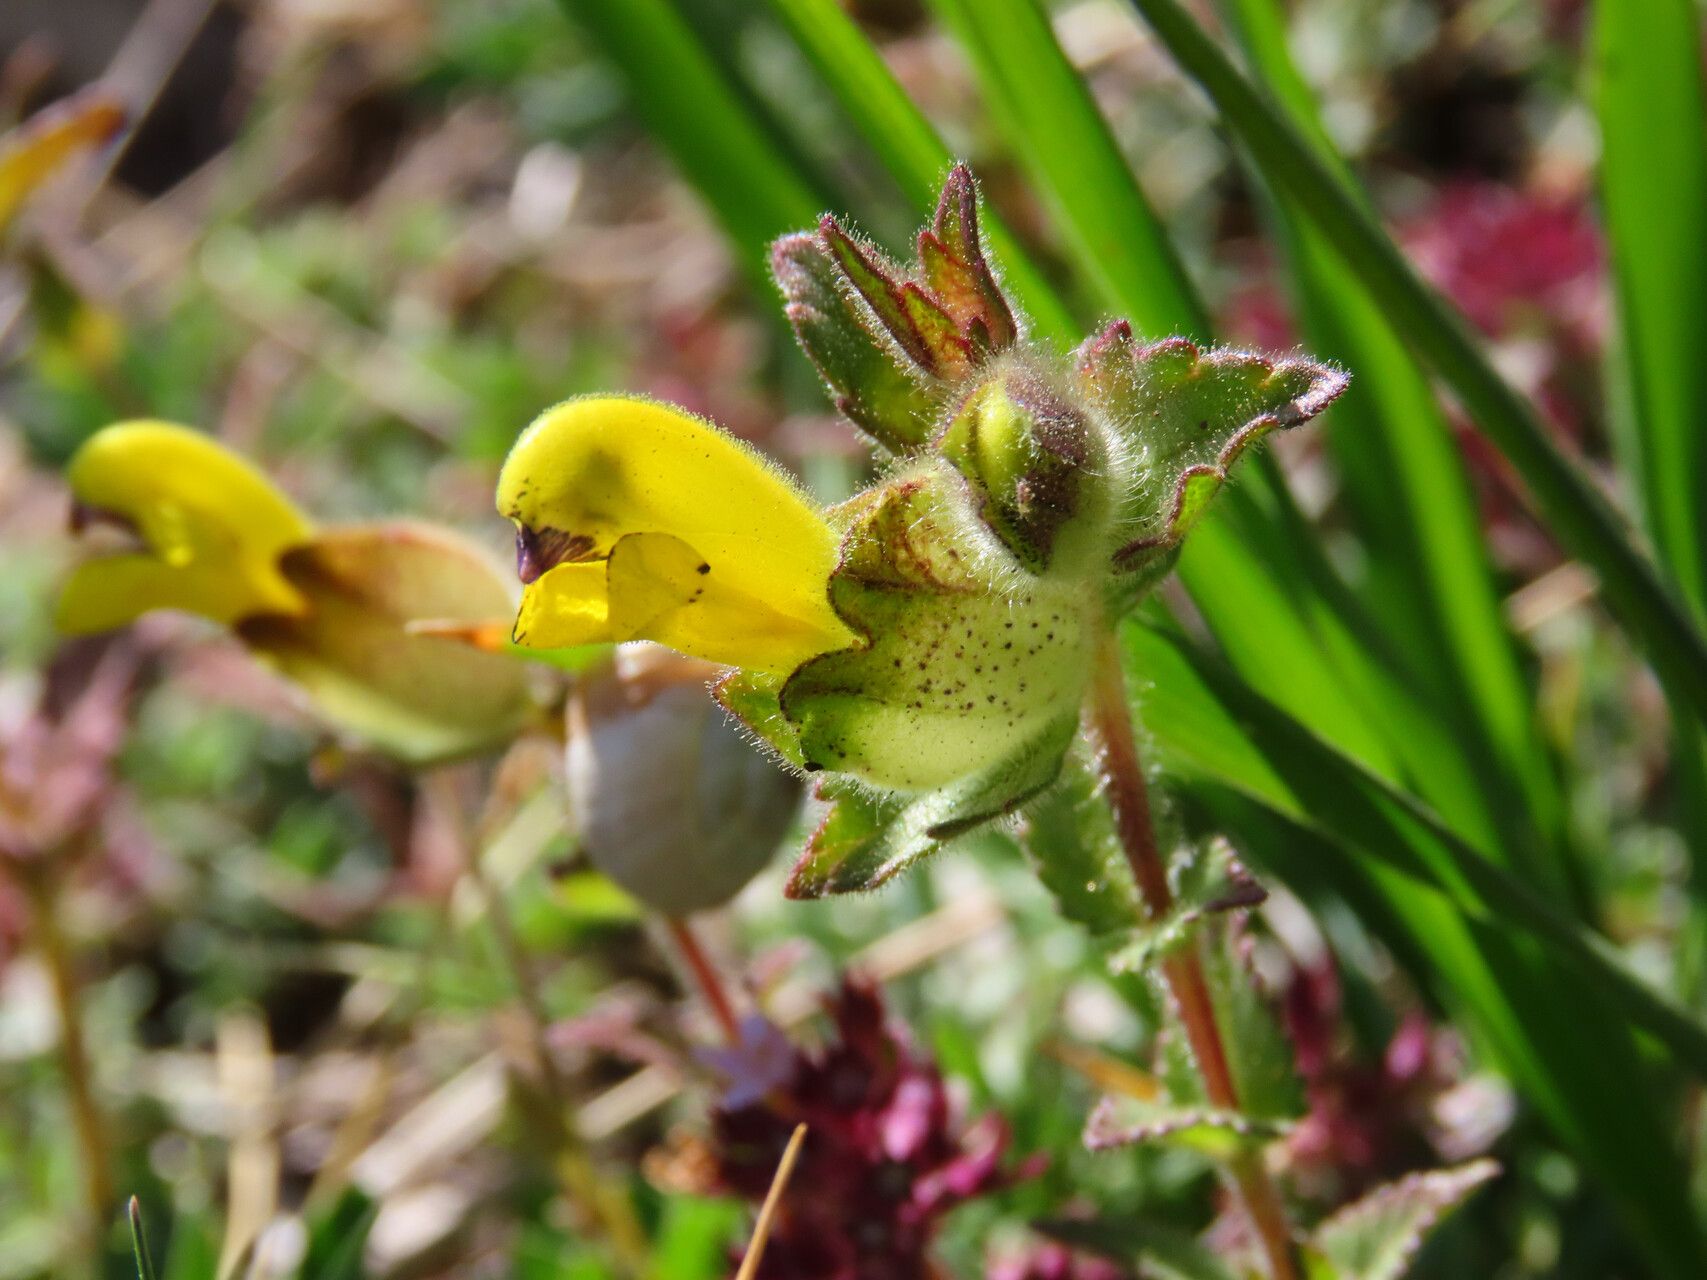
Oh, Rhinanthus wettsteinii! What a truly delightful plant to bring into your garden. Those cheerful yellow blooms, often looking like little snapping mouths, bring such a sunny disposition to any spot. And you know, there’s a special kind of satisfaction that comes from nurturing a brand new plant from a tiny piece of its parent. It’s like a whispered secret shared between you and nature. Now, is Rhinanthus wettsteinii a breezy beginner project? Honestly, I’d say it’s moderately easy, especially if you’re willing to pay a little attention. It’s not a plant that will throw a huge tantrum if you get something slightly wrong, but there are a few things that will really boost your success rate.
The Best Time to Start
From my experience, the absolute prime time to try propagating Rhinanthus wettsteinii is late spring to early summer, right around when the plant is actively growing and building up its energy after flowering (or just before it really gets going, depending on your climate). You want to catch it when it’s full of vigor. Waiting until the plant is well-established in its growth cycle is key, rather than trying to take cuttings from a plant that’s looking a bit stressed or languid.
Supplies You’ll Need
Gathering your tools before you start always makes the process smoother. Here’s what I generally have on hand:
- A sharp, clean pruning shear or craft knife. Sterilize it with rubbing alcohol.
- A potting mix that drains well. A good blend is 50% peat moss or coco coir and 50% perlite or coarse sand.
- Small pots or trays with drainage holes.
- A plastic bag or clear dome to create a mini-greenhouse.
- Optional: Rooting hormone. While Rhinanthus wettsteinii can root without it, a little dip can give you a head start.
Propagation Methods
For Rhinanthus wettsteinii, I find the most reliable methods are stem cuttings and, if you’re lucky, dividing them when they’re well-established.
Stem Cuttings
This is my go-to for adding more Rhinanthus to my collection.
- Select your parent plant. Look for a healthy stem that isn’t flowering and has at least two sets of leaves.
- Take your cutting. Using your clean shears, cut a piece of stem about 4-6 inches long, making the cut just below a leaf node (where a leaf attaches to the stem).
- Prepare the cutting. Gently remove the lower leaves from the bottom half of the cutting, leaving just the top two or three sets of leaves. If the leaves are very large, you can cut them in half horizontally to reduce water loss.
- Apply rooting hormone (optional). Dip the cut end into rooting hormone, tapping off any excess.
- Plant the cutting. Make a small hole in your soil mix with a pencil or your finger and insert the cut end. Firm the soil gently around the stem, making sure the leaf nodes are buried.
- Water gently. Water the pot thoroughly but avoid waterlogging.
- Create a humid environment. Cover the pot with a plastic bag (propped up so it doesn’t touch the leaves) or a clear dome. Place it in a bright spot, but avoid direct sunlight, which can scorch the delicate cuttings.
Division
If you have a mature, healthy clump of Rhinanthus wettsteinii, you can try dividing it in early spring.
- Carefully dig up the plant. The goal is to disturb the roots as little as possible.
- Gently separate the root ball. You might be able to tease sections apart with your fingers. If not, a clean trowel or knife can help. You’re looking for sections with healthy roots and some shoots.
- Repot the divisions. Plant each division into its own pot with fresh, well-draining soil. Water thoroughly.
The “Secret Sauce” (Pro Tips)
These are little things I’ve learned over the years that make a big difference.
- The “Air Gap” is Crucial: When you’re using a plastic bag or dome, ensure there’s space between the covering and the leaves. If the leaves are constantly touching the plastic, they’re more prone to rot and disease. It’s all about circulating that humid air, not sealing them in a suffocating, wet hug.
- Bottom Heat is Your Friend: Especially if your house is on the cooler side, placing your pots on a gentle heat mat can significantly speed up root development. It mimics the warmth of spring soil beautifully and gives those little roots the encouragement they need to emerge.
- Don’t Be Afraid to Adjust: You’ll want to uncover your cuttings for a few minutes each day to allow for air exchange and prevent fungal issues. This also gives you a chance to check on moisture levels. It’s a balance – you want humidity, but not stagnant, soggy air.
Aftercare & Troubleshooting
Once you see signs of new growth – tiny leaves emerging from the top or even a peek of white root through the drainage hole – that’s your cue!
- Gradual Acclimation: Don’t plunge your new little babies into the harsh outdoor elements too quickly. Gradually remove the plastic covering over a week or so. Start by taking it off for a few hours each day, then longer, until they are used to the open air.
- Keep them Moist but Not Soggy: Continue to keep the soil consistently moist. A good test is to stick your finger about an inch into the soil. If it feels dry, it’s time to water.
- Common Pitfalls: The most frequent issue you’ll encounter is rot. This usually happens because the soil is too wet or there’s not enough air circulation. If a cutting turns mushy and black, unfortunately, it’s usually a lost cause. Another sign of trouble can be wilting that doesn’t recover after watering – this might mean the roots haven’t formed yet, or they’re struggling to take up water. Don’t despair if a few don’t make it; it’s all part of the learning curve.
A Encouraging Closing
Growing plants from cuttings is such a rewarding journey. It takes a bit of patience, a dash of observation, and a whole lot of love. Don’t be discouraged if your first attempts aren’t perfect. Each plant you nurture from a tiny piece of another is a mini-miracle, and the joy it brings to your garden is immeasurable. So go ahead, get your hands dirty, and enjoy the magic of creating new life!
Resource:
https://identify.plantnet.org/k-world-flora/species/Rhinanthus%20wettsteinii%20(Sterneck)%20Soó/data