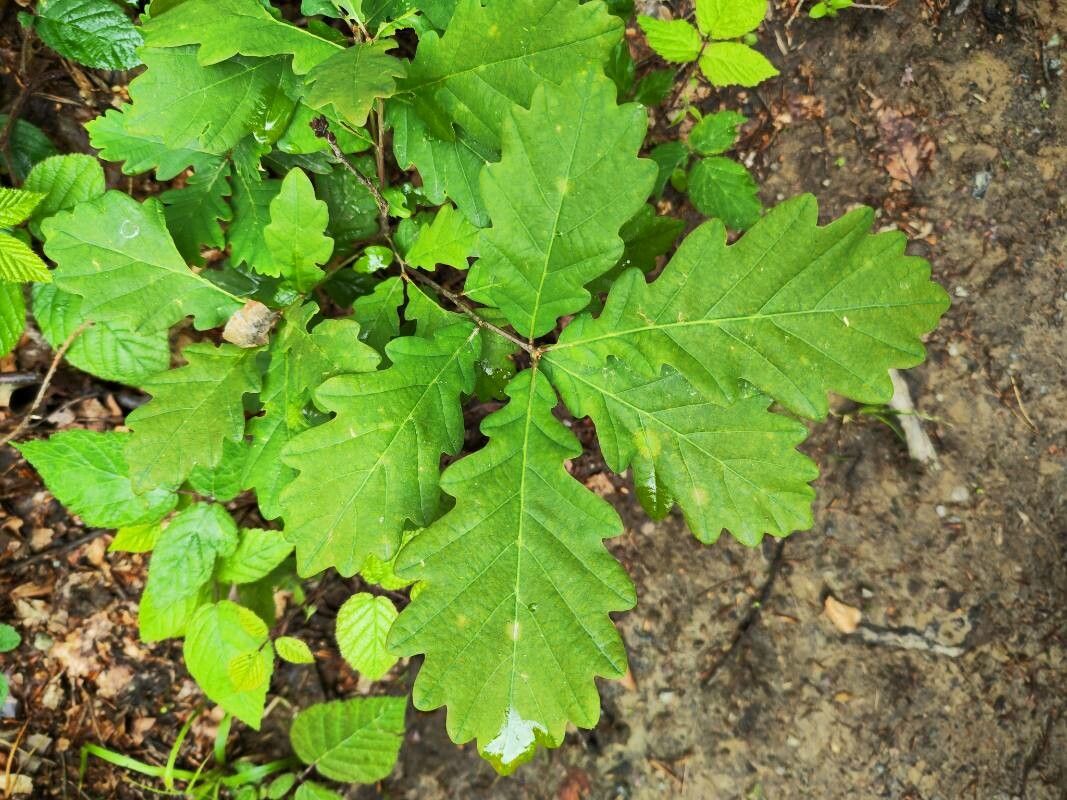
Oh, hello there! Come on in and grab a mug. We’re going to talk about something truly special today: Quercus canariensis, the Algerian Oak. I’ve always been a sucker for its luscious, deep green leaves and its dignified, spreading habit. It’s a magnificent tree, isn’t it? And the idea of growing your own from scratch? Talk about a gardener’s thrill!
Now, before we dive in, let me be honest. Propagating Quercus canariensis can be a bit of a journey. It’s not the easiest plant for a complete beginner to start with, but with a little patience and the right approach, you can absolutely achieve success. Think of it as a rewarding challenge – like learning to bake that perfect sourdough.
The Best Time to Start
The sweet spot for propagating Algerian Oaks is quite specific. You’ll want to work with fresh acorns as soon as they drop from the parent tree, which is typically in the fall. This is when they are at their most viable and ready to sprout. If you’re considering cuttings, then late spring to early summer, when the new growth is still somewhat soft but hardening off, is the most promising window.
Supplies You’ll Need
Gathering your tools beforehand makes the whole process smoother. Here’s what I always have on hand:
- Fresh Quercus canariensis acorns or semi-hardwood cuttings.
- Sharp pruning shears or a clean, sharp knife for taking cuttings.
- A well-draining potting mix. I like a blend of peat moss, perlite, and a bit of coarse sand.
- Rooting hormone powder (optional, but can give an extra boost to cuttings).
- Small pots or propagation trays with drainage holes.
- A clear plastic bag or propagation dome to maintain humidity.
- A spray bottle for misting.
- A warm, bright location (but not direct, scorching sun initially).
- Coarse grit or gravel for the bottom of pots if you’re worried about drainage.
Propagation Methods
We’ll focus on the two most common and effective ways to get a new Algerian Oak growing.
Propagating from Acorns
This is the most straightforward method, provided you can get your hands on fresh acorns.
- Collect the Acorns: As soon as they fall in the autumn, gather as many healthy-looking acorns as you can. Discard any that show signs of insect damage or are cracked.
- The Float Test: Fill a bowl with water and drop your acorns in. The ones that float are likely not viable, so set them aside. The ones that sink are your candidates!
- Stratification (The Cold Treatment): This is crucial! Acorn germination often requires a period of cold, damp conditions to break dormancy. You have a couple of options here:
- In a Bag: Mix your viable acorns with some slightly damp peat moss or vermiculite in a resealable plastic bag. Store this in the refrigerator (not the freezer!) for 6 to 12 weeks. Check the moisture level periodically and mist if it dries out.
- Direct Sowing (Fall Planting): If you live in a climate with cold winters, you can sow the acorns directly into pots filled with your potting mix in the fall. Plant them about 1-2 inches deep, with the pointed end facing downwards. Then, simply leave them outside in a sheltered spot to experience natural winter stratification.
- Planting After Stratification: Once your acorns have been stratified (either in the fridge or naturally outdoors), plant them point-down about 1 inch deep in your well-draining potting mix.
- Water Gently: Water the soil thoroughly but gently. You don’t want to disturb the acorns too much.
- Provide Warmth and Light: Place your pots in a bright location, but avoid direct, intense sunlight. A greenhouse or a bright windowsill works well.
- Be Patient! Germination can take anywhere from 3 weeks to several months. You’ll see a root emerge first, followed by a shoot.
Propagating from Cuttings
This method is a bit more advanced but can be very rewarding.
- Take Cuttings: In late spring or early summer, choose healthy, semi-hardwood stems that have started to firm up but aren’t completely woody. Look for stems that are about pencil-thick and at least 6 inches long. Using your sharp shears, make a clean cut just below a leaf node (where a leaf attaches to the stem).
- Prepare the Cuttings: Remove the leaves from the bottom half of the cutting. If you have very large leaves, you can cut them in half to reduce water loss.
- Apply Rooting Hormone (Optional): Dip the cut end of each cutting into rooting hormone powder, tapping off any excess.
- Plant the Cuttings: Fill small pots with your well-draining potting mix. Make a hole with a pencil or dowel and insert the cutting about 2 inches deep, ensuring the nodes where you removed leaves are below the soil surface. Gently firm the soil around the cutting.
- Water and Cover: Water thoroughly and then cover the pot with a clear plastic bag or a propagation dome. This traps humidity, which is vital for cuttings.
- Provide Warmth and Light: Place the pots in a bright location, away from direct sun. A spot on a heat mat can significantly improve success rates, as oak cuttings appreciate bottom warmth.
- Mist Regularly: Mist the inside of the plastic bag or dome daily to keep the environment humid. You can also mist the cuttings themselves.
- Check for Roots: This can take anywhere from 4 to 12 weeks. You can gently tug on a cutting; if there’s resistance, it means roots have formed. Alternatively, you might see roots poking out of the drainage holes.
The “Secret Sauce” (Pro Tips!)
Here are a couple of things I’ve learned over the years that really make a difference.
- For Cuttings, Bottom Heat is Your Friend: Oaks can be a bit stubborn when it comes to rooting. Placing your pots on a propagator with a thermostatically controlled heat mat really speeds things up and significantly increases your success rate. It mimics the warmth of spring soil.
- Don’t Drown Your Acorns: When sowing acorns, especially after stratification, it’s easy to overwater. The soil should be consistently moist, but never waterlogged. Soggy conditions can lead to rot, and that’s a quick way to lose your precious acorns.
- Label Everything! Seriously, take it from me. If you’re trying multiple methods or have different batches, label your pots with the date and method. You’ll thank yourself later when you’re trying to remember what was what!
Aftercare & Troubleshooting
Once your acorn sprouts or your cutting shows signs of rooting, it’s time to shift your focus.
- Gradual Acclimatization: If you’ve been using a plastic bag or dome for cuttings, gradually open it up over a week or so to let the new plant get used to ambient humidity.
- Watering: Continue to water regularly, allowing the top inch of soil to dry out slightly between waterings.
- Light: Gradually move your new seedling or rooted cutting into brighter light, but continue to avoid harsh, direct sun for the first few months until it’s well established.
- Fertilizing: Wait until you see new leaf growth before introducing a very diluted liquid feed.
- Signs of Trouble: The most common issue you’ll encounter is rot, especially with acorns and cuttings in overly wet conditions. Look for stems turning mushy or black at the base, or wilting leaves that aren’t related to dryness. If you see this, it’s usually best to discard the affected plant to prevent it from spreading. Damping-off is another concern for seedlings, appearing as a sudden collapse at the soil line. Good drainage and avoiding overwatering are your best defenses.
A Word of Encouragement
Growing something from scratch, especially a magnificent tree like the Algerian Oak, is a truly rewarding experience. It might take time, and there might be a few tries before you get it just right, but that’s all part of the joy of gardening. Be patient with your little acorns and cuttings, observe them carefully, and celebrate every little bit of progress. Happy propagating!
Resource:
https://identify.plantnet.org/k-world-flora/species/Quercus%20canariensis%20Willd./data