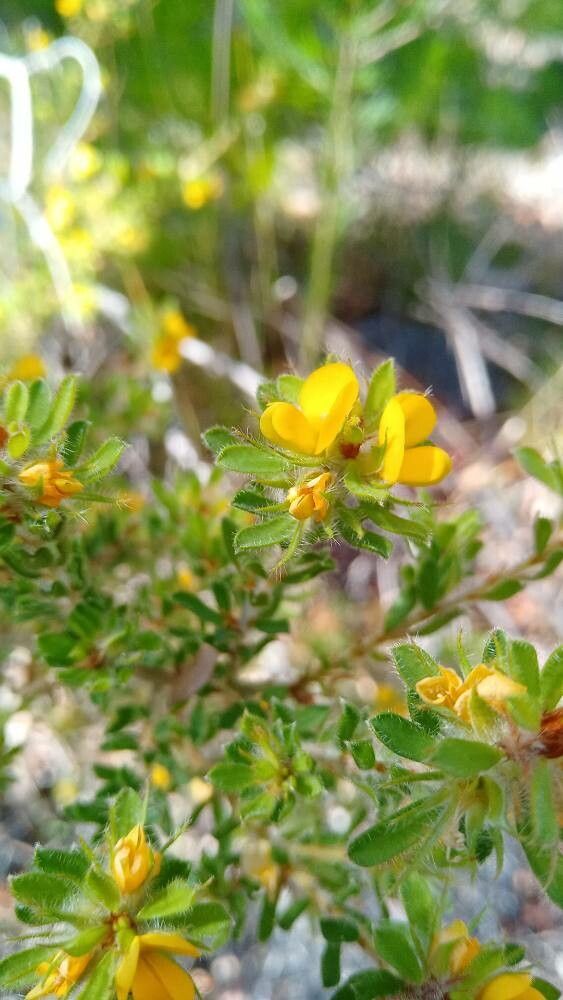
Hello there, fellow plant enthusiasts! Today, I want to chat about a truly delightful Australian native: Pultenaea villosa, often called the Flannel Flower or Native Violets. Its delicate, papery white and yellow blooms are like tiny artworks, and the soft, velvety leaves are just a joy to touch. If you’re looking for a plant that brings a touch of sunshine and gentle beauty to your garden, this is definitely one to consider.
And the best part? Propagating it is surprisingly rewarding. While it might seem a little intimidating at first, I’ve found that with a few key insights, you can definitely have success. It’s not the absolute easiest for a complete beginner, but with a little care and attention, you’ll be making new plants in no time. Think of it as a fun challenge that yields beautiful results!
The Best Time to Start
For Pultenaea villosa, my experience tells me the sweet spot for propagation is late spring to early summer. This is when the plant is actively growing and has plenty of energy to put into developing new roots. You want to be taking cuttings from stems that are semi-hardwood – that means they’ve finished their rapid spring growth but are not yet completely woody and mature. Look for stems that are flexible but don’t bend too easily.
Supplies You’ll Need
Gathering your tools beforehand makes the whole process smoother. Here’s what I usually have on hand:
- Sharp pruning shears or a clean knife: For making clean cuts.
- Rooting hormone: A powder or gel to encourage root development. Don’t skip this if you can help it!
- A well-draining potting mix: I like a mix of equal parts perlite, vermiculite, and seed-starting mix. Some growers also add a bit of coarse sand.
- Small pots or trays: Clean, with drainage holes. About 4-6 inch pots are usually a good size to start.
- Clear plastic bags or a propagator: To create a humid environment.
- Watering can with a fine rose: For gentle watering.
- Labels: To mark your cuttings (trust me, you’ll thank yourself later!).
Propagation Methods
While Pultenaea villosa can sometimes be coaxed from seed, I find stem cuttings to be the most reliable and straightforward method for home gardeners.
Here’s how I do it:
- Take Your Cuttings: On a cooler part of the day (early morning or late afternoon is best), select healthy, vigorous stems from your mother plant. Using your clean shears or knife, make a clean cut just below a leaf node (where a leaf attaches to the stem). Aim for cuttings that are about 4-6 inches long. Remove any lower leaves, leaving just a few at the top.
- Prepare the Cuttings: Dip the cut end of each cutting into your rooting hormone. Give it a gentle tap to remove any excess.
- Plant Your Cuttings: Fill your clean pots with the prepared potting mix. Make a small hole in the center of each pot with a pencil or your finger. Carefully insert the base of each cutting into the hole, ensuring the leaf nodes that will be below the soil line are covered. Gently firm the soil around the cutting.
- Create a Humid Environment: Water the soil gently until it’s evenly moist but not soggy. Then, cover each pot with a clear plastic bag or place the pots inside a propagator. This traps moisture and creates the high humidity Pultenaea villosa loves. You can secure the bag with a rubber band.
- Provide Light and Warmth: Place the pots in a bright, indirect light location. Avoid direct sun, which can scorch the delicate cuttings. A little warmth from the bottom can also be beneficial, but it’s not always essential if your ambient temperature is warm enough.
The “Secret Sauce” (Pro Tips)
Over the years, I’ve learned a few tricks that can really boost your success rate with these charming plants:
- Sterilize Everything: Before you begin, make sure your tools and pots are scrupulously clean. A quick wash with warm, soapy water and a rinse with diluted bleach or isopropyl alcohol is all it takes. This prevents any sneaky fungal infections from taking hold.
- Don’t Drown Them: While humidity is key, avoid waterlogging the soil at all costs. Soggy conditions are a fast track to rot. If you see condensation building up excessively inside the plastic bag, open it up for a few hours to allow for some air circulation.
- Be Patient with Bottom Heat (if you use it): If you opt for bottom heat (like a propagation mat), make sure it’s set to a gentle temperature, around 20-24°C (68-75°F). Too much heat can dry out the cuttings or cook the delicate roots before they even form.
Aftercare & Troubleshooting
Once your cuttings are planted, be patient! It can take anywhere from 4-8 weeks for roots to develop. You can gently tug on a cutting; if there’s resistance, you likely have roots.
When roots have formed, it’s time to gradually acclimatize your new plants. First, start taking the plastic bags off for longer periods each day. Once they seem happy with that, you can remove the bags permanently. Continue to keep them in bright, indirect light and water when the top inch of soil feels dry.
The most common problem you’ll encounter is rot. If a cutting looks limp, black, or mushy, it’s probably succumbed to rot. This is usually a sign of overwatering or poor drainage. Don’t be discouraged if you lose a few – it’s all part of the learning process! Just remove the affected cutting and make sure your remaining ones are in well-draining soil.
A Encouraging Closing
Watching a tiny cutting transform into a beautiful new plant is one of the most satisfying aspects of gardening. So, grab your tools, get your hands in the soil, and give propagating Pultenaea villosa a go. Be patient, observe your plants, and enjoy the journey. Happy propagating!
Resource:
https://identify.plantnet.org/k-world-flora/species/Pultenaea%20villosa%20Willd./data