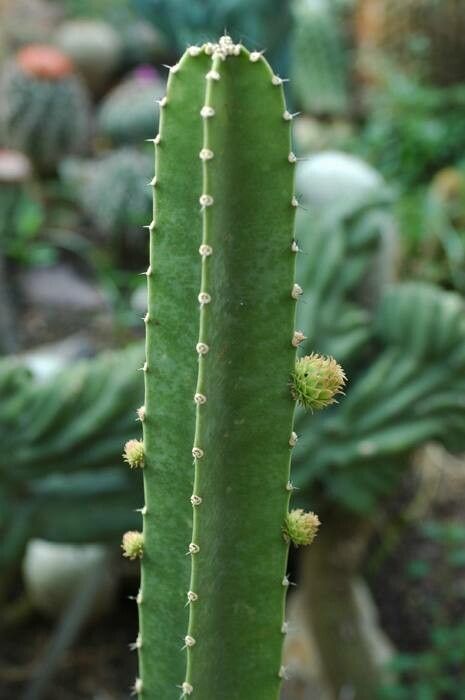
Hey there, fellow plant enthusiasts! Today, we’re diving into the wonderful world of propagating Pterocereus gaumeri. This magnificent cactus, with its unique segmented arms and often striking sculptural form, is a real showstopper. If you’ve ever admired one and thought, “I wish I had more of those!” then you’re in the right place. Propagating these beauties is not only incredibly rewarding, but it’s also a fantastic way to share the love of these desert dwellers with friends. Now, while I wouldn’t call these the absolute easiest plants for a complete beginner to propagate, with a little care and the right approach, you’ll be well on your way to success.
The Best Time to Start
Honestly, the sweet spot for propagating Pterocereus gaumeri is during its active growing season. For most of us, that means late spring and summer. This is when the plant has the most energy reserves to put into growing new roots. Starting a cutting when the plant is dormant is just asking for a bit of a struggle. You want those warmer temperatures and longer days working in your favor!
Supplies You’ll Need
Before we get our hands dirty, let’s gather our tools. Having everything ready makes the process so much smoother.
- Sharp, sterile pruning shears or a clean knife: For making clean cuts. We don’t want to invite any nasty bugs or diseases in.
- Rooting hormone (optional but recommended): This can give your cuttings a little boost. Look for one formulated for succulents or cacti.
- Well-draining potting mix: This is crucial for cacti! A good mix is typically 50% potting soil and 50% perlite or coarse sand. You can also buy pre-made cactus and succulent soil.
- Pots or containers: Terracotta pots are awesome because they breathe and help the soil dry out. Make sure they have drainage holes!
- A tray or newspaper: To catch any excess soil or dust.
- Gloves (optional): Some cacti can be a bit prickly, so these can be helpful.
- A mister or spray bottle: For gentle watering.
Propagation Methods
There are a couple of tried-and-true ways to get new Pterocereus gaumeri plants going. I find the stem cutting method to be the most effective and straightforward for this particular cactus.
Stem Cuttings
This is how you’ll get your new cactus babies!
- Take a Cutting: Choose a healthy, mature segment of the Pterocereus gaumeri. Using your sharp, sterile shears or knife, make a clean cut where the segment meets the main stem. Try to get a segment that’s at least a few inches long.
- Callus Over: This is a very important step for cacti. Let the cut end of your new cutting dry and callus over for a few days to a week. You can simply lay it on a clean surface in a dry, well-ventilated spot out of direct sunlight. This prevents rot when you plant it. It will look like a dry, sealed scar.
- Apply Rooting Hormone (Optional): Once calloused, you can dip the cut end into your rooting hormone powder. Gently tap off any excess.
- Plant the Cutting: Fill your pot with your well-draining cactus mix. Make a small hole in the center of the soil with your finger or a pencil.
- Insert the Cutting: Gently insert the calloused end of the cutting into the hole. You want it to stand upright on its own, so don’t be afraid to push it in a bit. You can use small stones or stakes to help support it if needed.
- Wait to Water: Resist the urge to water immediately! Wait at least another week after planting before giving it its first gentle watering. This gives the cutting another chance to establish itself and further prevents rot.
The “Secret Sauce” (Pro Tips)
Every gardener has their little tricks! Here are a couple that have really helped me with propagating cacti like Pterocereus gaumeri:
- The “Dry Spell” is Your Friend: When you’re first getting cuttings established, they need to be kept on the drier side. Overwatering is the quickest way to lose a cutting to rot. Those calloused ends and infrequent watering are your best defense.
- Bottom Heat Can Be a Game-Changer: If you’re propagating in cooler weather or just want to give things an extra boost, consider using a propagator tray with a heat mat. This gentle warmth encourages root development quite nicely without drying out the cutting too quickly. Just make sure it’s set to a moderate temperature, not scorching hot!
Aftercare & Troubleshooting
Once you’ve potted up your cuttings, the patience game begins! Keep them in a bright spot, but avoid direct, harsh sunlight for the first few weeks. They’re still a bit delicate.
Water very sparingly initially. Water only when the soil is completely dry, and when you do, water thoroughly but allow all excess to drain away. You’re looking for the soil to stay slightly moist, not soggy.
Signs of Success: You’ll start to see new growth emerging from the top or sides of the cutting. This is a sure sign that roots are forming below. You might also feel a slight resistance when you gently tug on the cutting.
Troubleshooting:
- Rot: This is the big one. If your cutting starts to turn mushy, black, or hollow, it’s likely rot. Unfortunately, this is often difficult to recover from. The best prevention is proper callusing and judicious watering. If you catch it early, you might be able to cut away the rotted section and try callusing and replanting again, but it’s a gamble.
- Shriveling: If the cutting looks dried out and shriveled, it might need a bit more water, but still only cautiously. Ensure it’s not getting too much direct sun, which can also cause shriveling.
A Encouraging Closing
Remember, gardening is all about patience and observation. Propagating Pterocereus gaumeri is a journey, and each cutting is a little experiment. Don’t get discouraged if your first attempt isn’t a runaway success. Learn from it, adjust your approach, and try again. The joy of watching a new plant emerge from a simple cutting is truly special. Happy propagating, and enjoy the journey!
Resource: