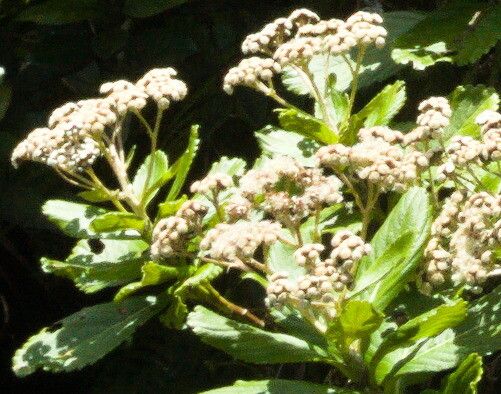
Hey there, fellow plant lovers! I’m so excited to talk to you today about a little gem that’s been captivating my garden for years: Psiadia boivinii. If you’re looking for a plant that brings a burst of cheerful, daisy-like blooms and a lovely, somewhat informal charm, this is it. And the best part? Sharing its beauty by propagating it is incredibly rewarding. For those of you just dipping your toes into propagation, I’d say Psiadia boivinii is a moderately easy plant to work with. It’s not going to throw too many curveballs your way, which makes it a great one to try.
The Best Time to Start
Spring is truly your best friend when it comes to propagating Psiadia boivinii. As the weather warms up and the plant is actively putting on new growth, your cuttings will have the best shot at rooting successfully. Think of it as giving them a head start for the growing season. Late spring, when the days are getting longer and warmer, is usually ideal.
Supplies You’ll Need
Gathering your tools before you begin makes the whole process much smoother. Here’s what I always have on hand:
- Sharp pruning shears or a clean knife: For making those crucial cuts.
- Rooting hormone powder or gel: This is especially helpful for encouraging faster and stronger root development.
- A quality potting mix: I like a blend that’s well-draining. A mix of 50% perlite and 50% peat moss or coco coir works wonders.
- Small pots or propagation trays: Make sure they have drainage holes!
- Clear plastic bags or a propagator: To create a humid environment.
- Watering can or spray bottle: For gentle watering.
Propagation Methods
Let’s dive into how you can create more of these lovely plants. Stem cuttings are definitely my go-to method for Psiadia boivinii.
Stem Cuttings
- Take the Cuttings: Look for healthy, non-flowering shoots. Aim for cuttings that are about 4-6 inches long. Make a clean cut just below a leaf node (the point where a leaf attaches to the stem).
- Prepare the Cuttings: Gently remove the lower leaves from the bottom half of the cutting. This prevents them from rotting in the soil. If your cutting has any flower buds, pinch them off. We want the plant to focus its energy on growing roots, not flowers at this stage.
- Apply Rooting Hormone: Dip the cut end of the stem into your rooting hormone. A good dusting or a thin, even layer is all you need.
- Plant the Cuttings: Make a small hole in your prepared potting mix with a pencil or your finger. Insert the cutting into the hole, ensuring the leaf nodes from which you removed leaves are below the soil surface. Gently firm the soil around the cutting.
- Create Humidity: Water the soil lightly. Then, cover the pot or tray with a clear plastic bag or place it in a propagator. This is crucial for keeping the cuttings from drying out while they establish roots.
Water Propagation (Optional, but can be fun!)
For Psiadia boivinii, I find soil propagation to be more reliable for long-term success, but you can certainly try water propagation for a visual treat!
- Take and Prepare Cuttings: Follow steps 1 and 2 above.
- Place in Water: Put the prepared cuttings into a jar or glass of clean water. Ensure no leaves are submerged – they’ll rot quickly.
- Change Water Regularly: Change the water every few days to keep it fresh and prevent bacterial growth.
- Wait for Roots: You’ll start to see tiny white roots emerge from the nodes. Once the roots are about an inch long, you can carefully transplant them into your potting mix, following step 4 of the stem cutting method.
The “Secret Sauce” (Pro Tips)
After years of fumbling around, I’ve picked up a few tricks that really make a difference with these guys.
- Bottom Heat is Your Friend: If you have a seedling heat mat, using it under your propagation tray is a game-changer. It provides gentle warmth to the soil, encouraging roots to form much faster. Don’t get it too hot, just a nice, cozy warmth.
- Patience with the “Wilts”: Sometimes, your cuttings might look a bit droopy after you’ve potted them up. This is normal! As long as they are still green and the leaves aren’t yellowing or mushy, give them time. The plastic bag will help keep them hydrated. Don’t be tempted to overwater.
- Sterilize Everything: I can’t stress this enough! Using clean tools and pots prevents the introduction of diseases that can kill your precious cuttings. A quick wipe with rubbing alcohol can do wonders.
Aftercare & Troubleshooting
Once you see new growth popping up or feel a gentle resistance when you tug lightly on the cutting, it’s a good sign that roots have formed!
- Acclimate Gradually: When you see good root development, it’s time to slowly introduce your new plant to the outside air. This is called hardening off. Gradually open the plastic bag a little more each day over a week or so.
- Start Feeding: Once your new plant is actively growing and has been acclimated, you can start feeding it with a diluted liquid fertilizer every few weeks.
- Watch for Rot: The most common issue is rot, which usually happens from overwatering or poor drainage. If your cutting turns mushy, slimy, or black at the base, it’s likely rotted. There’s usually no coming back from this, so learning from it and trying again is key. Ensure your soil drains well and only water when the top inch of soil feels dry.
A Encouraging Closing
Propagating plants is like a little bit of horticultural magic, and Psiadia boivinii is a delightful subject for your spellcasting. Be patient with your cuttings, observe them closely, and don’t be discouraged if your first attempts aren’t perfect. Every gardener learns from their successes and their “oopsies.” Enjoy the process of nurturing new life, and soon you’ll be sharing these beautiful blooms with friends and family! Happy propagating!
Resource:
https://identify.plantnet.org/k-world-flora/species/Psiadia%20boivinii%20B.L.Rob./data