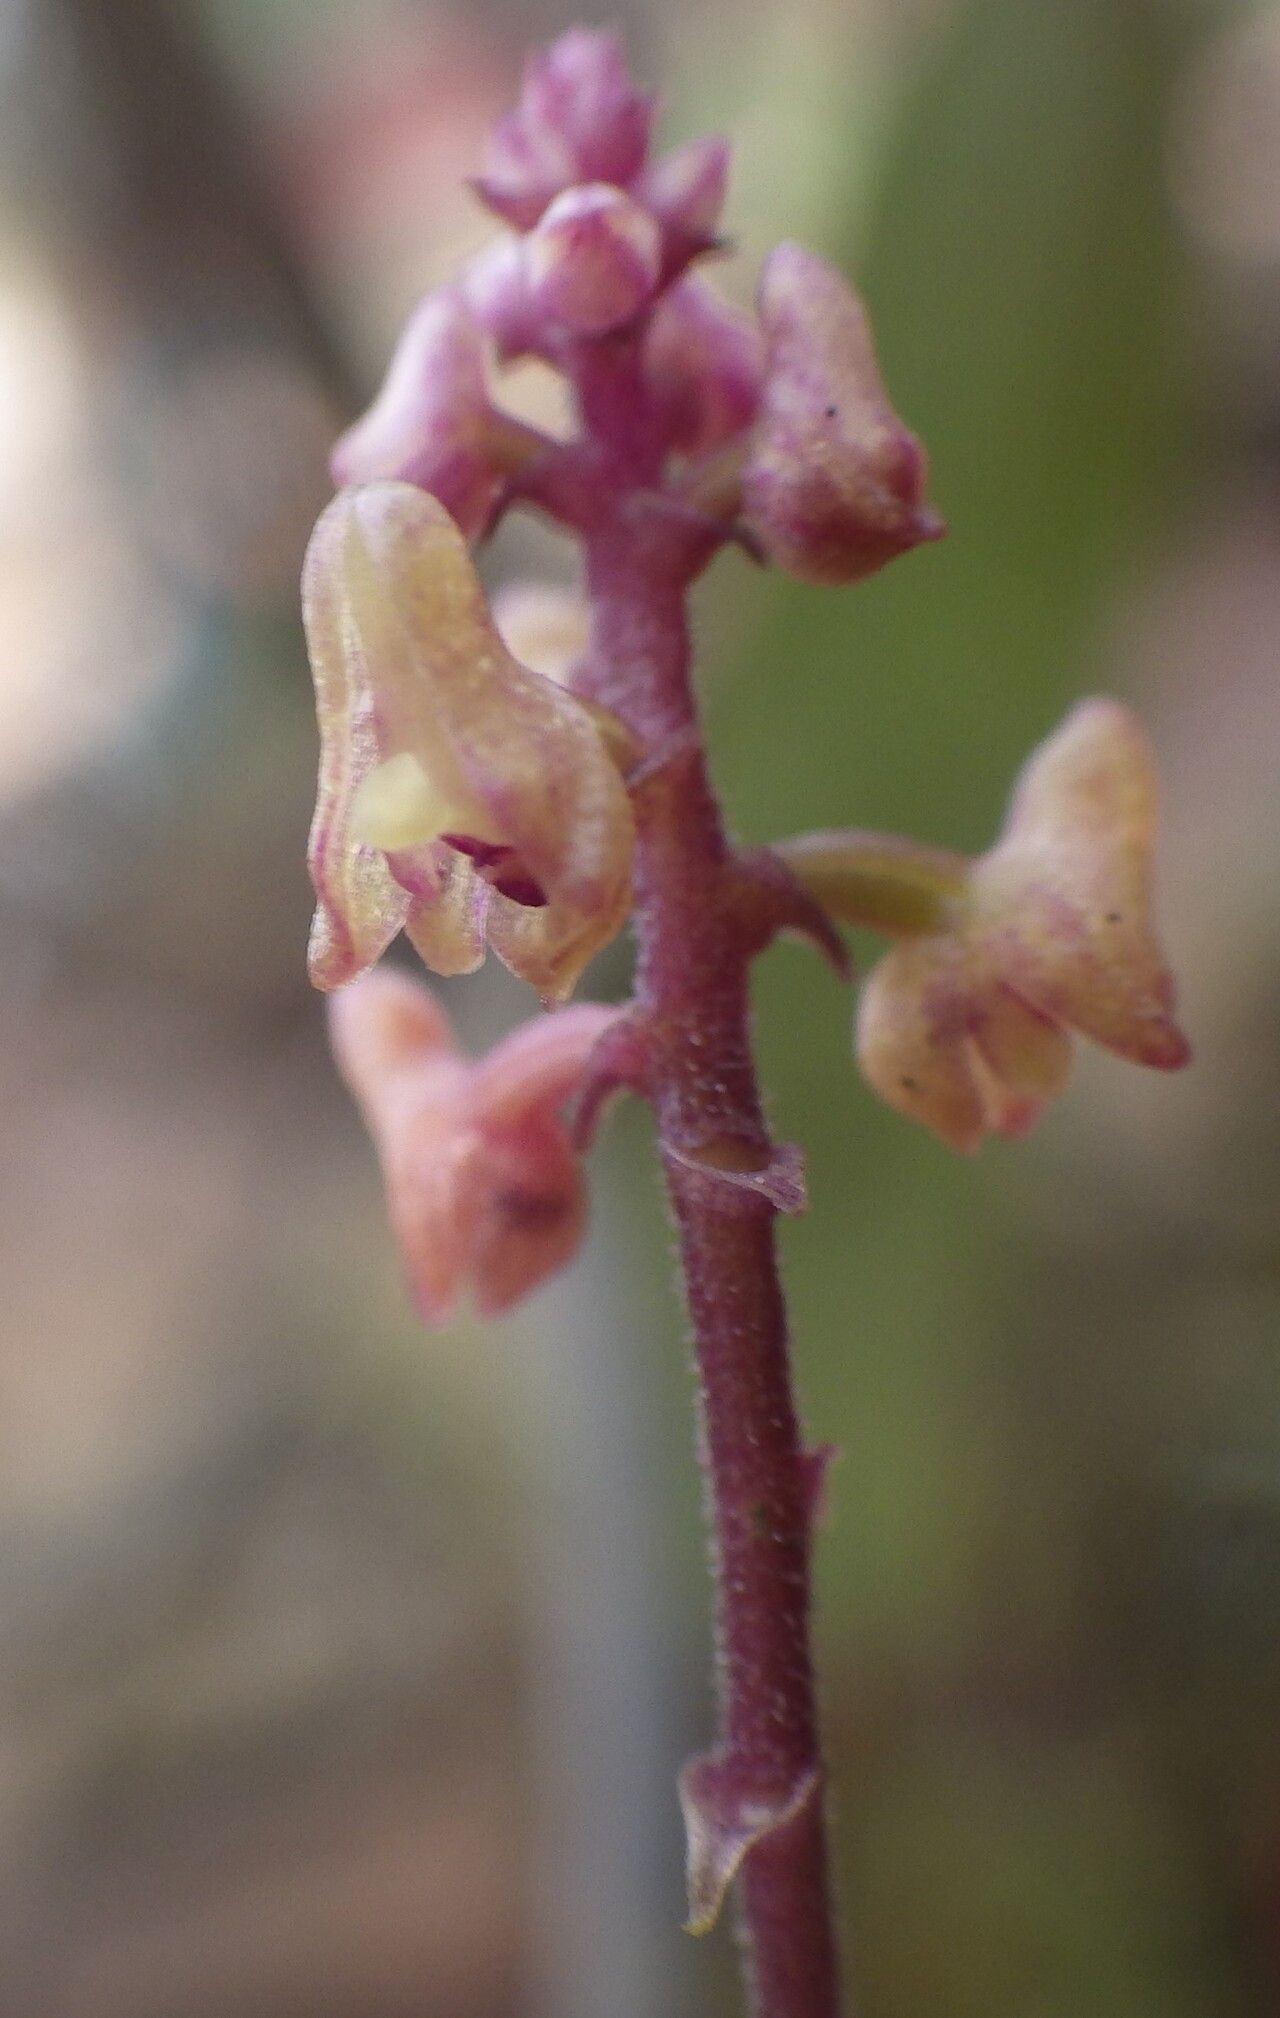
Hello fellow plant lovers! Today, we’re diving into the wonderful world of Polystachya ramulosa. If you haven’t met her yet, let me tell you, this little orchid is a true delight. Her delicate, often fragrant blooms are a joy to behold, and watching a tiny cutting unfurl its first new leaf feels like magic.
Now, I know talking orchids can sometimes sound intimidating, but I promise, Polystachya ramulosa is surprisingly forgiving when it comes to propagation. For those of you just dipping your toes into the orchid-growing stream, this is a fantastic plant to try. There’s a real sense of accomplishment when you bring another one of these beauty queens into existence.
The Best Time to Start
When it comes to getting your Polystachya ramulosa to feel like starting a family, the spring is generally your best bet. This is when the plant is actively growing after its dormancy. You want to catch it with that fresh surge of energy. Look for new growth, often indicated by plump little pseudobulbs or developing leaves. Starting then gives your new babies plenty of their first growing season to establish themselves.
Supplies You’ll Need
Gathering your supplies beforehand makes the whole process go so much smoother. Here’s what I usually have on hand:
- Sharp, sterilized pruning shears or a clean knife: For making clean cuts. Sterilize with rubbing alcohol.
- Orchid bark mix: A coarse, well-draining mix is crucial. I like a blend with chunks of bark, perlite, and a bit of charcoal.
- New pots or containers: Small net pots or clay pots work wonderfully for orchids.
- Rooting hormone (optional but helpful): A powdered or liquid form specifically for cuttings can boost root development.
- A watering can with a fine rose: For gentle watering.
- Labels and a marker: So you remember what you propagated and when!
- A tray or saucer: To catch any stray water.
Propagation Methods
For Polystachya ramulosa, the most reliable method for me has been by division. It’s like giving your plant a little haircut and sharing the bounty!
Division is your friend here. Here’s how I do it:
- Gently Unpot: Carefully remove your Polystachya ramulosa from its current pot. You want to disturb the roots as little as possible. If the roots are tightly bound, you might need to gently tease them apart with your fingers or a chopstick.
- Locate Natural Breaks: Look for where the plant naturally wants to split. Healthy divisions will usually have at least two or three pseudobulbs (those swollen stem segments) and a good root system attached to each section.
- Make the Cut (or Pull): Using your sterilized shears or knife, carefully cut or pull the plant into sections. Ensure each section has a decent amount of healthy roots. If you’re struggling to separate the roots, a gentle pull can sometimes work.
- Prepare the New Pots: Fill your new containers about halfway with your orchid bark mix.
- Pot Up Each Division: Place each division into its new pot. The pseudobulbs should sit just on top of the bark, not buried deeply. Gently arrange the roots around the pseudobulbs and then fill in with more bark, anchoring the plant. Don’t pack the bark too tightly – orchids like air circulation around their roots.
- Initial Watering: Water your newly potted divisions thoroughly but gently. You want to settle the bark around the roots.
The “Secret Sauce” (Pro Tips)
Here are a couple of tricks I’ve learned over the years that really seem to make a difference:
- Let Those Wounds Dry: After dividing, I often let the cut surfaces on the mother plant and the new divisions sit out for a few hours, or even overnight, in a dry, airy spot. This helps to callus over any wound, reducing the risk of rot.
- Humidity is Key (but not wet feet!): While you don’t want the potting mix to be constantly soggy, new divisions absolutely love a humid environment to encourage root growth. I often place my newly potted divisions in a clear plastic bag with a few holes poked in it (to allow for some air flow) or on a tray filled with pebbles and water, ensuring the bottom of the pot doesn’t sit directly in the water.
Aftercare & Troubleshooting
Once your Polystachya ramulosa divisions are potted, give them a good soak and then let them dry out slightly between waterings. You’ll want to keep them in bright, indirect light. They’re not as fussy about temperature as some orchids, but consistent warmth is always appreciated.
Keep an eye out for the first signs of new growth – that’s usually a new root or a fresh leaf emerging. This can take a few weeks, so be patient!
The biggest challenge you might face is rot. If you see pseudobulbs or leaves turning black and mushy, it’s a sign of overwatering or poor drainage. In this case, you might need to unpot, trim away any rotted parts with your sterilized tool, and repot with fresh, drier bark. It’s a tough lesson, but often a salvageable one if caught early.
A Little Bit of Patience Goes a Long Way
Watching a new Polystachya ramulosa take hold and thrive is incredibly rewarding. Don’t get discouraged if your first attempt isn’t perfect. Gardening is a journey of learning and observation, and every plant you nurture brings you closer to becoming an even more seasoned grower. Happy propagating!
Resource:
https://identify.plantnet.org/k-world-flora/species/Polystachya%20ramulosa%20Lindl./data