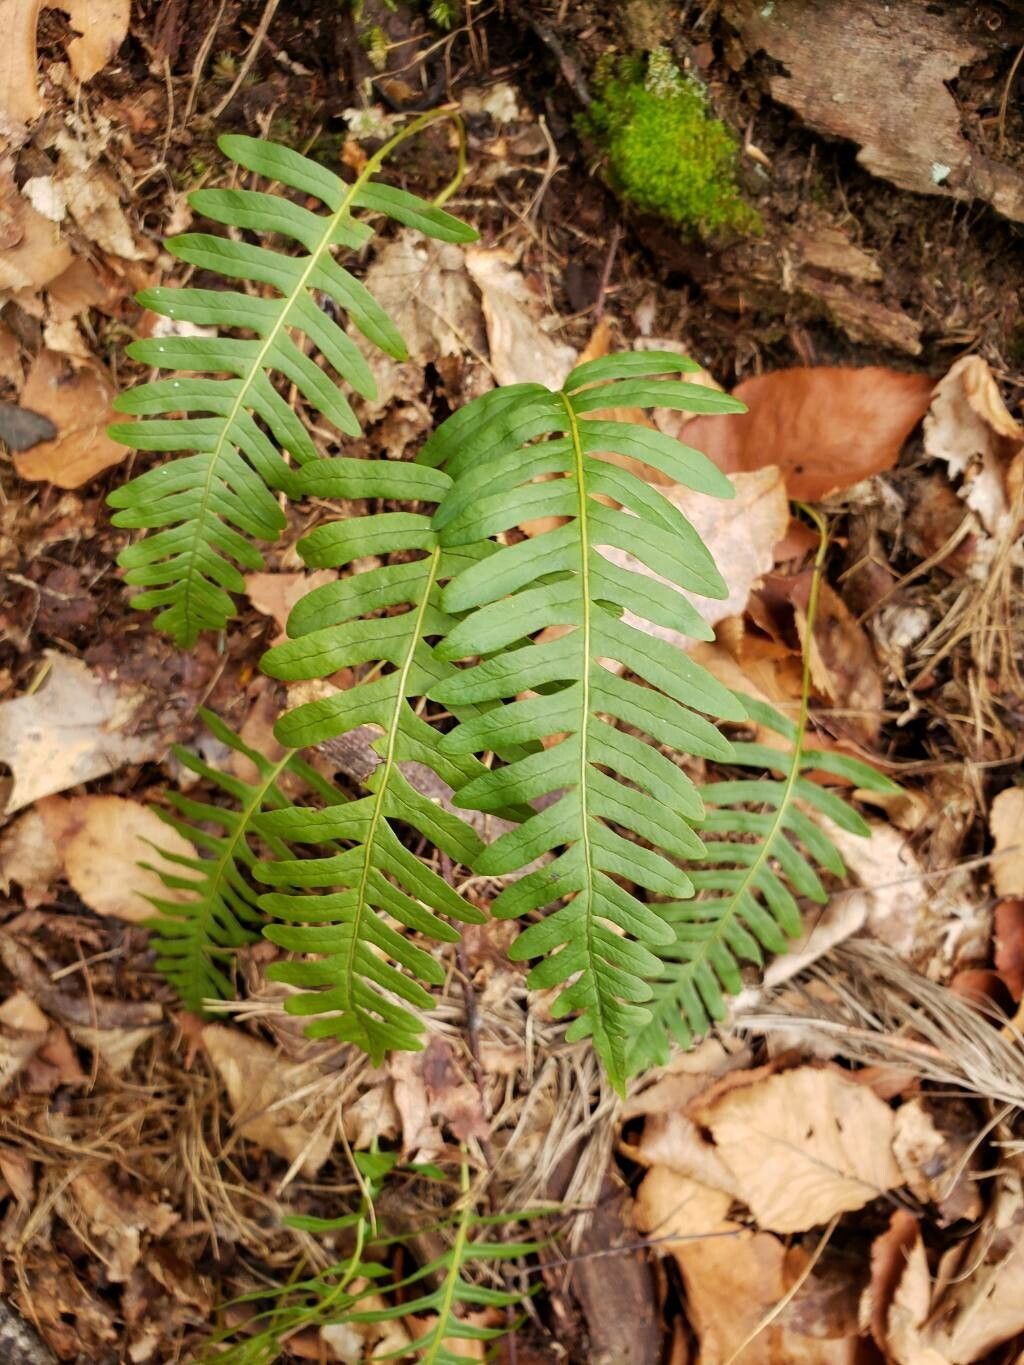
Hello there, fellow plant enthusiasts! Today, we’re diving into the wonderful world of Polypodium virginianum, also known as Virginia’s Polypody or Rock Cap Fern. This native fern is such a charmer with its resilient nature and beautiful, leathery fronds. It’s perfectly suited for shady nooks, rock gardens, or even as a woodland groundcover. And the best part? Propagating it is a truly rewarding experience, offering a fantastic way to expand your fern family without breaking the bank. If you’re curious about getting started, I’d say this fern is moderately easy to propagate, making it a great project for those stepping beyond the absolute beginner stage.
The Best Time to Start
For the highest success rate with Polypodium virginianum, I always recommend spring, just as new growth is starting to unfurl. This is when the plant has plenty of energy to dedicate to rooting. You can also have success with propagation in early summer, but the spring push gives you a nice head start. The key is to propagate when the plant is actively growing.
Supplies You’ll Need
Here’s what I usually have on hand when I’m ready to propagate:
- Fresh, healthy Polypodium virginianum rhizomes (the creeping underground stems) or mature fronds.
- Sharp, clean pruning shears or a sharp knife. Sterilize them with rubbing alcohol before use!
- A well-draining potting mix. A good blend for ferns often includes peat moss, perlite, and compost. I often use a 1:1:1 ratio for a good balance.
- Small pots or trays with drainage holes.
- Plastic bags or a propagation dome to create a humid environment.
- Mist bottle for keeping things moist.
- An optional rooting hormone if you’re feeling adventurous for division, though often unnecessary for this fern.
- Labels so you don’t forget what you planted where!
Propagation Methods
Polypodium virginianum is primarily propagated through division and rhizome cuttings. Leaf cuttings aren’t generally effective.
-
Division: The Classic Approach
- This is my go-to method for Polypodium virginianum. Look at your mature plant. You’ll see a creeping, scaly stem called a rhizome, usually just below the soil surface or even exposed.
- Gently tease the plant out of its pot or carefully dig it up from its spot in the garden.
- Identify sections of the rhizome that have at least a few healthy fronds and some roots attached.
- Using your sharp shears or knife, carefully cut the rhizome into smaller sections, ensuring each piece has both fronds and roots.
- Pot up each division into its own container filled with your pre-moistened potting mix. Plant the rhizome so the bases of the fronds are just at the soil surface.
- Water gently and then cover the pots with a plastic bag or place them inside a propagation dome to maintain high humidity.
-
Rhizome Cuttings: A Little More Patience
- This method uses sections of the rhizome without any attached fronds.
- From your healthy parent plant, take pieces of the rhizome that are at least 2-3 inches long. Make sure there are no fronds attached to these cuttings.
- You can lightly dust the cut ends with rooting hormone if you wish, though it’s not strictly necessary for this tough fern.
- Lay the rhizome pieces horizontally on the surface of your well-draining potting mix, or gently press them just barely into the surface.
- Maintain consistent moisture and high humidity. This is crucial, as these cuttings have no initial means of water uptake beyond what the rhizome itself holds. Cover with plastic or a dome and mist regularly. New fronds should eventually emerge from the rhizome.
The “Secret Sauce” (Pro Tips)
- Don’t bury the rhizome too deeply. For division, I like to see the top of the rhizome just peeking out or level with the soil. This gives it room to breathe and prevents rot.
- Bottom heat is your friend. While not absolutely essential, placing your pots on a gentle heat mat can significantly speed up root development, especially for rhizome cuttings. It mimics the warmth of spring soil perfectly.
- Give them space for air circulation. Once new growth appears, even while still in the humid environment, try to give them a little air. You can poke a few holes in the plastic bag or slightly vent your propagation dome. This helps prevent fungal issues.
Aftercare & Troubleshooting
Once your divisions or cuttings show signs of new growth – that’s your cue that roots are forming! Keep them in their humid environment for a few more weeks, gradually acclimating them to normal room humidity by slowly opening the bags or dome over several days.
The biggest challenge you might face is rot. If you see your rhizome pieces turning mushy and black, it’s likely due to too much moisture and poor air circulation. In this case, the stem will probably not recover. Ensure your soil drains well, and don’t let them sit in soggy conditions. If a frond begins to yellow and wilt excessively, don’t panic. Check for signs of rot, and if the rhizome seems healthy, sometimes it’s just the plant adjusting. Remove any completely dead or rotting material.
A Little Patience Goes a Long Way
Propagating Polypodium virginianum is a journey of observation and gentle tending. Don’t be discouraged if your first attempt isn’t a runaway success. Observe your plants, learn from what you see, and celebrate each tiny unfurling frond as a victory. Enjoy the process of coaxing new life from your beloved ferns! Happy gardening!
Resource:
https://identify.plantnet.org/k-world-flora/species/Polypodium%20virginianum%20L./data