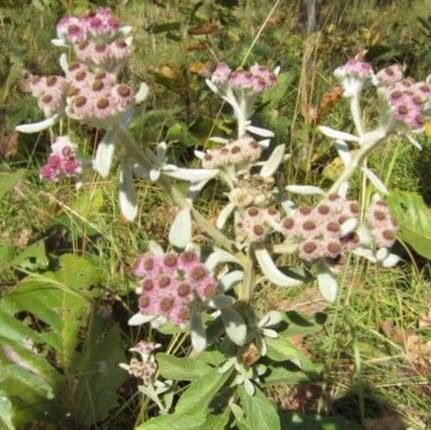
Oh, hello there! Come on in and let’s chat about one of my absolute favorite plants: Pluchea odorata. You know, the one with that lovely, almost camphor-like scent that just fills the air on a warm day? It’s a beautiful, hardy plant with such a rewarding presence in the garden. And the best part? It’s wonderfully easy to multiply! If you’re new to plant propagation, Pluchea odorata is a fantastic, forgiving place to start. You’ll be sharing little green babies with friends in no time.
The Best Time to Start
My favorite time to get started with propagating Pluchea odorata is from late spring through summer. This is when the plant is in its active growing phase. You’ll find plenty of lush, healthy stems that are perfect for taking cuttings. Waiting for this energetic growth period really sets you up for success, giving those new cuttings the best chance to root and thrive.
Supplies You’ll Need
Don’t let a long list intimidate you; most of these are likely already in your gardening shed!
- Pruning shears or a sharp knife: Cleanliness is key here.
- Rooting hormone (optional but recommended): A little boost never hurts!
- Potting mix: A well-draining mix is crucial. I like a blend of potting soil and perlite (about 50/50) to ensure good aeration.
- Small pots or trays: Anything that can hold your cuttings and mix. Drainage holes are a must.
- Watering can or spray bottle: For gentle watering.
- Plastic bags or a propagation dome: To create a humid environment initially.
Propagation Methods
Let’s get our hands dirty! Here are my go-to methods for Pluchea odorata.
Stem Cuttings: My Top Choice
This is the most common and effective way to propagate Pluchea odorata.
- Take Cuttings: Using your clean pruners or knife, select a healthy, non-flowering stem. Aim for cuttings that are about 4-6 inches long. Make your cut just below a leaf node (the little bump where a leaf grows from the stem).
- Prepare the Cuttings: Gently remove the lower leaves, leaving just a few at the top. This prevents them from rotting in the soil.
- Apply Rooting Hormone: If you’re using it, dip the cut end of each stem into the rooting hormone, tapping off any excess.
- Plant the Cuttings: Fill your small pots with your prepared potting mix. Make a small hole with your finger or a pencil, and insert the cut end of the stem. Gently firm the soil around the base to ensure good contact.
- Water Gently: Water thoroughly but gently. You don’t want to disturb the cuttings.
- Create Humidity: Cover the pots with a clear plastic bag or place them under a propagation dome. This keeps the humidity high, which helps the cuttings not to dry out while they root. Place them in a bright, indirect light location.
Water Propagation: The See-Through Method
This is a lovely, visual way to watch your cuttings root.
- Prepare Cuttings: Follow steps 1 and 2 from the stem cutting method.
- Place in Water: Find a clean jar or glass and fill it with fresh water. Place your prepared cuttings in the water, ensuring no leaves are submerged. Like soil, leaves in water can quickly turn slimy and rot.
- Change Water Regularly: Change the water every few days, or whenever it starts to look cloudy. This keeps things fresh and prevents bacterial growth.
- Watch for Roots: You’ll start to see tiny white roots emerging from the leaf nodes. Once the roots are about an inch or so long, they are usually ready to be transplanted into a pot.
The “Secret Sauce” (Pro Tips)
Here are a couple of little tricks I’ve picked up over the years.
- Bottom Heat is Your Friend: If you can, placing your pots on a heat mat designed for seedlings can really speed up the rooting process. Pluchea odorata loves a bit of warmth for establishing roots.
- Don’t Rush the Transplant: When propagating in water, try to wait until the roots have developed a bit of branching, not just a single long root. This tells me the plant is robust and ready for the next stage. For soil cuttings, patience is key. You’ll see new growth appearing from the top of the stem before you even see roots emerging from the bottom.
Aftercare & Troubleshooting
Once your cuttings have developed a healthy root system (you can gently tug on the stem – if there’s resistance, they’ve rooted!), it’s time for a little more consistent care.
- Gradual Acclimation: If you used the humidity tent, gradually introduce your new plants to drier air. Start by removing the plastic bag for a few hours each day.
- Watering: Water the new plants when the top inch of soil feels dry. Avoid overwatering, as this is the quickest way to invite root rot.
- Light: Continue to provide bright, indirect light. As they grow stronger, you can slowly introduce them to more direct sunlight.
Now, what if things go wrong? The most common issue I see is rot. This usually happens with overwatering or if the cuttings are too crowded in their humid environment, leading to fungal issues. If you see a stem turning black and mushy, remove it immediately to prevent it from spreading. Sometimes, a cutting just won’t root. Don’t get discouraged! It happens to all of us. Just try again with a fresh cutting.
A Encouraging Closing
See? Not so daunting, is it? The joy of Pluchea odorata propagation is in the watching, the waiting, and the eventual success. Be patient with your little green charges, and enjoy the garden magic of creating something new from something you already love. Happy propagating!
Resource:
https://identify.plantnet.org/k-world-flora/species/Pluchea%20odorata%20(L.)%20Cass./data